1966 Starcraft Holiday Engine Repower

66Holiday924

Chief Petty Officer
Joined
Aug 21, 2017
Messages
525
These are the little issues you get into not being able to do the work yourself and the right way.

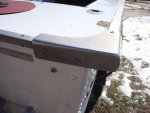
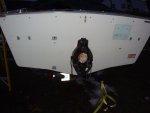
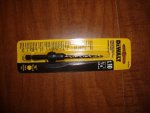
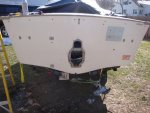
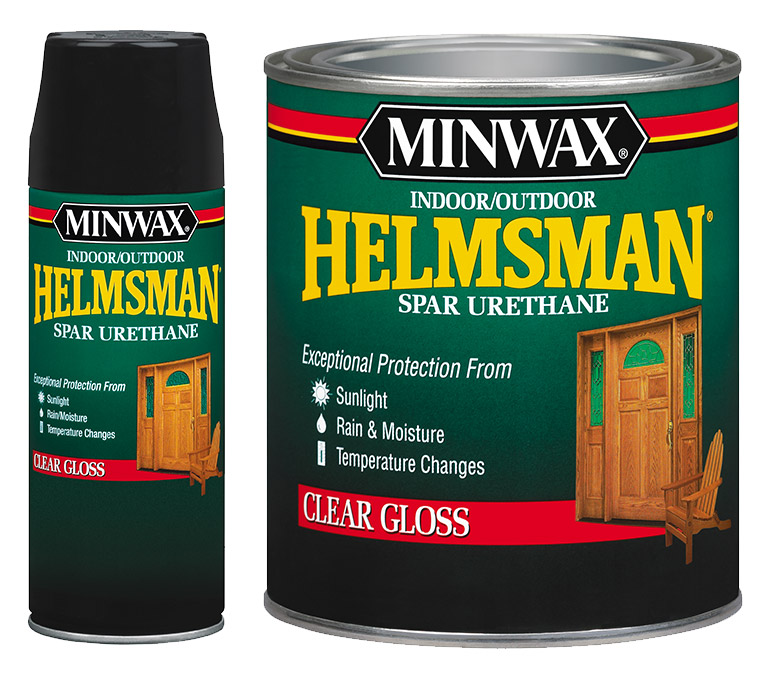
The keyhole may be below the waterline in part but no way should it be getting wet from the outside, if so you have a serious issue with the transom assembly and are sinking. It does need to be sealed, raw wood is not a good thing in a boat. The guy cutting the hole should know that and should be just fine with your request to seal the wood and the holes he drills through. A small can of Helmsman Spar and a chip brush, it's sealed up. I don't think you'd be better served asking him to mix up fiberglass resin.


Pretty much my thoughts too, thanks for recommending the Helmsman Spar. I am a big fan of recommendations. I like tried and tested.

I don't think there will be an issue with the request. The only reason they wouldn't like it, is because it holds up space in their facility while it dries... They're going to have my boat for an entire winter though, plenty of time to work it in.
 

kcassells

Fleet Admiral
Joined
Oct 16, 2012
Messages
8,598
https://www.glen-l.com/phpBB2/viewtopic.php?t=4714

FYI;

I was looking at that varnish today as well. my concern is that it says its only good above the water line. The hull I am going for is all wood with a 16" stripe down the keel. So can I use this below the water line? if not, what can I use? also, it can not be used over paint so, what can co under water and over paint?

Postby Fifty Plus » Thu Dec 18, 2008 7:10 am

I don't know of any varnish that can be used below the water line. Ditto for over paint.
icon_sad.gif
 

66Holiday924

Chief Petty Officer
Joined
Aug 21, 2017
Messages
525
kcassells the forums that you've shared are people who have wooden boats and the context is the use of varnish on the exterior of their hull, below the waterline. It's a different application than what we are talking about. In their application it is the exterior of the hull which will always be submerged, always exposed to water. In my application it's for my transom which should never be exposed to water. The aluminum skin and the 5200 is supposed to keep my transom dry, or, as Watermann said, something is wrong.

Reading this forum the people say that they use it in the interiors of their boat. you can bet that they all have interior pieces that are varnished, that do go below the waterline, and that's what my transom is, interior wood.
 

jbcurt00

Moderator
Staff member
Joined
Oct 25, 2011
Messages
24,863
I dont think many working on SCs are actually using Varnish, Spar or otherwise. Most are using spar urethane, urethane or polyurethane...
 

Watermann

Starmada Splash of the Year 2014
Joined
Jan 12, 2013
Messages
13,753
Exactly... and what I'm referring to is not varnish. You could also just get the guy doing the work a spray can.

2Q==
minwax-helmsman-spar-urethane.jpg
 

66Holiday924

Chief Petty Officer
Joined
Aug 21, 2017
Messages
525
Some real progress was finally made today. I got my boat back from the canvas shop. I'm really happy that they didn't end up having to drill into the hull. They put the snaps on the bottom side of the rub-rail. They said the hull is so clean they didn't want to drill into it either.

Here's a couple pictures, one with my tow vehicle and an up close of the boat. I guess it's a beauty only boat owners can appreciate...
 

Attachments

  • photo285858.jpg
    photo285858.jpg
    99.2 KB · Views: 1
  • photo285859.jpg
    photo285859.jpg
    118.1 KB · Views: 1

66Holiday924

Chief Petty Officer
Joined
Aug 21, 2017
Messages
525
From the canvas shop it went straight to a gentleman's shop who purchased the Merc 110 that was in it. He's going to put it in his 65 Lymann. So, I sold the engine and his friend removed it from my boat. Looking at the giant void in my boat and the birds nest of wires I had to ask; what have I gotten myself into.
 

Attachments

  • photo285860.jpg
    photo285860.jpg
    96.6 KB · Views: 4
  • photo285861.jpg
    photo285861.jpg
    150.2 KB · Views: 13
  • photo285862.jpg
    photo285862.jpg
    86.7 KB · Views: 4
  • photo285863.jpg
    photo285863.jpg
    132 KB · Views: 4

Watermann

Starmada Splash of the Year 2014
Joined
Jan 12, 2013
Messages
13,753
Cover looks great, I need one of those for my boats.

Nothing better than to see a cast iron lumpectomy in progress. :lol:

fetch
 

66Holiday924

Chief Petty Officer
Joined
Aug 21, 2017
Messages
525
Awesome deer mount I saw at the canvas shop. Yes... we do things a little different in Ohio...
 

Attachments

  • photo285873.jpg
    photo285873.jpg
    53.1 KB · Views: 0

mickyryan

Rear Admiral
Joined
Apr 18, 2016
Messages
4,210
late to this but i wouldn't use otf on this i/0 i would use epoxy since its just one board, seal it up good with epoxy then epoxy the i/o bolt holes and cut out after its cut out and that way you know everything is sealed, o t f and epoxy or poly wont work together i wouldn't think.
 

66Holiday924

Chief Petty Officer
Joined
Aug 21, 2017
Messages
525
Day 2


I think it's progressing nicely. I had about two and a half hours to work and I'm satisfied where I'm at after that. I got all my belongings off the boat, removed the back to back seats, removed the fuel tank, removed the panel under the transom cap, cleared out the rats nest of wiring and other hardware from the transom area.
 

Attachments

  • photo285900.jpg
    photo285900.jpg
    122.6 KB · Views: 3
  • photo285901.jpg
    photo285901.jpg
    106.3 KB · Views: 3
  • photo285902.jpg
    photo285902.jpg
    138.6 KB · Views: 4

66Holiday924

Chief Petty Officer
Joined
Aug 21, 2017
Messages
525
Can somebody tell me what size bit they use to drill out these rivets on the corner cap and the trim piece?
 

Attachments

  • photo285903.jpg
    photo285903.jpg
    84.6 KB · Views: 1

Watermann

Starmada Splash of the Year 2014
Joined
Jan 12, 2013
Messages
13,753
A 3/16" drill bit is what you need, I bought a titanium pilot point to use for all my rivet drilling as cheap ones often break.
 

66Holiday924

Chief Petty Officer
Joined
Aug 21, 2017
Messages
525
I'm going to try to spend a couple hours on the boat again today. We have bad weather coming and won't be able to get much done for the rest of the week. Have to take advantage of these nice 35 degree and sunny days while they last. lol.

Is there any special tips or sequence to removing the gimbal assembly? I'm thinking the steering might come in handy for removing the bell housing? Is that right? This is a first for me. I'm thinking the bell housing comes off first, then the inside bracket then the outside bracket.
 

Watermann

Starmada Splash of the Year 2014
Joined
Jan 12, 2013
Messages
13,753
Yeah the bell housing has the bellows attached to the assembly so yeah it's first. Those pins in it can be a real PITA too. But yeah just start taking out nuts and bolts.
 

66Holiday924

Chief Petty Officer
Joined
Aug 21, 2017
Messages
525
Day 3:

I got to work a couple more hours today. Nothing super exciting. I removed the hardware from the transom: 2 transducers, kicker motor mount, eyelet, and handles. I started to tear down the gimbal assembly. I got the trim, shocks and bell housing removed.

Watermann I went to look for the pilot tipped bit that you recommended but didn't find one. I got a tapered bit instead. I think it'll probably work great.
 

Attachments

  • photo285965.jpg
    photo285965.jpg
    66.1 KB · Views: 1
  • photo285966.jpg
    photo285966.jpg
    115.8 KB · Views: 1

66Holiday924

Chief Petty Officer
Joined
Aug 21, 2017
Messages
525
Day 4:

About another 3 hours of progress on the boat today. The first hour was pretty unproductive. I was trying to get the gimbal ring off of the gimbal assembly. I spent forever looking for a way to take the swivel pin out. Finally I realized, why take it off. So I moved into the boat and had the inside plate off in about 5 minutes, which of course allowed the removal of the outer bracket, gimbal ring and all. Other than that I Removed my side panels, removed the trim across the back of the transom cap, removed the corner pieces. The drill bit I bought (pictured above) sucks for drilling out rivets...
 

Attachments

  • photo286020.jpg
    photo286020.jpg
    128.4 KB · Views: 2
  • photo286021.jpg
    photo286021.jpg
    121.3 KB · Views: 8

Watermann

Starmada Splash of the Year 2014
Joined
Jan 12, 2013
Messages
13,753
Hey the keyhole is a bowling pin shape already :thumb:

fetch
 
Top