


Broaters
Petty Officer 2nd Class
- Joined
- Jul 31, 2017
- Messages
- 139
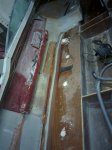
One more question about the fuel tanks compartment.
It seems that a lot of rebuilders on the forum sealed them once for all under a monoblock deck fully glassed on the deck surface. Some install some access hatch some even don't.
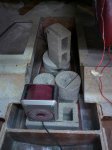
On our original boat the fuel tank cover was removable with some srecws that attache to sort of cleats on the inner side of the stringers.
I read the USCG reccomendations and they say "install in a way that make access, maintenance and removable feasible without major modification of the boat strucutre"...
What do you guys reccomends? what have you done on your rebuilds?
thanks
It seems that a lot of rebuilders on the forum sealed them once for all under a monoblock deck fully glassed on the deck surface. Some install some access hatch some even don't.
On our original boat the fuel tank cover was removable with some srecws that attache to sort of cleats on the inner side of the stringers.
I read the USCG reccomendations and they say "install in a way that make access, maintenance and removable feasible without major modification of the boat strucutre"...
What do you guys reccomends? what have you done on your rebuilds?
thanks


")