1974 Sea Ray SRV 240 Weekender - complete rebuild, refit, and who knows what else...

PCUK

Petty Officer 3rd Class
Joined
Sep 22, 2011
Messages
82
Hello Finn, Sorry I missed your message last October, haven't been here for a while. During the winter I got my New Vetus VF250 diesel into the boat and the Mercruiser 3X coupled. Haven't started it yet as I'm rebuilding the helm position ready to take the Burr walnut instrument panel (DIY of course). Still wet here in the UK (no change there then!) I managed to keep going through the snow with heaters on the epoxy in the shed but not pleasant. My dad worked with me on my last boat and did most of the detail work. Aren't dad's great? Sadly he's long gone and I'm on my own with this one so progress is definitely slower. Picked up a nice Webasto marine electric sunroof for the helm shelter on the boat and that's a nice feature at not too silly money. Keep up the good work, Cheers, Peter
 

CrazyFinn

Petty Officer 1st Class
Joined
Dec 12, 2016
Messages
357
Went out fishing with my dad first thing this morning (we were out on the water by 6:00 am). Started raining a bit after 9:00, so we headed home. We did get a couple of pike at least!

Got home, figure it was time to get something done on this thing. Pulled the pistons, honed the cylinders, pistons back in... new rod bearings, and the heads are back on.

Planning to finally pull the tarp off the boat and start working on it tomorrow. We’ll see how it goes!
 

CrazyFinn

Petty Officer 1st Class
Joined
Dec 12, 2016
Messages
357
As promised, I did get a bit of a start on the boat yesterday.

Pulled the tarp off. Removed the lumber that was supporting the tarp.

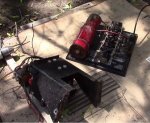
Cleaned all of the loose junk out of the boat. Removed all of the wiring, steering and throttle cables, etc. going to the transom. Removed the engine mounts/gimbal assembly from the transom.

Click image for larger version  Name:	1_mounts.JPG Views:	1 Size:	124.5 KB ID:	10576227

Removed the pumps for trim and trim tabs.

Click image for larger version  Name:	2_pumps_removed.JPG Views:	1 Size:	117.9 KB ID:	10576228

Removed the rest of the hardware from the transom.

Click image for larger version  Name:	3_transom_1.JPG Views:	1 Size:	61.7 KB ID:	10576229

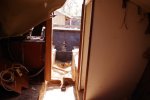
Eventually, got the inside cleared out enough to begin the real work!

Click image for larger version  Name:	5_IMGP1037.JPG Views:	1 Size:	251.3 KB ID:	10576230

Got a clean sheet of paper, drew a lot of diagrams, took a lot of measurements.

Wedged in several lengths of 2x6 under the hull for extra support to make sure nothing deforms once I start carving out the inside of the boat.
 
Last edited:

CrazyFinn

Petty Officer 1st Class
Joined
Dec 12, 2016
Messages
357
The wood in this boat is so rotten, you can't really call it wood anymore...

A few more pics from before I got into the real fun!

The side "shelves" are quite rotten for the rear 3 feet or so - mainly because the bilge vent intakes have had the hoses missing (and the covers missing), and have been dumping rain water on the shelves for years.

Click image for larger version  Name:	7_side_shelf_port.JPG Views:	1 Size:	85.9 KB ID:	10576234Click image for larger version  Name:	8_side_shelf_starboard.JPG Views:	1 Size:	84.7 KB ID:	10576235

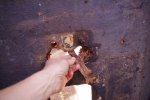
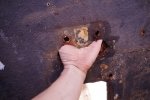
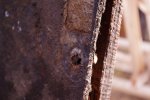
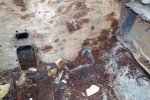
The next few pictures are an indicator of how rotten the transom really was - the whole outer skin just flexed freely, everything inside was mush. I could push my fingers into the transom from any of the openings.

Click image for larger version  Name:	10_engine_hole_rot.JPG Views:	1 Size:	75.1 KB ID:	10576236
Click image for larger version  Name:	11_IMGP1044.JPG Views:	1 Size:	232.0 KB ID:	10576237Click image for larger version  Name:	12_IMGP1045.JPG Views:	1 Size:	237.0 KB ID:	10576238
Click image for larger version  Name:	13_IMGP1055.JPG Views:	1 Size:	160.3 KB ID:	10576239
Click image for larger version  Name:	14_IMGP1057.JPG Views:	1 Size:	182.5 KB ID:	10576240
 

CrazyFinn

Petty Officer 1st Class
Joined
Dec 12, 2016
Messages
357
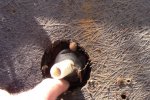
Here's a shot of the remnants of the mushroom I originally found growing in the boat.

16_tearing_into_transom.JPG
 

Attachments

  • 16_tearing_into_transom.JPG
    16_tearing_into_transom.JPG
    83.3 KB · Views: 0
  • 9_shroom_remnants.JPG
    9_shroom_remnants.JPG
    117.1 KB · Views: 0
  • 15_IMGP1059.JPG
    15_IMGP1059.JPG
    253.7 KB · Views: 0
  • 6_IMGP1039.JPG
    6_IMGP1039.JPG
    172 KB · Views: 0

chevymaher

Commander
Joined
Mar 29, 2017
Messages
2,915
I had live worms in mine. I opened a stringer and there he was flopping on the hull.
 

CrazyFinn

Petty Officer 1st Class
Joined
Dec 12, 2016
Messages
357
I originally planned to just pull out the transom rot last night - it was after supper time before I got started on that part - but the transom removal went so easily and quickly that I just grabbed the circular saw, reciprocating saw and shovel and kept going!

20_IMGP1071.JPG

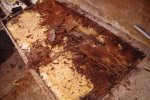
First step was peeling the skin off the floor. I had already fallen through in a couple of places, so I knew the underlying wood was just as rotten as the transom.

17_IMGP1067.JPG

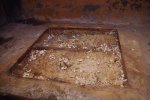
Interestingly, the foam under the existing "hole" in the floor was a different colour.

18_IMGP1068.JPG

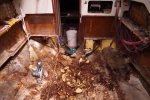
I then used the reciprocating saw to cut away the stringers, and used the shovel to carve out the foam. Water was oozing out of the foam as I cut - and the boat has been covered since last fall. Foam like that will never dry out once it gets wet!

22_IMGP1076.JPG

As I continued my excavation, I discovered that the hole in the floor, different coloured foam was the result of a hull repair done sometime in the past. Why didn't they replace the section of floor?

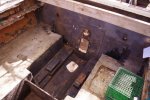
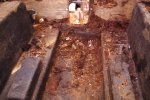
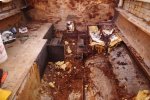
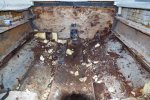
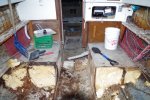
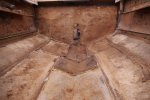
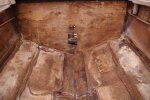
After a couple of hours of cutting, hacking, and digging, this is what I had.

23_IMGP1080.JPG
A bit more stuff to clean up still near the transom.

24_IMGP1082.JPG

Looking forward, this is what I'm hoping to tackle today.

25_IMGP1083.JPG

The stringers that are in the middle of the foam are complete powdery (but wet) mush. I've seen potting soil with more structural integrity. They don't even resemble wood...
 

CrazyFinn

Petty Officer 1st Class
Joined
Dec 12, 2016
Messages
357
Just looked at the date on the original post in this thread... it was almost a year ago.

Since I got this boat, I have had it parked with the stern down, drain plug out. Pumped out all of the standing water. Kept it covered. Canvas top on it all last summer, tarped all winter. No standing water in the bilge after I got it “dried”. Still, the foam is saturated. I’m not thinking that foam is such a good idea... some of that foam I dug out was unbelievably heavy! Water was spraying on me as I dug in with the shovel...
 

mickyryan

Rear Admiral
Joined
Apr 18, 2016
Messages
4,210
think you would halfta stand it on end with a room full of dehumidifiers and wait years most likely :)
 

oldrem

Commander
Joined
Nov 7, 2013
Messages
2,002
I dug over 270 lbs of wet foam out of the Ouachita - and that was just a 14 footer
 

CrazyFinn

Petty Officer 1st Class
Joined
Dec 12, 2016
Messages
357
Got a bit more done today...

IMGP1085.JPG

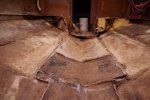
Got the rest of the floor and stringers carved out up to the cabin wall.

IMGP1094.JPG

Cleaned up the ridges on the floor as close as I could with the saw. The less grinding I have to do, the better!

IMGP1098.JPG

Scraped/chiseled as much of the remnants of the wood off the transom as possible (again - the grinder will do the rest, but trying to minimize the grinding).

IMGP1088.JPG

Filled up my trailer pretty nicely!

IMGP1101.JPG

Time to pick up some discs for the grinder tomorrow on the way home from work...
 

CrazyFinn

Petty Officer 1st Class
Joined
Dec 12, 2016
Messages
357
what kind of outdrive is that? and awesome progress man!

Mercruiser TR. Big heavy beast, separate water intake on the transom. Transmission inside the boat. Oil reservoir for the drive is located inside the boat.
 

CrazyFinn

Petty Officer 1st Class
Joined
Dec 12, 2016
Messages
357
do they still make them?

No. And parts are getting harder to find, but not impossible. Probably the most solid drive Merc has ever made. Weakest part is the MercTrans II. But they are pretty reliable if you maintain them properly.
 

mickyryan

Rear Admiral
Joined
Apr 18, 2016
Messages
4,210
read up on them it always made me scratch my head why there wasn't a transmission on outdrives to reduce rpm and make the engines last longer better fuel consumption. who knows maybe soon they will have too since boats burn so much fuel
 

CrazyFinn

Petty Officer 1st Class
Joined
Dec 12, 2016
Messages
357
The structure of this boat is somewhat curious. I’ve read a couple of other projects on similar boats that have found the same thing.

There was three pairs of “stringers”. The tallest set near the centre - on both sides of the fuel tank - were glued to the hull with some kind of hard green stuff, looks like it was fired out of a gun, and not very neatly. They weren’t tabbed in on the outer sides. Both sides of the stringer were glassed in, but it looked quite porous.

The next pair of stringers, mid way between the main stringers and the side of the boat, were unsealed plywood, and weren’t even touching the hull. They appeared to have been (sometime in the distant past) to have been attached to the floor. The flotation foam was filling the 1/2” gap between the bottom of the stringers and the hull. It appears that they might have been there primarily to support the floor. Or something.

The third pair of stringers were about 3” tall, and were about 1/2” from the sides of the hull, to support the floor. They were also unsealed.

Why didn’t they seal the stringers? And why wouldn’t the only stringer that runs full length up to the cabin wall not be attached to the hull?
 
Top