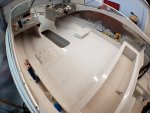
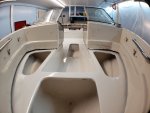
96 Bayliner 2050 - The Dirty Rotten Baystard

Mad Props

Lieutenant Commander
Joined
Jul 8, 2016
Messages
1,766
Didnt think it was gonna happen but I sanded, wiped down, and got the 2nd coat of primer on tonight... next is sanding with 220, then topcoats... I'd post a picture but scroll up and it looks exactly the same lol

I'm trying to decide how i wanna go about the nonskid.. not sure if i wanna do 1 coat over the particles or 2. The benefit of only one is i dont need to sand/scuff where the nonskid is between coats... downside is, it probably wont be as durable with only 1 coat.
 

kcassells

Fleet Admiral
Joined
Oct 16, 2012
Messages
8,594
Didnt think it was gonna happen but I sanded, wiped down, and got the 2nd coat of primer on tonight... next is sanding with 220, then topcoats... I'd post a picture but scroll up and it looks exactly the same lol

I'm trying to decide how i wanna go about the nonskid.. not sure if i wanna do 1 coat over the particles or 2. The benefit of only one is i dont need to sand/scuff where the nonskid is between coats... downside is, it probably wont be as durable with only 1 coat.

I use a sponge sand block, fine to medium, one side had an angle.
They make getting around tight areas a breeze then a light wipe of assetone. :D

My application was different with broadcasting the rubber into the pattern then rolling it into the paint to push it in better with a top coat of paint.
I think if you are mixing it up in the paint a rolling it you could just roll another coat in about an hour with out sanding.
 

Mad Props

Lieutenant Commander
Joined
Jul 8, 2016
Messages
1,766
Welp, nothing super exciting to post after this past weekend, was pretty busy with baseball, yard work, car stuff, list goes on...
That being said, tonight I did get out and sanded the primer and wiped everything clean so now its ready to go with the first coat of paint.
The plan was to do a full coat before doing any nonskid or anything, but the more I thought about it, doing a full coat first seems like just a waste of paint.
I think tomorrow I'm going to do a coat in the non-non-skid areas lol (the smooth spots). That way I can go on with my next coats over the whole thing and still end up with the same amount of paint everywhere. Plus it will give me a little practice at rolling and tipping and it looks like crap or I screw up, I can sand it off the next night and try again.

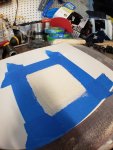
That said, I did make a test panel and tried laying down a test coat tonight and it looked pretty good. I think I'm still getting a little of the glass texture showing thru because I didn't do a layer of primer, but we'll see how it goes.
 

Mad Props

Lieutenant Commander
Joined
Jul 8, 2016
Messages
1,766
Tonight was pretty productive. Got down my first coat of the interlux brightside paint. I coated all the no non-skid areas by rolling and tipping. I love this paint, it rolls and tips wonderfully. I used just under about 5% of their brushing thinner and it worked great. After it dries (hopefully tomorrow night) I'll go in and scuff it with 320grit paper, wipe up the sanding dust, and then spend some time laying out the tape for the nonskid areas. Probably won't be able to do all that AND apply the nonskid tomorrow, but maybe by this weekend I can get my full 2nd coat down and see how it looks.
I was originally thinking 3 coats, but I'm not sure. The nonskid particles are the medium soft sand and I don't want to lose too much grippyness with too many coats of paint.
I laid up a test panel and I also did a little square tonight of softsand and I will top coat it tomorrow and see how it looks with 1 top coat.

More to come, including videos.

20190925_220323-800x600.jpg20190925_220400-800x600.jpg20190925_220448-600x800.jpg
 

Mad Props

Lieutenant Commander
Joined
Jul 8, 2016
Messages
1,766
Nonskid..... check!
Tomorrow is clean up excess and apply first full coat of brightside to seal in nonskid... I'm hoping it's ok to leave the tape until tomorrow cuz there's really no way to remove it without stepping in the wet paint right now...

20190929_222236-800x600.jpg
 

Mad Props

Lieutenant Commander
Joined
Jul 8, 2016
Messages
1,766
Not an option until tonight :facepalm:
Hopefully it'll be ok...
Been reading some stuff instead of working lol and it looks like some people have had good luck with the tape removal even after several layers and a few days later using the interlux paint I used.
Crossing my fangers
 

Mad Props

Lieutenant Commander
Joined
Jul 8, 2016
Messages
1,766
Good news is the tape pulled up just fine... The bad news is I ended up missing a few spot with the nonskid but it was an easy fix... as I rolled on the seal coat, I just sprinkled more in the spots that were light on particles and rolled them in with the paint. The other bad news is I need another quart of brightside paint, so I ordered it and hopefully should have it in a few days. Thats all for meow
 

Mad Props

Lieutenant Commander
Joined
Jul 8, 2016
Messages
1,766
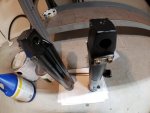
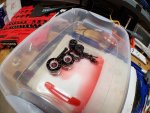
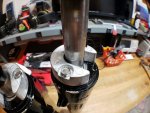
Waiting on another quart of paint to arrive saturday, so I decided tonight to take stuff to the bench and rebuild my trim cylinders... fairly easy job that I've done before, but everything takes 2x longer when taking video... anyways, got everything disassembled, cleaned, and now sitting in a tub with auto tranny fluid. Time to spend a little time with the admiral before bed, then I'll throw em back together tomorrow night... one more thing off the list.

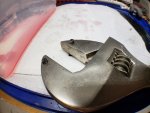
Oh and my pro tip for the night.. if you ever need a spanner wrench for the trim cylinders or anything else, buy an adjustable wrench from harbor freight and drill 2 holes in it and press in some hardened steel pins... instant adjustable face spanner... see pics if your confused.

20191003_224257-800x600.jpg20191003_224245-800x600.jpg20191003_224312-800x600.jpg
 

Mad Props

Lieutenant Commander
Joined
Jul 8, 2016
Messages
1,766
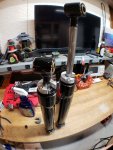
Paint still felt a little tack tonight so couldnt sand it yet so headed down to the shop to reassemble the trim cylinders with the new seal kits, and some shiny new magnesium anodes :D

20191006_212458-600x800.jpg20191006_212504-800x600.jpg
 

Mad Props

Lieutenant Commander
Joined
Jul 8, 2016
Messages
1,766
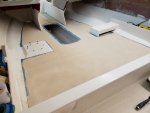
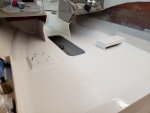
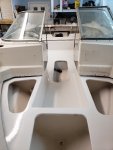
Welp, finally got the 3rd and final coat of paint on the deck/nonskid last night so I think its officially time to start rebuilding... I was staring at the bilge last night thinking about how I want to route wires and stuff and I decided to but some totalboat thixoflex epoxy and I'm going to mount some sacrificial wood strips all around the bilge that I can screw cable ties/clamps/hoses to... The last thing I want is to screw cable ties and stuff into the transom.
 

steve_h7

Chief Petty Officer
Joined
Sep 16, 2018
Messages
401
:thumb: Beautiful job!

I wondered the same thing about how to route battery cables and hoses, but I've got to drill holes through the transom for the outboard, swim platform, splashwell drain, etc... so I'm not sure if it's worth worry about cable ties?
 
Top