1969 Sea Ray Rebuild (and mods) [SPLASHED Sept 2017]

CrazyFinn

Petty Officer 1st Class
Joined
Dec 12, 2016
Messages
357
Awesome looking good man.

Thanks. Feels good to be making some progress!

My goal is to have it in the water this spring. Lots to do still, but now that the disassembly/demolition stage is in the past, it's looking positive.
 

Baylinerchuck

Commander
Joined
Jul 29, 2016
Messages
2,726
Definitely feels good to start putting a boat back together for sure. Did you use poly for your stringer layups? Didn't see you using CSM before the biax cloth. Curiosity has the better of me.

Interesting what you said about the cedar. I didn't know that.
 

CrazyFinn

Petty Officer 1st Class
Joined
Dec 12, 2016
Messages
357
Definitely feels good to start putting a boat back together for sure. Did you use poly for your stringer layups? Didn't see you using CSM before the biax cloth. Curiosity has the better of me.

Interesting what you said about the cedar. I didn't know that.

Using a biax with CSM attached. Cedar is an oily wood... part of the reason it is so rot resistant while being a relatively soft wood. Moisture doesn't absorb into it very well. Neither does resin it seems.
 

Baylinerchuck

Commander
Joined
Jul 29, 2016
Messages
2,726
Is cedar plentiful where you are? Seems like kind of a strange choice for boat lumber. Unless it was a simple act of grabbing what was laying around.....nice work by the way!!
 

CrazyFinn

Petty Officer 1st Class
Joined
Dec 12, 2016
Messages
357
Is cedar plentiful where you are? Seems like kind of a strange choice for boat lumber. Unless it was a simple act of grabbing what was laying around.....nice work by the way!!

Probably they used it because it is rot resistant. They thought they were doing the right thing... they just used trimmed down cedar 2x6 lumber usually used to build decks, docks, etc.
 

CrazyFinn

Petty Officer 1st Class
Joined
Dec 12, 2016
Messages
357
Sunday morning progress - routed out all of the extra screw holes (and other miscellaneous holes) in the top of the boat with a countersink bit, sanded all of the surrounding areas, cleaned up with acetone, and then filled all of the holes with a PB mix. Sealed up the back side of the new bulkhead with resin...

Enough fun for today.

Now to relax for the rest of the day, planning to watch the Daytona 500 on TV, before going back to the real job tomorrow.
 

CrazyFinn

Petty Officer 1st Class
Joined
Dec 12, 2016
Messages
357
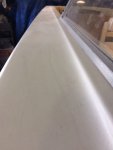
Haven't had much time to work on the boat during the week, but last weekend got the top of the boat (above the rub rail) almost ready for paint - holes filled, sanded, etc.
side_prep.JPG

Yesterday, got home early from work, finished up the prep, primed the inside (dash, sides, etc). I'll be using Interlux Brightside paint and their recommended primer - would love to spray, but will have to settle with a roll/brush application.

Dash with primer applied:
dash_prime.JPG

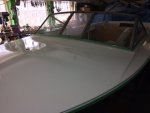
This morning, got primer applied to the rest of the upper part of the boat:
top_prime_2.JPG

The plan is to paint everything above the rub rail bright white, the hull will be dark blue.
 
Last edited:

CrazyFinn

Petty Officer 1st Class
Joined
Dec 12, 2016
Messages
357
Looking good. That's some shiny primer!

Most paint is shiny when it's wet. It's just Interlux Pre Kote. Not shiny when dry...

Got the rest of the hull primed this afternoon - grey primer to prepare for the blue paint.
 

Woodonglass

Supreme Mariner
Joined
Dec 29, 2009
Messages
25,924
I'd recommend you investigate the Roll n' Roll Technique. Just about the best method I know other than Spray Painting.:nod:
 

CrazyFinn

Petty Officer 1st Class
Joined
Dec 12, 2016
Messages
357
I'd recommend you investigate the Roll n' Roll Technique. Just about the best method I know other than Spray Painting.:nod:

Do you mean roll and tip? That's what we were doing so far.

I have smaller garage in the back with good ventilation for spraying, but the boat won't fit in there.
 

Woodonglass

Supreme Mariner
Joined
Dec 29, 2009
Messages
25,924
Nope, Roll n' Roll. I'll explain the technique. Start by rolling on the paint using a High Density Foam Roller. Get em at Lowe's. Usually the package says for painting cabinet finishes. Roll on the paint and you'll notice small bubbles forming. That's ok. When the roller is almost totally void of paint then go back to where you started and use extremely light pressure to Re-Roll the paint surface. The bubbles will go away and leave a very smooth surface. A LOT of our members use this technique and yield almost Spray Like finishes. There is also a distinct SOUND that you will pick up on. Tacky Tape removing sound. When you hear this Sticky sound Stop rolling!!! You're Done and time to move to the next section. Read more here.Paint Your Boat with Tractor Paint...Say What!!!
eek.gif
This method works with just about Any paint you use.
 

Baylinerchuck

Commander
Joined
Jul 29, 2016
Messages
2,726
Nope, Roll n' Roll. I'll explain the technique. Start by rolling on the paint using a High Density Foam Roller. Get em at Lowe's. Usually the package says for painting cabinet finishes. Roll on the paint and you'll notice small bubbles forming. That's ok. When the roller is almost totally void of paint then go back to where you started and use extremely light pressure to Re-Roll the paint surface. The bubbles will go away and leave a very smooth surface. A LOT of our members use this technique and yield almost Spray Like finishes. There is also a distinct SOUND that you will pick up on. Tacky Tape removing sound. When you hear this Sticky sound Stop rolling!!! You're Done and time to move to the next section. Read more here.Paint Your Boat with Tractor Paint[/URL]...Say What!!!
eek.gif
This method works with just about Any paint you use.

Not to hijack, but do you have a proven method for gelcoat? Thick gel coat!!
 

CrazyFinn

Petty Officer 1st Class
Joined
Dec 12, 2016
Messages
357
Nope, Roll n' Roll. I'll explain the technique.

Thanks for that - reminded me of the technique I saw used in a sign shop many years ago to paint backgrounds of billboards (I was their sign installer for a while).

So... I decided to try it yesterday for the second coat of white (I had already done the first coat using the roll & tip method - looked pretty good, but I wanted better).

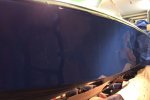
Worked well, other than a few mistakes I made (I missed a couple of spots somehow). Worked well enough that I just went ahead and did the blue with the same method (first coat). The blue ended up looking very good.

This is how it looked when I headed to bed last night:

blue_first_coat.JPG

blue_side.JPG

blue_white_boat.JPG
 
Last edited:

CrazyFinn

Petty Officer 1st Class
Joined
Dec 12, 2016
Messages
357
If that ain't good enuf... Not sure what else you can do.:first:


Thanks - I was happy with the shine, but still need to do one more coat (at least). Part of the trick really is to go thin with the paint though. I put it on a bit too heavy at first and it took forever to get it to shine up with no bubbles.

If I get home early enough tonight, might give it another coat.
 

CrazyFinn

Petty Officer 1st Class
Joined
Dec 12, 2016
Messages
357
Got the second coat of blue done on Wednesday. Looks good enough for me! Ended up working late Thursday and Friday, so didn't get anything done on the boat - but the paint needs time to cure anyway.

This morning, started getting some of the exterior hardware cleaned up, ready to be re-installed.

The name plates for the side of the boat were looking kinda worn, so I decided to freshen them up with a bit of black paint and a small model brush. This was the result as the first one got painted:

Logo.JPG
 
Last edited:
Top