1969 Sea Ray Rebuild (and mods) [SPLASHED Sept 2017]

CrazyFinn

Petty Officer 1st Class
Joined
Dec 12, 2016
Messages
357
My wife loves boating also. Bought a cruiser but had a houseboat before I even got the cruiser in the water. Progress looks great.


Thanks. Not much progress this week. I got one new bunk installed on the trailer. That's all... This working for a living is getting in the way of working on the boat.
 

CrazyFinn

Petty Officer 1st Class
Joined
Dec 12, 2016
Messages
357
Some success today. New bunks are all installed on the trailer! Now that the boat is properly supported, I can start working on the stringers and floor... gonna be itchy by this time tomorrow.
 

CrazyFinn

Petty Officer 1st Class
Joined
Dec 12, 2016
Messages
357
As promised, I got started on the stringer/floor work today. Earlier, I replaced the transom - and had only removed the rear foot or so of the stringers.

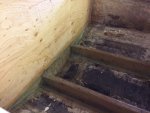
This boat also had these side "pods" on each side (advertised back in 1969 as a place to put your water skis, other junks so it doesn't roll around the boat. In reality, I think they were there as a bit of extra support (the vertical parts are effectively extra stringers), and to hide some flotation foam. They were completely rotten:
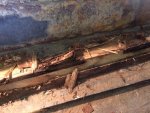
side_rot.JPG

The foam inside was soggy, and I discovered an entire ecosystem of bugs and other things living in there! They are now gone...

Also, my earlier plan was to just replace the rear 4' or so of the stringers (as they had been previously replaced), and only the last couple of feet were now rotten because they had drilled drain holes through the stringers and left them unsealed. As I started cutting the glass around the rear 4' of stringer (they had used some very heavy, coarse roving type fabric), I decided to pull up just to see how well it was bonded to the hull. Turns out it just pulled off like a loud rip of velcro...

I also noticed that the glass wasn't bonded at all to the stringers. Appears that some genius had used cedar for the stringers. Poly resin doesn't stay bonded to cedar. So... I decided that I would just pull out everything and replace the stringers completely. I really don't want to do all this work and leave something questionable in there!

I cut the glass covering the stringer, near the top of each stringer, with the grinder/cut-off disc the full length of each stringer. I then peeled the top off of each stringer - the glass just peeled off easily.

Then - just for kicks (my dad happened to be watching), I went to the back of the boat and lifted on both stringers (one in each hand) - not expecting that they would move as they were still completely glassed in on both sides. Instead, they just popped out - full length, bulkheads and all, in one piece! Like I said, poly resin doesn't stick to cedar. At all...

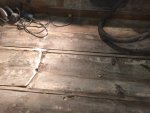
A bit of cutting with the grinder and this is what I have now:
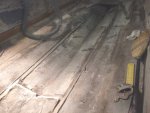
floor_no_stringer_1.JPG

floor_no_stringer_2.JPG
 
Last edited:

CrazyFinn

Petty Officer 1st Class
Joined
Dec 12, 2016
Messages
357
This afternoon - grinding. And dust, lots of dust. Especially when the shop vac that was supposed to be sucking up the dust as I was grinding got the filter all clogged up and I didn't notice. Looked up, and wow... guess I have to check the filter a bit more often!
 

CrazyFinn

Petty Officer 1st Class
Joined
Dec 12, 2016
Messages
357
Did some more grinding this morning, and then a lot of vacuuming. This is the result:

bottom_ground.JPG

A bit more cleanup, and then I start measuring new stringers. Gotta admit, it's a good feeling seeing that all of the old questionable stuff is GONE. Now I just start building a new boat inside the old shell.
 
Last edited:

CrazyFinn

Petty Officer 1st Class
Joined
Dec 12, 2016
Messages
357
No pics today... but I cut the ply for the stringers, got them laminated, and temporarily positioned in the boat so I could transfer the bottom contour to the stringers for fitting. Feels good to be back to building!
 

CrazyFinn

Petty Officer 1st Class
Joined
Dec 12, 2016
Messages
357
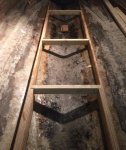
Got the stringers cut, trimmed, bedded in place today. Used a PB mix to bed them to the hull.

bedded_stringers.JPG

The "bulkheads" in the pic are just pieces of 2x3 I put in there temporarily to hold the stringers vertical and in place until the resin sets. Tabbed the inner edges with strips of glass, then worked in the PB mix from the outer/"uphill" sides. Hoping to make the actual bulkheads out of plywood tomorrow. After that, glass everything in properly.
 
Last edited:

CrazyFinn

Petty Officer 1st Class
Joined
Dec 12, 2016
Messages
357
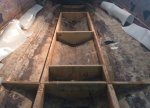
A bit more progress today... Got the new bulkheads in place.

Bulkheads.JPG

Did a bit of glassing, but ran out of resin. Time to go buy another 5 gallon bucket of it I guess...
 
Last edited:

CrazyFinn

Petty Officer 1st Class
Joined
Dec 12, 2016
Messages
357
it never goes as far as you think it should , lol

No it doesn't. That 18oz biax sure sucks it up!

Stringers are done now, and got the plywood for the floor cut, test fit, trimmed yesterday. Sealed the bottom side of the plywood last night, hoping to glue it in today.
 

CrazyFinn

Petty Officer 1st Class
Joined
Dec 12, 2016
Messages
357
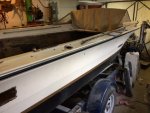
More progress today... First of all, a shot of the boat as it sits today. On the outside, not much change from when I got it, but I sure have gotten to know what's inside pretty well!

boat_in_garage.JPG

From yesterday, cutting the last pieces of cloth for the stringers. Got them all in place once I got my new pail of resin.

last_glass.JPG

Got the plywood for the floor in place. Mixed up a PB mix to glue it in. The bottom was already sealed before it was placed in the boat.

floor_new.JPG

Laid a layer of cloth/resin over the top (over most of the surface) once the PB under the deck had started to set.

When I got the boat, it just had two swivel fishing seats, and a "doghouse" over the engine that didn't fit very well (it was from some other boat). It also weighed almost as much as the rest of the boat...

I've decided to "modernize" the design a bit, and am installing a bulkhead forward of the engine, with a deck/lid on top. The idea is that this bulkhead will separate the engine compartment from the rest of the boat, with a separate bilge for each section.

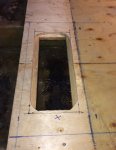
Here is the access hatch/hole for the forward bilge. The bulkhead will (hopefully) be installed tomorrow just to the rear of this opening (to the left in the photo). The new layer of glass on the floor stops just ahead of the hatch - planning to run a layer of glass down the bulkhead and across the floor to meet this.

forward_bilge.JPG
 
Last edited:

CrazyFinn

Petty Officer 1st Class
Joined
Dec 12, 2016
Messages
357
More progress yesterday and today...

Yesterday morning, cut a piece of plywood to create a bulkhead to separate the engine compartment. The cutting was tricky, getting the thing to actually pop into place was even trickier! Amazingly, it fit on the first try. Got it tabbed in on the aft side yesterday.

bulk_engine.JPG

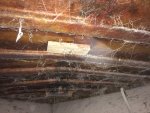
Then, with my father's help, decided to strip all of the cleats, rails, bow light, horn, etc. off of the boat so we could start to prepare the top side for paint. I got the fun task of crawling into the bow to hold the nuts on the fasteners while he undid them from the top side. Decided I needed to do a bit of vacuuming before I crawled in there!

bow_cobwebs.JPG

Got all of that done yesterday. I had originally planned to just fill the holes with gel coat and polish the whole thing, but concluded that there are way too many imperfections to tackle that way - I just wouldn't be happy with the result. So, it's getting paint.

This morning, went out, mixed up some PB to fill the gaps around the new bulkhead, and then tabbed the forward side.

bulk_tab.JPG

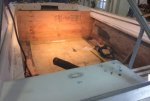
Here's a shot of the new floor and beginnings of a bulkhead as seen through the windshield (used the blue marker to mark all of the holes we need to fill before painting).

bulkhead_windshield.JPG

I also managed to take a chunk out of my back when I stood up too quickly in the engine compartment - the jagged edge some previous owners left on the cap got me!
 
Last edited:
Top