Popular Mechanics 1962 PM38 Build [SPLASHED 2017]

Ned L

Commander
Joined
Sep 17, 2008
Messages
2,266
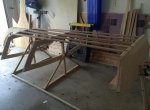
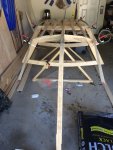
I will say that sometimes it can seem a bit tricky at first to glue up a tapered scarf. When you clamp the scarf together the glue acts like a lubricant and the two angled cuts can tend to just slide past each other. To solve this, simply clamp the pieces to be glued to another piece of wood that extends well past both ends of the glued scarf (scrap, temporary backing block). Clamp them to the scrap backing block piece making sure they are aligned properly, and then apply the clamps to the scarf area. This prevents them from moving as you clamp the scarf. ------ Just make sure you use a separator between your part and the scrap backer block so you can remove it later (waxed paper, piece of plastic shopping bag, etc).
 

Woodonglass

Supreme Mariner
Joined
Dec 29, 2009
Messages
25,924
It's not just the glue up of a scarf joint that's tricky. It's accurately cutting the 12:1 angle on both mating surfaces that can also be problematic. In order to get a good glued joint you need both surfaces to mate properly. Easier said than done. On a boat this size the hull does not flex all that much and when using epoxy, a Flexible and strong adhesive, IMHO, either joint would suffice. Big water boat hulls for sure need the stronger scarf joints since their hulls encounter much harsher conditions. But...It's just the Opinion of an Old Dumb Okie sooooo take that into consideration!!!!;)
 

Scott Danforth

Grumpy Vintage Moderator still playing with boats
Staff member
Joined
Jul 23, 2011
Messages
47,537

Ned L

Commander
Joined
Sep 17, 2008
Messages
2,266
Scott. ..... Sorry to say, I would have to disagree, finger joints have no place here either. ...... Hand rails and closet rods, they are made straight and installed straight. Take a finger jointed piece of wood, force a curve and twist into it and install it that way then see what happens over time.
 

Ned L

Commander
Joined
Sep 17, 2008
Messages
2,266
Keep in mind that there is nothing critical about the 10:1, or 12:1 (or whatever) ratio, other than the longer the scarf the better. Really the only thing that is important is that the length of the tapers on both halves be equal. In actuality you can do it just as well without even measuring. If both halves are clamped and planed together the length of taper will by nature end up the same on both pieces.
 
Last edited:

Grandad

Lieutenant Commander
Joined
Jun 7, 2011
Messages
1,504
Hey guys, I think sometimes we get a little fanatical in our quest to do it better, myself included. At some point I think we need to step back, take a breath and get things in perspective. Regardless of which joint is used here, assuming the join is made between the transom and the next frame, the plan is to seam 2 pieces of plywood at an angle of about 45 degrees. The juncture of these 2 pieces needs enough tree-wood to hold fasteners that will meld the 2 pieces of ply. In reality, separate wood blocks would hold this join together structurally in this area of the hull. The plywood itself will actually add sufficient strength to bridge the joint. I'm not suggesting wood blocks, but I think the difference in strength between these joints won't make a significant difference in this structure. K.I.S.S.
Just sayin'. - Grandad
 

pekstrom

Chief Petty Officer
Joined
Dec 31, 2015
Messages
490
Woodonglass, do you have a supplier where you get your Spax screws? I can't seem to find anyone around me here in Georgia. I'm happy with the screws I use for the boat but am curious and would like to try some Spax screws as well if I can find them.
 

pekstrom

Chief Petty Officer
Joined
Dec 31, 2015
Messages
490
Oh, great! I'll have to look for them during my next visit then. Thanks!
 

pekstrom

Chief Petty Officer
Joined
Dec 31, 2015
Messages
490
No Title

So I have made some progress. The temperatures warmed up enough so I could glue/screw the stem, keelson, frame #4 and transom together. Then it got too cold again so no more gluing for a while. I did cut out the 4 bottom battens though and screwed them in place. They will also need glue when it gets warmer again. I had measured the spacing wrong for the two closest to the camera so I had to cut new slots for them. The ends will be covered by a 1x4 piece in the end so it will be ok. Now I just need the lumber for those chines.
 

Attachments

  • photo240078.jpg
    photo240078.jpg
    66.9 KB · Views: 0

pekstrom

Chief Petty Officer
Joined
Dec 31, 2015
Messages
490
No Title

Cap'n! There be Chines here! Pardon the mess...
I'm just testing how they fit. I now need to make the lap joint so they will be just under 15 feet long.
Once that's done, and the notches are done so they sit right in the transom and frames I need to steam bend them into place.
 

Attachments

  • photo240841.jpg
    photo240841.jpg
    97.6 KB · Views: 1
Last edited:
Top