Stringer replacement, how to tackle this?

KCKracker

Petty Officer 1st Class
Joined
Jul 28, 2008
Messages
280
tryingt o plan my attack.

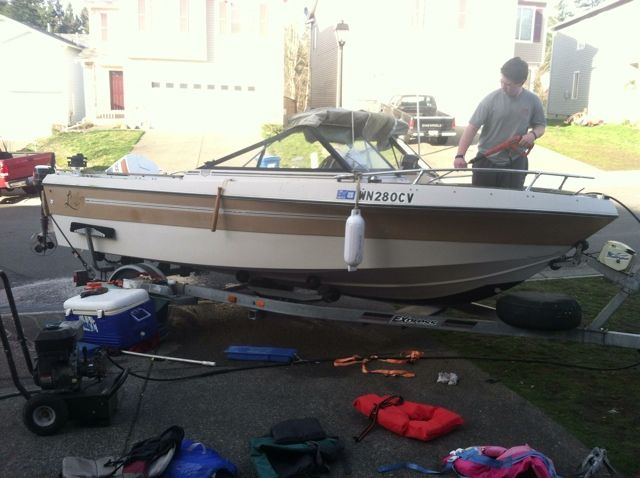
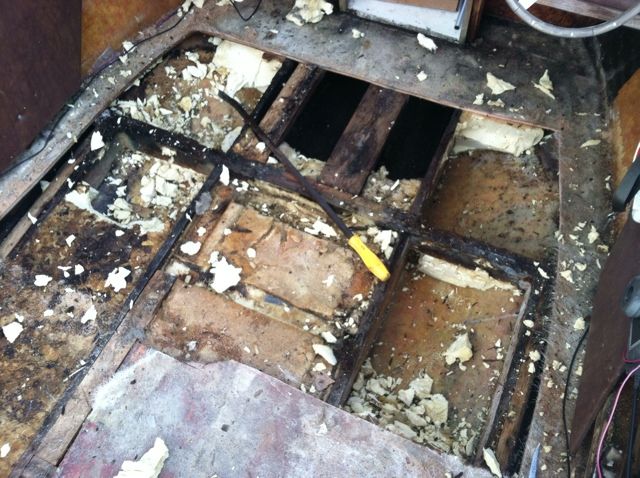
i have a 1978 rally cruizer, seems rare? cannot find a pic of another! i have 4 stringers front to back that are 1x8 with very thin glass on the sides, and they are not one piece. they seems to be interjected by a few cross braces (?) side to side that are foam filled. i got all my foam out and found alot of stringer seems soft so i was going to cut all that out this week.

the confusing part is i have a helm / dash partition and open bow thats all 1 different shell, so getting under that looks like it may not be possible?

anyways. trying to figure out how this ought to be done, and the cheapest and easiest way to bed my stringers. adhesive? glass? im not very good at glass work and adhesive bed looks faster and easier??

BUT i saw someone say that stringers are not supposed to touch the hull, and so?? arent they all attached to the hull?

here are some not so great pics to show.

9DE4004D-84BB-45B0-8041-A0C075EB7530-161-000000149517B3BC_zps2c298f5d.jpg


B22E1922-D36F-4984-B185-95D98B154ED2-161-0000001497327CB9_zps88622b57.jpg


65FDA3C4-4578-4861-9B94-4E52B0F697B2-161-0000001498B47054_zpsa9fcf52b.jpg

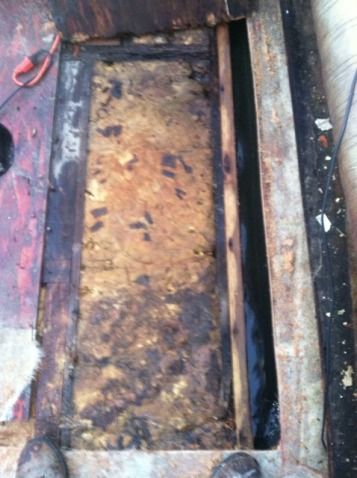
this pic shows 4" deep water on the side channels!

8BDBC260-70D7-4F20-A434-CA4D0357F922-161-0000001516BFC786_zpsfc228c13.jpg

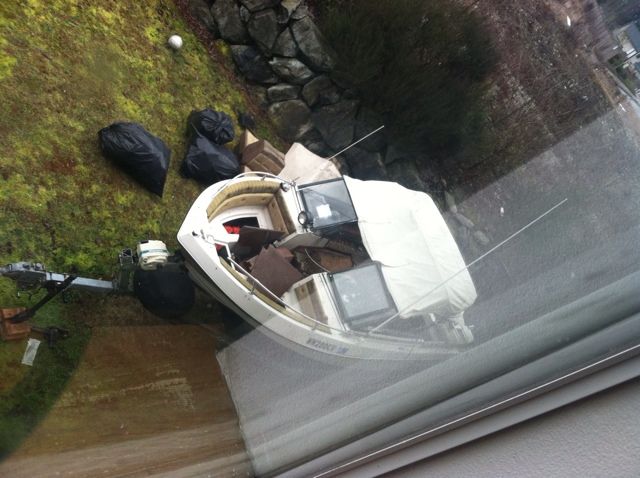
from the helm to the bow is a upper shell, ??
 

DeepBlue2010

Lieutenant
Joined
Aug 19, 2010
Messages
1,304
Re: Stringer replacement, how to tackle this?

I believe what you are referring to as ?upper shell? is your cap. The boat is manufactured as two parts (think of a shoe box as an example) which get attached together by the rivets under the rub rail. To get to the portion of the stringers that is under the cap, I believe you will need to left the cap up. There are multiple threads and discussions on what is the best way to remove the cap. It is a simple process specially if you have few buddies who are willing to help you. Start by removing the rub rail (the rubber piece) out of the aluminum (or SS) holder. Drill out all rivets with a drill bit that is slightly larger than the through whole of the rivet. Take a look from inside the hull to make sure you remove any other fasteners (sometimes there are bolted screws). Left the cap the back of the boat ? with the help of friends or winch enough to insert 2*4 under the cap that extends to the other side of the hull along your beam (basically you are building a bed or a platform to support the weight of the cap). Repeat for the forward part of the boat and finally in the middle. Now you have 3 2*4s supporting your cap. Turn them so that the 2 side is vertical and secure them to the cap by tying them to the cleats (the goal here is from them to stay in place and not to move around freely). Use friends or a winch ( if it is a winch, you will need a frame to hold it on top of the cap) to left the cap. Your boat is small enough to be manageable by a 4 or 6 people. Now you got your cap out and have full access to your hull. Few things to be aware of though..

  • Without the support of the cap, the hull tends to extend side-to-side. Before you do any of the above, make sure the hull is setting evenly and tightly on the trailer. Also make sure you measure the distance from side-to-side at multiple locations and continue to check them and make sure they stay the same during your build or better yet, use an adjustable-length steel cable to keep the hull in shape during your build.


  • The stringers gap is to avoid hard-spots. Google or search the forum for hard-spots. Long story short, while you are battling waves, your hull is flexing up and down at different areas. A small gap (1/8 or ? of an inch is to ensure that you hull is not ?hitting? the wood during this time which may cause structural damage to the hull and/or cosmatic damange to the gelcoat on the long run. The easiest way is to lay down 2*4s on top of the hull horizontally from front to transom and parallel to the stringers. Cut smaller piece of 2*4s and secure them vertically every 3 feet or so. Use these to temporarily suspend the stringers above the hull while you are bedding and glassing it.


  • For bedding, and I know it is debatable, use PL premium adhesive if you can afford to give it time to fully dry (3 or 4 days depends on the weather) for fillet ? to build a radius between the stringers and the hull so the fiberglass can lay down without problems) use a filler of mixed resin and cabosil and glass (a.k.a Peanut Butter) search the forum for it and you will find a post from Oops and a video from Friscoboater on how to make it.


  • I see that you have a roller trailer. Removing the stringers might subject the hull to intense stress from the rollers that is not distributed uniformly across the hull as in the case of bunk trailers. I hope our experts will provide some advice on how to handle this.

Finally, It might be helpful to spend some more time reading. Most of what I just mentioned is a very well-known techniques posted by experts and restorers in multiple threads. Good luck to you.
 

KCKracker

Petty Officer 1st Class
Joined
Jul 28, 2008
Messages
280
Re: Stringer replacement, how to tackle this?

what does fillet mean, and i read about a "hook" how do i avoid that?
 

DeepBlue2010

Lieutenant
Joined
Aug 19, 2010
Messages
1,304
Re: Stringer replacement, how to tackle this?

Fillet

a : a concave junction formed where two surfaces meet (as at an angle)
b : a strip that gives a rounded appearance to such a junction; also : a strip to reinforce the corner where two surfaces meet

fillet.jpg

The green part of the above image is your Fillet. It plays two roles

  1. Strengthen the bond
  2. Help in laying down the fiberglass since FG doesn?t like to bend around sharp angels

You avoid hooks by making sure your hull is flat and straight during the build. Also when laying down and fiberglass the stringers/bulkheads, I would make sure my body weight is distributed across the hull to the best of my ability by laying down a rectangle piece of plywood and use it to support my weight instead of pushing against the hull. Keep measuring the flatness of the hull with flat edge with every step. Problems are easier to correct if you spot it as early as possible. Don?t sweat it though, just be careful and plan ahead.
Pay attention to the roll type trailer you have. I edited my initially post with a warning about the rollers pushing against the hull.
 

KCKracker

Petty Officer 1st Class
Joined
Jul 28, 2008
Messages
280
Re: Stringer replacement, how to tackle this?

the trailer is all i have for it to sit on :facepalm:
 

mwe-maxxowner

Master Chief Petty Officer
Joined
Jun 20, 2012
Messages
825
Re: Stringer replacement, how to tackle this?

What you will want to do is remove the boat from the trailer, and build a cradle for it out of 2x's. It is not hard to do, and conduct a search for boat cradle, and you will see several. No sense in going through the hard work of rebuilding this thing and have it turn out wrong because you were afraid to build a cradle. If you had a bunk trailer it would be different, but not with the roller trailer. It is not all that difficult to remove the boat from the trailer, or to build a cradle. If you dig all the wet foam out first it will be much lighter, and easier to remove from the trailer. Read some restoration threads, there is a lot of good information! I suggest going to the completed restos forum, right underneath this one, and read friscoboater's sea-ray restoration NIGHTMARE thread. Also look at his signature and go to his glasstron carlson cvx restoration thread. He built a cradle in that thread. I left the cap on my boat and cut the bottom off my bow seats, which I will have to put back together when I'm done. Not necessarily saying you should do it that way, but it's an option. It makes grinding the hull more difficult in places and I'm sure glassing will be fun under the bow section.

Your transom will almost surely need replacing as well.
 
Top