Hello folks
I have used this site consistently in the past and think its a great forum so I just wanted to give back by sharing my project with the community. Hopefully others will either find this story helpful or at least interesting.
This time last year I was deep into rebuilding an old Paceship P17 daysailer that had probably should have been scrapped. It was advertised on our local internet classifieds which here in Canada is called Kijiji. I`m sure many of you are familiar. The add had one picture and stated that the owner would sell for a good price. He was asking $1400 and the picture showed the mast, rigging and sails all laying in a pile in the boat and the boat laying on the ground. I assumed it was a good boat and that the owner had just gotten tired of it and didn`t want to bother with it. I let it sit for a week or 2 while a rounded up a friends trailer. After calling him to see if it was still available and negotiating a price over the phone, he was willing to take $500.
Funny how hard it is to think objectively when you think you`re getting a deal and it`s something you`ve been after for a while. I was a little skeptical when he agreed to sell it for $500 so I asked him again if it had any holes or needed any major repairs. He said `She`s as fine as kind`which is a local saying meaning it`s in great shape.
When we finally got out to look at it, it was obvious that wasn`t the case. It was sitting with the nose up and the plugs out of the stern and when I tried to move it and get a sense of how heavy it was, I couldn`t budge it. It weighed a ton and I guessed at that time that it was water logged. By this time I had already invested a bit of time and effort plus I was looking forward to bring home a new project but my mind was screaming run away! I offered $400 thinking he`ll refuse and I can walk away. Remember, he was origionaly asking $1400. He countered and I explained that $400 was the best I would do and that I was actually hoping he wouldn`t take it. At that point he accepted and away I went. We drug it up onto the trailer and strapped it down and tied up the loose rigging. The hull actually seemed quite solid and although it was quite heavy I was thinking it might not be too bad. Time would tell.
Long story short, the floor was very soft and the main ribs were rotted. My first thought was to patch it up cheep and just let the kids play with it in the lake. If it sank or ran aground then no big deal. Using a mirror and trouble light I looked down under the floor towards the stern and could see 2 large blobs that looked like spray foam used to support the rear deck area. Knowing this I couldn`t just leave it and decided to separate the deck from the hull and fix the entire thing properly. It would be something I hadn`t done before and although it would be a lot of work I needed a distraction anyway.
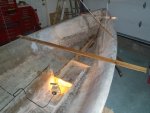
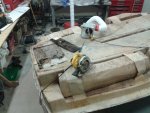
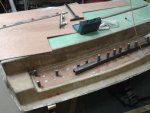
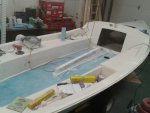
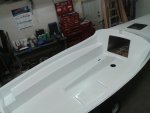
Below are some pictures as I got started. I wish I had gotten some pics of the foam they had in there. It was amazing how well the spray foam gripped the two haves of the hull together. After sitting for a month or more in a dry warm garage with air being pumped through the hull to dry it out, the foam was still dripping wet and very heavy. I`ll add more later and explain my process and what I did. It wasn`t a professional job and there are things I could have done.
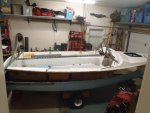
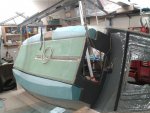
When it came home

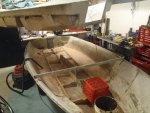
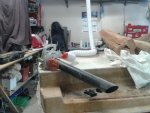
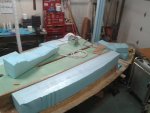
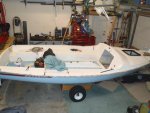
Fitting it in the garage
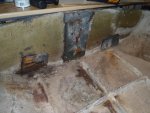
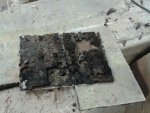
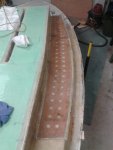
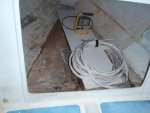
A picture of the rot in the front cudy area
I have used this site consistently in the past and think its a great forum so I just wanted to give back by sharing my project with the community. Hopefully others will either find this story helpful or at least interesting.
This time last year I was deep into rebuilding an old Paceship P17 daysailer that had probably should have been scrapped. It was advertised on our local internet classifieds which here in Canada is called Kijiji. I`m sure many of you are familiar. The add had one picture and stated that the owner would sell for a good price. He was asking $1400 and the picture showed the mast, rigging and sails all laying in a pile in the boat and the boat laying on the ground. I assumed it was a good boat and that the owner had just gotten tired of it and didn`t want to bother with it. I let it sit for a week or 2 while a rounded up a friends trailer. After calling him to see if it was still available and negotiating a price over the phone, he was willing to take $500.
Funny how hard it is to think objectively when you think you`re getting a deal and it`s something you`ve been after for a while. I was a little skeptical when he agreed to sell it for $500 so I asked him again if it had any holes or needed any major repairs. He said `She`s as fine as kind`which is a local saying meaning it`s in great shape.
When we finally got out to look at it, it was obvious that wasn`t the case. It was sitting with the nose up and the plugs out of the stern and when I tried to move it and get a sense of how heavy it was, I couldn`t budge it. It weighed a ton and I guessed at that time that it was water logged. By this time I had already invested a bit of time and effort plus I was looking forward to bring home a new project but my mind was screaming run away! I offered $400 thinking he`ll refuse and I can walk away. Remember, he was origionaly asking $1400. He countered and I explained that $400 was the best I would do and that I was actually hoping he wouldn`t take it. At that point he accepted and away I went. We drug it up onto the trailer and strapped it down and tied up the loose rigging. The hull actually seemed quite solid and although it was quite heavy I was thinking it might not be too bad. Time would tell.
Long story short, the floor was very soft and the main ribs were rotted. My first thought was to patch it up cheep and just let the kids play with it in the lake. If it sank or ran aground then no big deal. Using a mirror and trouble light I looked down under the floor towards the stern and could see 2 large blobs that looked like spray foam used to support the rear deck area. Knowing this I couldn`t just leave it and decided to separate the deck from the hull and fix the entire thing properly. It would be something I hadn`t done before and although it would be a lot of work I needed a distraction anyway.
Below are some pictures as I got started. I wish I had gotten some pics of the foam they had in there. It was amazing how well the spray foam gripped the two haves of the hull together. After sitting for a month or more in a dry warm garage with air being pumped through the hull to dry it out, the foam was still dripping wet and very heavy. I`ll add more later and explain my process and what I did. It wasn`t a professional job and there are things I could have done.
When it came home

Fitting it in the garage

A picture of the rot in the front cudy area


