1984 Grady White 242 Offshore refurb

Joined
Sep 17, 2009
Messages
28
I posted about this boat in the engine section at first... now it looks like I'll be doing a little more work than expected, no biggie. Got the boat for nothing, enjoy the work.

The old 305 has been pulled out and will be replaced with a 350 merc when this other work is done.

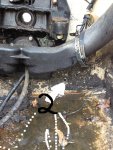
Attached are some photos of what I have found.

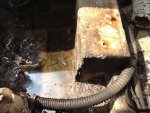
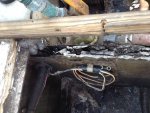
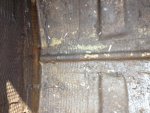
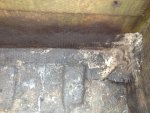
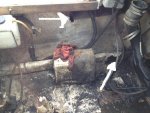
There needs to be some cleaning done, but you can see the split in the motor mounts. Not so sure how to handle this yet. I'm going to clean up everything so I can get a better look at it.

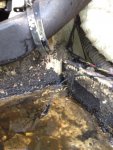
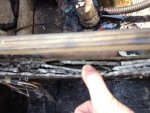
Also look, the stringers don't go all the way to the transom? They are not attached. It looks original? Does this make sense? Should I leave it as is? Or cut it back, clean it up and run them up the transom?

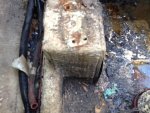
I also pulled up the rear fuel cover and found... NO TANK! Didn't expect this! I did pull the cover on the front tank and it is there. I called Phil at Alloy metal works in Farmingdale NY and he can make up the tank, he has the plans. He quoted me what seems to be a fair price, but I'll shop around a little bit.

Except for some slime, dirt and grit the compartment seems to be in ok shape, solid (I knocked on it) all around (a good cleaning will show the truth). Except for the wall between the rear fuel tank compartment and the bilge... rotted wood. My question is should I cut out entire wall and replace? Or cut out the rotted ply between and keep the fiberglass and fill it?

Here are the split motor mounts, in the corner of the blocks.
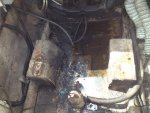
Bilge Dirty 3.jpg

Bilge Dirty 1.jpg

Bilge Dirty 2.jpg

Here is where the stringers don't touch the transom.
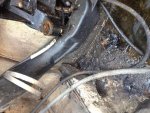
Transom not attached 1.jpg

Transom not attached 2.jpg
 
Joined
Sep 17, 2009
Messages
28
Re: 1984 Grady White 242 Offshore refurb

Here is the divider between the gas tank and the engine compartment.

Between Rear Fuel Tanks and Bilge.jpg

Between Rear Fuel Tanks and Bilge 2.jpg

Here are photos of the rear fuel tank compartment.

Rear Fuel Tank 3.jpg

Rear Fuel Tank 1.jpg

Rear Fuel Tank 2.JPG

I will post new photos after it has all been cleaned up and of the front fuel tank section. I still need to empty that tank and remove it. That tank seems to be in ok shape... just looking at the top. What should I look for?

Also any thoughts, tips and what to look for would be appreciated.
 

xanthras

Petty Officer 3rd Class
Joined
Jun 29, 2009
Messages
76
Re: 1984 Grady White 242 Offshore refurb

I dont mean to be a downer but with the look of that i would be shocked if there was not some rot issues going on there. I would get some core samples and report back here for the experts.
 
Joined
Sep 17, 2009
Messages
28
Re: 1984 Grady White 242 Offshore refurb

You're not being a downer. I'm looking for someone with knowledge to point out the truth, while I recover from possible denial! and decide what exactly to do!

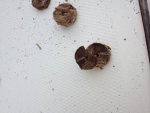
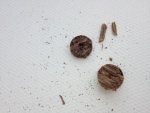
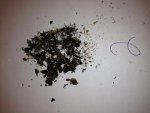
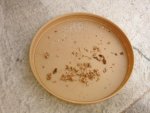
So I had some time to drill some holes. Here is the photo of the shavings. They felt every so slightly moist? Or could it just be in my head? (denial?)

From the engine mount:

Wood shavings from drivers side engine mount.jpg

From the stringer in front (towards the helm) of the port side engine mount:

Wood shavings from Passnger side in front of engine mount 2.jpg

Next I drilled a hole in the rear fuel compartment starboard side stringer here are the shavings

Wood shavings from fuel compartment small core hole.jpg

Then I cored that same side

Core from fuel compartment hole 2 2.jpg

Core from fuel compartment hole 2.jpg


Is this enough info? I can provide more photos or go back to the boat and drill elsewhere.

I think what I'm looking at is... finding where the rot/moisture stops and then deciding what to do? I guess the front fuel compartment is next?

What do you guys think? What should I do next?

Thanks
 

Woodonglass

Supreme Mariner
Joined
Dec 29, 2009
Messages
25,924
Re: 1984 Grady White 242 Offshore refurb

actually engine mount shavings look pretty good. The fuel compartment does look a bit dark and troublesome. Damp means you are getting water intrusion and it will lead to rot but they are NOT there yet. I'm not sure a restore is called for. Others may have a different opinion.
 
Joined
Sep 17, 2009
Messages
28
Re: 1984 Grady White 242 Offshore refurb

Wood, thanks for the opinion.

I'm going to be dropping in a 350 merc into this boat... I'm wondering if I should just replace these stringers and engine mounts now and feel better moving forward. Knowing that 4-5 years (later or sooner) I won't have to replace them.

Better safe than sorry?

What do you think?
 

mrdjflores

Lieutenant Junior Grade
Joined
Apr 1, 2009
Messages
1,169
Re: 1984 Grady White 242 Offshore refurb

did you take any core samples from around the transom? specially near the bottom of the transom.
and it is quite common to see the stringers stop just shy of the transom
 
Joined
Sep 17, 2009
Messages
28
Re: 1984 Grady White 242 Offshore refurb

No I didn't take any samples of the transom.
I'm going to empty the front fuel tank, pull it out and sample that compartment and the transom. When sampling the transom, do you drill all the way through? Or just enough to get some wood?
I will post pictures of those samples when I'm done.

What should be used to fill the sample holes?

At the very least I'm going to replace the stringers (in the bilge), the wall between the fuel tank and bilge and the engine mounts. Is it best to leave the stingers short of the transom? Or tab them up the transom?

Thanks for the help.
 

mrdjflores

Lieutenant Junior Grade
Joined
Apr 1, 2009
Messages
1,169
Re: 1984 Grady White 242 Offshore refurb

do not drill all the way through.
you can fill all your sample holes with some 3M filler (3M 3500??)
 
Joined
Sep 17, 2009
Messages
28
Re: 1984 Grady White 242 Offshore refurb

Ok... I emptied the front fuel tank, but haven't pulled the tank out yet.

I did take samples of the transom and was able to pull some foam from the left and right of the engine compartment.

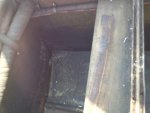
This photo shows where I reached down to pull foam out of. I have the scrapes to prove it. It also shows where the stinger has no fiberglass on it and where it doesn't attach to the transom

Hole for foam and exposed wood stringer.JPG

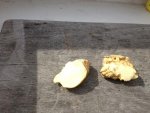
Here are the foam pieces I pulled out. They are bone dry, I felt around in those areas and pushed into the foam, I felt no moiture at all. I'm happy about that.

Dry Foam.jpg

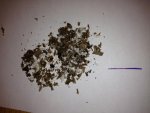
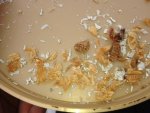
Here are the wood samples from core #1

Shavings from hole 1.jpg

I than drilled another hole, core # 2. The hole from core # 1 is directly on the other side of the key hole.

Drill Hole 2.JPG

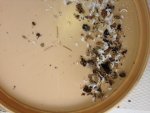
Samples from core # 2

Shavings from sample 2.jpg

I will say that samples from # 2 are darker than samples from # 1. Samples from # 2 felt slightly moist, as moist as anything else I sampled in this boat.

I'm happy to find the dry foam.


I'm thinking of at the least replacing the stringers and mounts in the bilge. What do you guys think of this transom? I'm thinking abour replacing everything motor, drive the works from a donor boat. I may have the chance to take a better look at this transom. But what are your initial thoughts?

When replacing the stringers should I run them up this transom?

Thanks for the help guys!
 

sqbtr

Senior Chief Petty Officer
Joined
Feb 23, 2010
Messages
716
Re: 1984 Grady White 242 Offshore refurb

I hate to say it but those transom shavings look black and rotten
 

mrdjflores

Lieutenant Junior Grade
Joined
Apr 1, 2009
Messages
1,169
Re: 1984 Grady White 242 Offshore refurb

look slike you need a transom...and typically, most stringers do not run directly up the the transom. usually stop about an inch short...at least mine did
 
Joined
Sep 17, 2009
Messages
28
Re: 1984 Grady White 242 Offshore refurb

Thanks everyone. It looks like I will replace the transom, motor mounts and the engine compartment stringers.
 
Top