'Mr.Krabs' Another Bayliner Story

1lrover1

Cadet
Joined
Jun 26, 2012
Messages
18
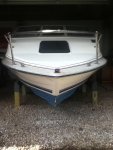
Greetings iboats! As the familiar story goes I picked up an 84 1950 cuddy and well thats all I guess I really need to say as to why I'm posting here. I think I was drawn by the volvo engine which does run well and the lines of the boat and sorta knew when the PO gave me the top 5 lies (The floors are solid, might need a bearing in the drive, the trailer tires have a little dry rot, it was in the water last year and I hate to get rid of it) that I was in for some work. But with visions of my kids fishing and skiing and the thought of getting back on the water, I handed the not so good liar $500 and off I went. So I'm hoping with the knowledge and experience on the forum I can eventually get in the water once I remove all of it and the rotted wood and foam from beneath the 'solid floors'. Learned alot over the past weeks from reading posts on this but still hope to get some advice (other than tow it to the dump) to accomplish my goal of getting this thing back to a useable condition. I plan to chronicle the process and will post pics so others can steer me along the proper path. My hopes are high, the beer is cold, the sawzall on standby and my wallet has been warned. So any tips, inspirational thoughts, warnings, advice from those who have been there and done that is greatly appreciated!
Thanks,
Rob
 

SDSeville

Lieutenant
Joined
Mar 19, 2010
Messages
1,481
Re: 'Mr.Krabs' Another Bayliner Story

Welcome to iboats Rob. While there is very little chance of finding good news, you may want to do a little drilling to see the actual condition of your transom and stringers. If it is indeed rotten, be sure to get all the proper safety equipment before you start the demo work -- tyvek suit, respirator, goggles, gloves... Good luck!
 

1lrover1

Cadet
Joined
Jun 26, 2012
Messages
18
Re: 'Mr.Krabs' Another Bayliner Story

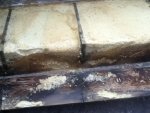
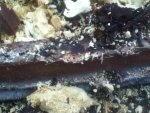
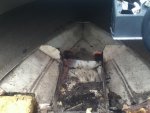
Thanks for the reply/ help. Here is where I am right now. I removed a 'patch' from the center section above the fuel tank. It was a 3 by 3 or so section of PT plywood poorly glassed over (came right off) held to the stringers by drywall screws and a cleat made of base moulding. I'm always amazed at the stuff the guy that came before you does. I mean I'm far from perfect and have plenty of duct tape in my garage like anybody else but what was this person thinking. Anyway, I proceeded to remove the original remaining section above the tank. It was very spongy and the guy had jammed plastic shopping bags under the section above the tank to cushion the deflection of the rotting plywood I guess. So I was able to pull the tank last night and can see both stringers. They are heavily glassed over and to my surprise looked better than I thought. I did drill some very small holes toward the bottom about a foot or so apart. The shavings on the bit were dry and honey in color. But this is only the 5 foot center section so I dont know yet what the rest of the stringers look like yet until i get the deck sections removed and get the foam out. Kinda weird on the foam some is wet and other sections are bone dry. So for the transom what size holes should I drill? And where? I don't have a suit but have been wearing long sleaves etc. All else I have and use. Where can you find the suit?
Thanks!
 

SDSeville

Lieutenant
Joined
Mar 19, 2010
Messages
1,481
Re: 'Mr.Krabs' Another Bayliner Story

Wow, plastic bags and drywall screws. I love it. Post pictures of that stuff.

Drill 1/4" holes about every 8 to 10" working your way up from near the bottom towards the middle. Be sure not to drill all the way thru. Lowes sells tyvek coveralls for cheap.
 

Trooper82

Commander
Joined
Nov 21, 2011
Messages
2,648
Re: 'Mr.Krabs' Another Bayliner Story

Welcome to iBoats, ya let's see some pics :)

and wear your protective gear...
 

1lrover1

Cadet
Joined
Jun 26, 2012
Messages
18
Re: 'Mr.Krabs' Another Bayliner Story

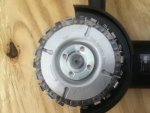
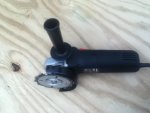
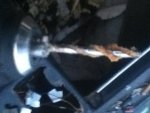
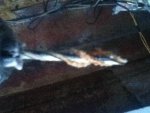
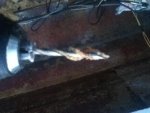
Ok..so I contunued to work a little today on the starboard side. Wasn't sure the best way to cut (or even what to cut) but I figured I would give a new tool I found a try. It's a deadly looking thing and you definitely want to keep the beer in the cooler and hold off on any good stuff till later as it demands your absolute attention. If not you could be well on your way to building a submarine or getting a new nickname like 'stubs', 'stumps', 'scar(s)' or something. Anyway, not sure if anyone has used this, but for me I was happy with the results did what I needed it to. I will be adding more pics soon of where I am with this thing. I'm finding the foam is really fun to get out so any tricks with this stuff?
ROBIPOD 602.jpgROBIPOD 603.jpg
 

1lrover1

Cadet
Joined
Jun 26, 2012
Messages
18
Re: 'Mr.Krabs' Another Bayliner Story

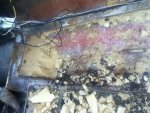
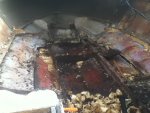
Here is the current state of affairs. The foam on top (seat box) was bone dry. Underneath..a different story. But, the stringer looks well encapsulated and the drill samples I took (still) yielded golden/ honey colored dry shavings? The transom is suspect, didn't drill holes yet but I found (after removing the volvo) a rather large washer on the left bottom bolt on the drive. Like a quarter inch plate 3 x 5 inches wide washer! More creative than the plastic bags under the deck, but consistent with the 'miller time' approach I'm finding on this thing. Anyway, for now I will keep my focus on the decks, or lack there of.
ROBIPOD 606.jpgROBIPOD 622.jpgROBIPOD 623.jpg
 

SDSeville

Lieutenant
Joined
Mar 19, 2010
Messages
1,481
Re: 'Mr.Krabs' Another Bayliner Story

Like a quarter inch plate 3 x 5 inches wide washer! More creative than the plastic bags under the deck, but consistent with the 'miller time' approach I'm finding on this thing.
View attachment 158117View attachment 158118View attachment 158119

Nice! Why no picture of the 3X5 plate? We want to see the good stuff. We have all seen rot and wet foam, but plastic bags and huge washers, now that is entertainment.

Sounds like the transom was mush in that corner and he couldn't get the transom plate tight. Nothing a huge washer won't fix!
 

mrdjflores

Lieutenant Junior Grade
Joined
Apr 1, 2009
Messages
1,169
Re: 'Mr.Krabs' Another Bayliner Story

yes...wear your protective gear!!!
i've been cutting and grinding in just a pair of shorts...no shirt, no shoes....
been too hot...

when i get done..i walk down the yard and jump in the pool...but still itchy
 

mrdjflores

Lieutenant Junior Grade
Joined
Apr 1, 2009
Messages
1,169
Re: 'Mr.Krabs' Another Bayliner Story

Ok..so I contunued to work a little today on the starboard side. Wasn't sure the best way to cut (or even what to cut) but I figured I would give a new tool I found a try. It's a deadly looking thing and you definitely want to keep the beer in the cooler and hold off on any good stuff till later as it demands your absolute attention. If not you could be well on your way to building a submarine or getting a new nickname like 'stubs', 'stumps', 'scar(s)' or something. Anyway, not sure if anyone has used this, but for me I was happy with the results did what I needed it to. I will be adding more pics soon of where I am with this thing. I'm finding the foam is really fun to get out so any tricks with this stuff?
View attachment 158099View attachment 158100
looks like chainsaw blade setup
 

1lrover1

Cadet
Joined
Jun 26, 2012
Messages
18
Re: 'Mr.Krabs' Another Bayliner Story

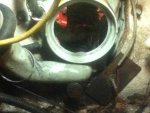
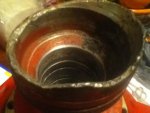
Ok..Ok..you asked for it. Check out the 'washer'. And as a bonus, I threw in a pic of the flywheel cover. 'It might need a bearing' he said. The u joint was playing rock'em sock'em robots with the flyweel cover and it 'might' need a bearing. Almost as good as his 'solid floors'. But to be honest, I knew he was BS and obviously desperate for $500 and as for me, I have been restoring cars for more years than I care to remember and have seen and heard more of this stuff from all walks of life. I know it's sick but I enjoy this kinda thing. I get to learn stuff and it is like a forensics game. In the end I will never see a quarter of what I'm about to spend both financially and in my time but I'm confident with help, I will gain knowledge and have a pretty nice boat..eventually. Albeit, I am out of my element with boats, but I still laugh about this kind of stuff regardless. I wish I had snapped pics of the bags, but in my disgust I just pulled them out and threw them in the can with the rest of the junk. But it is still early in this doozy, so I'm sure I will have more opportunity to 'capture' the creativity! Enjoy.
ROBIPOD 626.jpgROBIPOD 627.jpg
 

93bayliner1800

Petty Officer 1st Class
Joined
May 9, 2011
Messages
239
Re: 'Mr.Krabs' Another Bayliner Story

Man, it is so nice to see someone in the cheerful...."it's all good" stage this early in a restoration. :D I agree there is nothing better than building it yourself! I work on mine in evenings and night if possible...so much cooler!! As far as protection....buy a couple tyvek suits from Lowes, some baby powder, and a full face respirator. The full face are expensive..(150.00) but lying on your side glass going everywhere and not worrying about getting it in your eyes....priceless!!! I would keep my air nozzle from my compressor handy and blow off my mask and tool usually every time I changed disks. Put in some good tunes with earbuds in your ears and now no glass gets into your ears, and the time just passes by. Any possible exposed skin....wrist, forearms, and hands even with gloves on will help you not to itch!! I also found that blowing the dust off with air compressor on wrist and forearms really reduced the itch also.

Good luck brother, and enjoy! :D
 

1lrover1

Cadet
Joined
Jun 26, 2012
Messages
18
Re: 'Mr.Krabs' Another Bayliner Story

Thanks to all for the help. Nearly down to the hull amid just a little work in the bow and I guess I will have to face the transom. Not sure on the stringers if I can leave them be, I would much prefer it. I drilled some more holes in both stringers. The wood still looks ok to me. For now, I'm leaving them alone. I'm hoping to have things cleaned to the hull by next weekend. Gonna need some help with the transom I think, but for now I will do some reading. Lots to learn, the itching hasn't been to bad but no grinding yet either so I'm sure I will be in for it. How much foam is needed for this thing, looking this week to get some supplies I think uscomposites has the best price on the foam but some posts seem to think laying in the pink or blue stuff is better..any thoughts on this?
ROBIPOD 631.jpgROBIPOD 631.jpgROBIPOD 642.jpgROBIPOD 643.jpgROBIPOD 641.jpgROBIPOD 644.jpg
 

Davem3

Chief Petty Officer
Joined
May 15, 2011
Messages
542
Re: 'Mr.Krabs' Another Bayliner Story

I'm always amazed at the stuff the guy that came before you does. I mean I'm far from perfect and have plenty of duct tape in my garage like anybody else but what was this person thinking.

I agree on this one. I, along with many others, use the Duct tape/WD-40 rule, but NEVER and i mean NEVER on a boat.

I forget who said it, but it went along the lines of , if your car brakes down, just call AAA. However, we do not get that option on the water, and considering the Transom and Hull are critical, that is when i draw the line and go by the book, period.

Nice work so far, and yes, when this project is done, YOU will know it was done right, and you can sleep easy at night ( if not out fishing at that time:cool: ) knowing, you, your passengers, and the boat was done safely..........

careful with the cutting tool, Jason, dang near lost a hand over that bad boy................

welcome aboard, and nice to meet you.
time for a pot of coffee, and see how this goes............
 

Teamster

Lieutenant Commander
Joined
Nov 8, 2010
Messages
1,923
Re: 'Mr.Krabs' Another Bayliner Story

In many glass boats the poured foam becomes part of the boats structural integrity as such I would be inclined too replace the foam with that and leave the pink/blue board to the tinny boat guys,...............
 

ricohman

Lieutenant Commander
Joined
Jul 30, 2011
Messages
1,631
Re: 'Mr.Krabs' Another Bayliner Story

I am always amazed at the amount of rot that exists under the floors of older boats. And I continue to be amazed at the self taught people with the skills to make these boats right again.
Good luck!
 

SDSeville

Lieutenant
Joined
Mar 19, 2010
Messages
1,481
Re: 'Mr.Krabs' Another Bayliner Story

Check those stringers thoroughly. It is hard to believe they are still good with all that rot around them. It really isn't hard to place them at this point.
 

1lrover1

Cadet
Joined
Jun 26, 2012
Messages
18
Re: 'Mr.Krabs' Another Bayliner Story

Good call on the stringers. Got tired of guessing with shavings. I cut a small section near the helm off the top. Not completely gone but wet. So, I came this far and have decided to replace it all. But first I need to stabilize things and get it in the garage. I think I'm going to build a bunk 'dry dock'. So Im hopeful by the weekend I can get to completely gutting things. In the meantime I'm reading away. Not what I was hoping for but I'm not surprised either. Will be checking in with more pics soon. Thanks all!!
 

1lrover1

Cadet
Joined
Jun 26, 2012
Messages
18
Re: 'Mr.Krabs' Another Bayliner Story

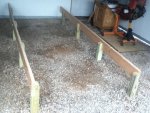
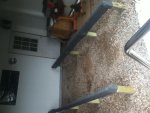
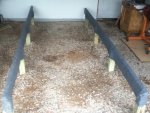
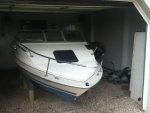
Ok, so she is on the temporary dry dock and in the garage (well most of her anyway). A litle over budget on this, I only wanted to spend $50 and $70 later..well at least it is supported better than the roller trailer. Also will help in addressing the trailer and getting things right and sorted. Began cutting further and have found a diamond tile saw works well and with greater accuracy than anything else I have found. So should it be transom then stringers or stringers then transom?
ROBIPOD 001.jpgROBIPOD 002.jpgROBIPOD 003.jpgROBIPOD 004.jpgROBIPOD 005.jpg
 
Top