1955 Johnson 5.5 CD-12 project

tbone303

Petty Officer 3rd Class
Joined
Jun 24, 2011
Messages
84
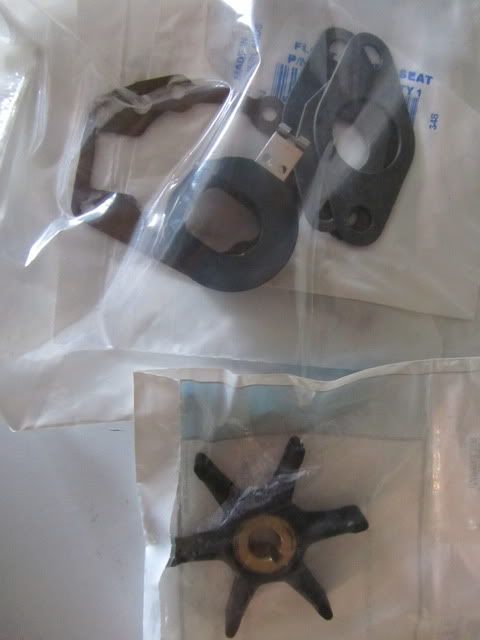
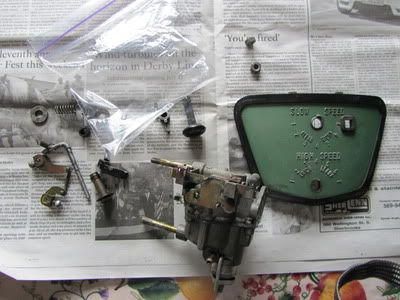
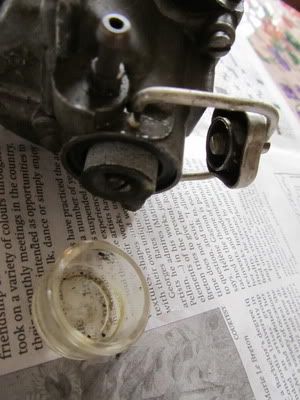
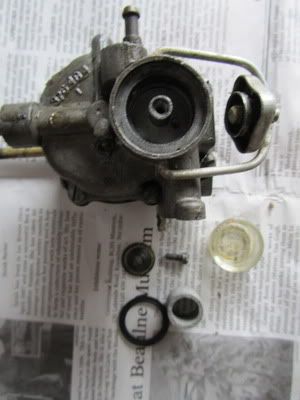
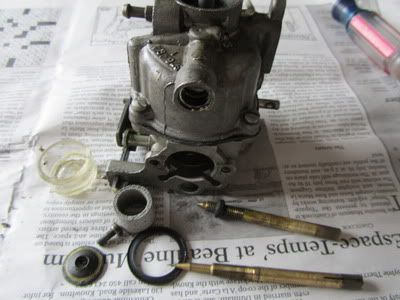
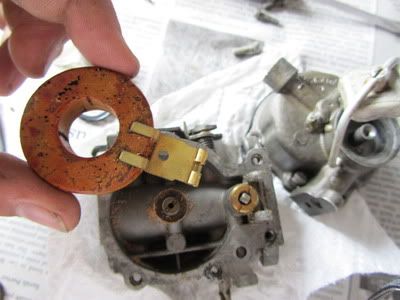
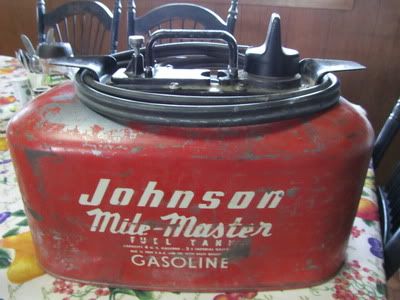
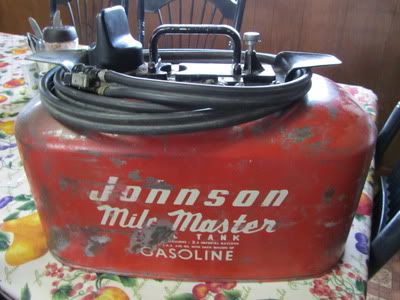
I have started other threads on this motor and it's gas tank but this one is dedicated to the procedure i will do to rebuild the motor. I am by no means a mechanic this is the first time i am working on a motor of any kind. This is my grandfathers motor and it hasn't started in about 25 years. I have ordered all the parts here's how much they costed. Impellar$18, carb kit with float$25, lower unit seal kit$17, gas tank repair kit$14, 2 ignition coils$38, ignition tune-up kit$19, 2 spark plugs$3.50, air silencer$25, and combined shipping was $40. $200 was the cost of all the parts.
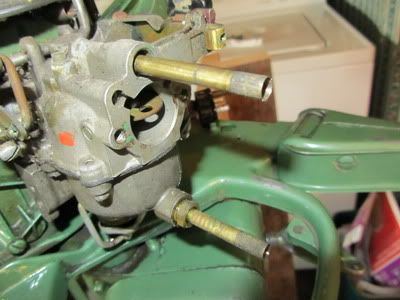
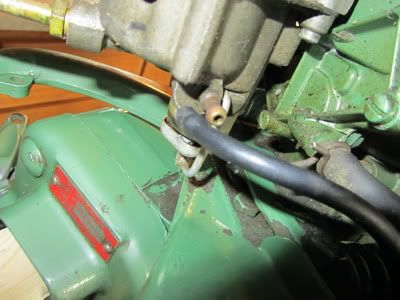
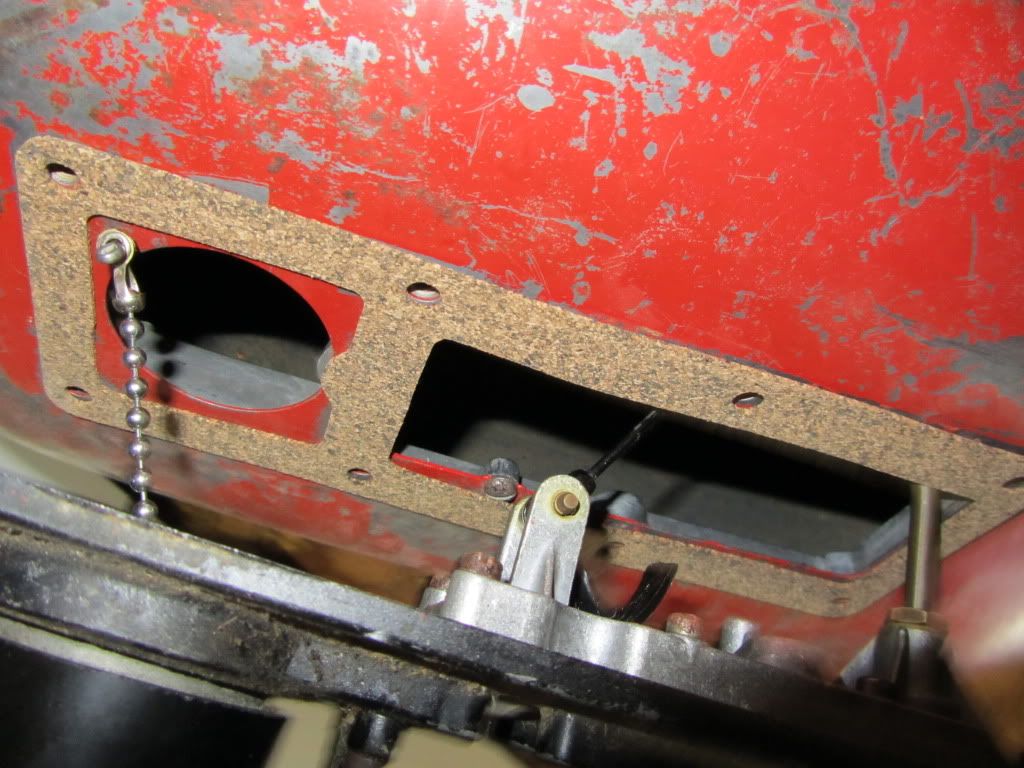
I will be focusing on the -Powerhead
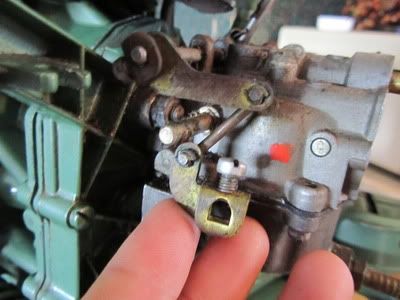
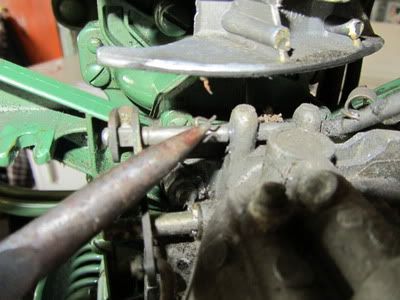
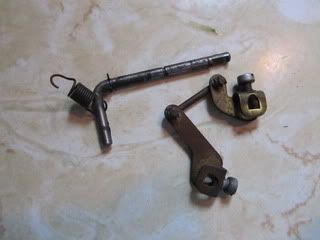
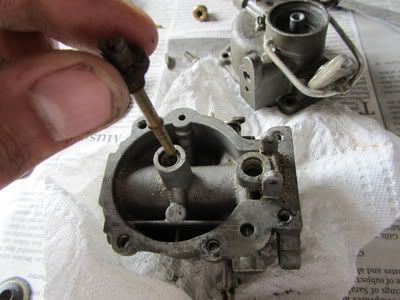
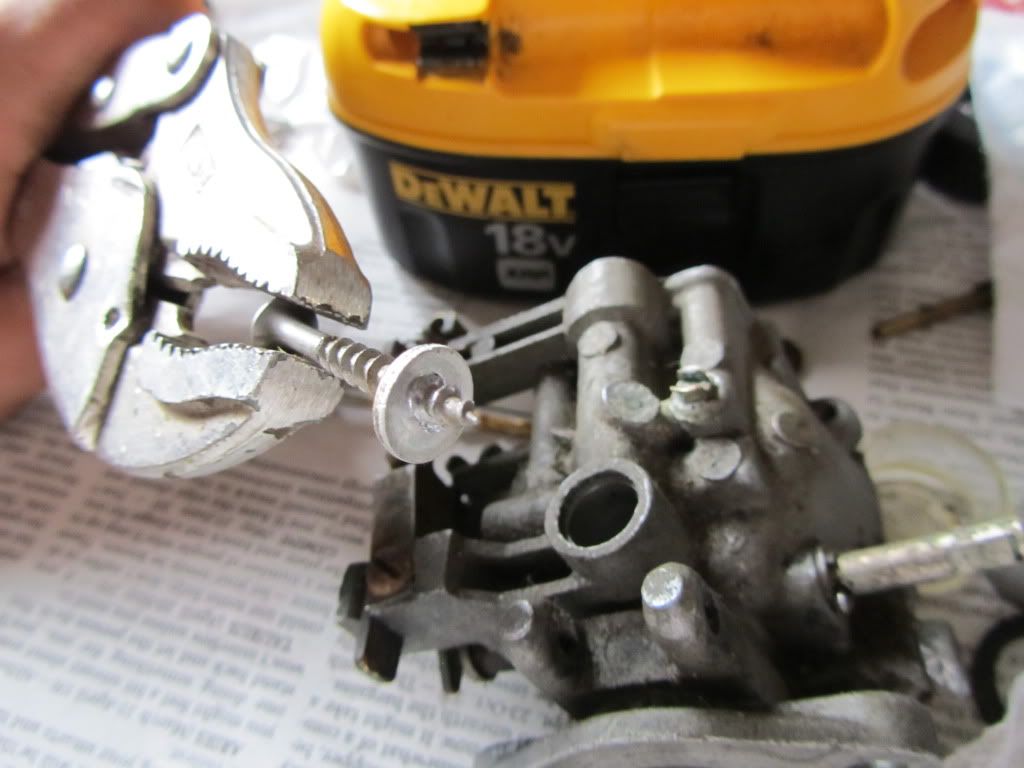
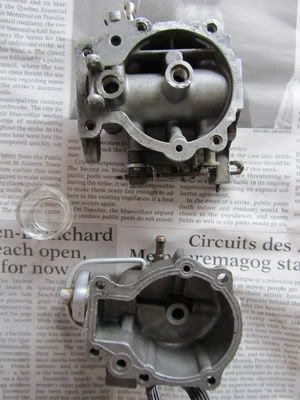
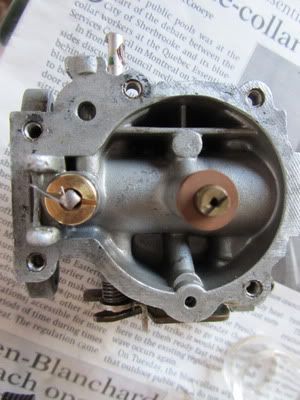
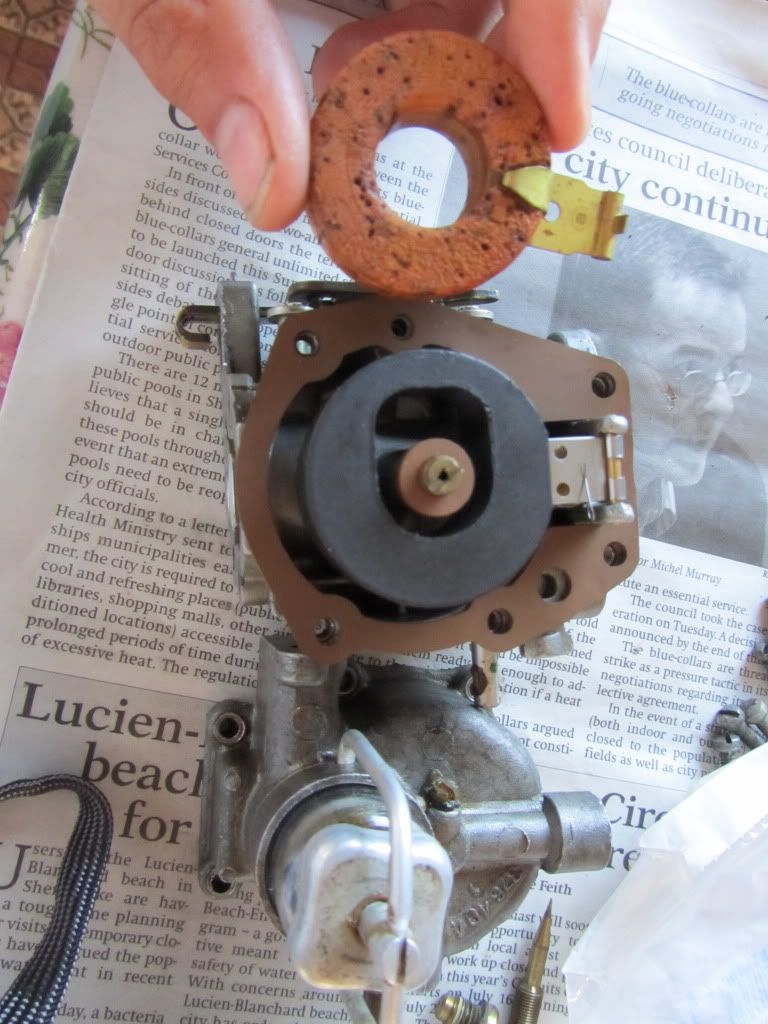
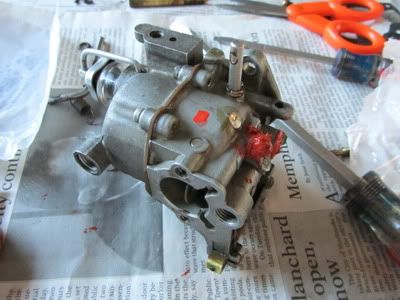
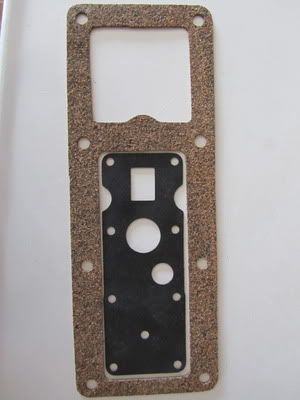
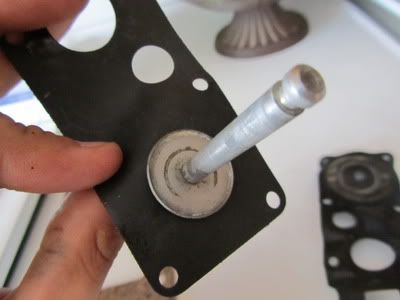
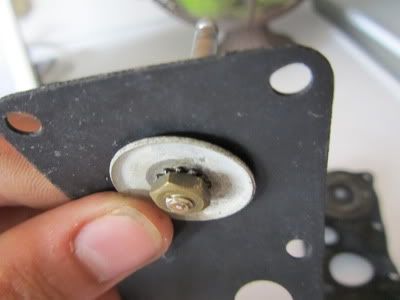
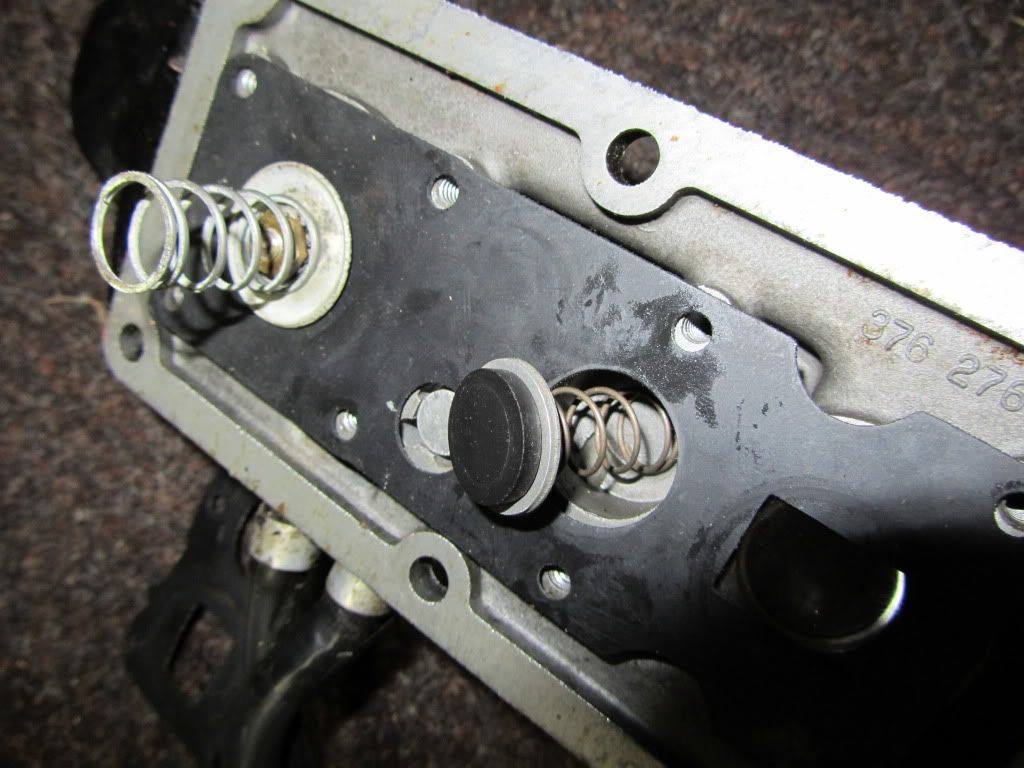
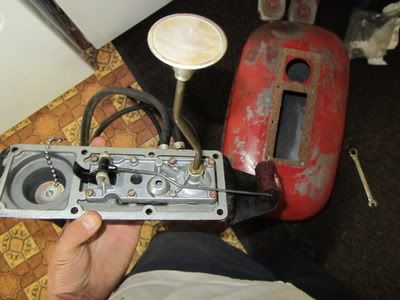
-carburator
-ignition system(Could not cover due to cousin wanting to do it for me)
-water pump(impellar)(Could not cover due to cousin wanting to do it for me)
-resealing lower unit(Could not cover due to cousin wanting to do it for me)
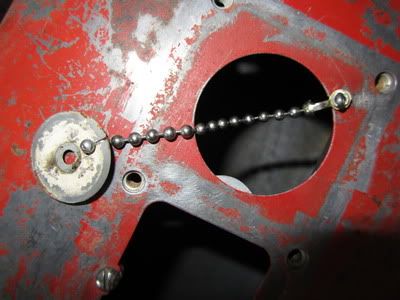
-resealing mile master gas tank
 
Last edited:

Huron Angler

Admiral
Joined
Apr 7, 2009
Messages
6,025
Re: 1955 Johnson 5.5 CD-12 project

I've got the same outboard, and I need to freshen mine up a bit too so I will be following this one.

It's great that the parts are still available and at reasonable prices too.:)

Do you already have the service manual?
 

tbone303

Petty Officer 3rd Class
Joined
Jun 24, 2011
Messages
84
Re: 1955 Johnson 5.5 CD-12 project

I have done the carb and will post the pics and i will do my best to explain what i did.
 

tbone303

Petty Officer 3rd Class
Joined
Jun 24, 2011
Messages
84
Re: 1955 Johnson 5.5 CD-12 project

Here is the carb kit and impellar. The carb kit was OMC #439071 with float (hard to find) bought off ebay
IMG_0084.jpg

First i took off the face plate, knobs, slow and high speed packing nuts, i did not have an air silencer to take off.
IMG_0086.jpg

removed fuel line from carb
IMG_0087.jpg

remove throttle linkage/spring
IMG_0089.jpg

remove throttle linkage here i only removed the one in pic but the top one i did get off but is hard to get to.
IMG_0091.jpg

remove retainer clip on timing advance lever, WARNING watch that little thing mine went flying of the pinchers when i pulled it off and found it with a magnet.
IMG_0092.jpg
 

tbone303

Petty Officer 3rd Class
Joined
Jun 24, 2011
Messages
84
Re: 1955 Johnson 5.5 CD-12 project

IMG_0093.jpg

IMG_0094.jpg

unscrew the glass bowl holder by hand, you have to clean the glass bowl mine was dirty.
IMG_0096.jpg

remove screw holding on the silver filter
IMG_0097.jpg

Remove the high and slow speed needles and remove the packing inside this is the tricky part i poored a little carb cleaner on the old ones and that loosened them a bit, the packing will be replaced with 4 new packing from carb kit 2 in each hole only after the carberater has been cleaned because the carb cleaner eats away at rubber. You can see in my pic 2 old packing on high speed needle.
IMG_0098.jpg

seperate the upper and lower half of carb by removing the 5 screws. Remove the old carb gasket, remove float hinge pin and float. over the years something got into the carb and burrowed in the float, that's why there is sawdust in upper half of carb. But the float looked in really great shape so i am keeping it as a spare, the float and float hinge pin will be replaced by new plastic float, pin from carb kit.
IMG_0099.jpg
 

jmendoza

Petty Officer 1st Class
Joined
Jun 9, 2008
Messages
314
Re: 1955 Johnson 5.5 CD-12 project

Here is a picture of a restored one to keep you motivated, I1954johnson.jpg spent about $300 including paint and decals:
 

tbone303

Petty Officer 3rd Class
Joined
Jun 24, 2011
Messages
84
Re: 1955 Johnson 5.5 CD-12 project

Here's where the pics are limited. Remove the float valve assembly located under float, and the high speed nozzle. The high speed nozzle is what i'm holding. Remove the old gasket on top of nozzle and replace with one from carb kit.
IMG_0100.jpg

Remove aluminum plug from upper part of carb. Drill a hole in the aluminum dowl and put a screw in it and yank it or pry it out. The aluminum plug will be replaced and should be in the carb kit in mine there was 2 the smallest was the one that fit, put some silicon around the edge of the plug to seal it you don't want any air leeks, tap it in lightly with a screw driver or soft hammer.
IMG_0102.jpg

Cleaned carb and glass bowl. Cleaned with carb cleaner aka intake cleaner.
IMG_0103.jpg

Here you can see the new gasket on the high speed nozzle, and the new float valve assembly provided in carb kit, the new float needle has a rubber tip attach the needle spring to the float needle, the spring helps so the rubber tipped float needle doesn't stick.
IMG_0105.jpg

attach new float with new float pin provided in carb kit. Make sure the float sits level, by bending float hinge. Attach float needle spring to float hinge as viewed in my pic.
IMG_0108.jpg

finished carb
IMG_0109.jpg
 

tbone303

Petty Officer 3rd Class
Joined
Jun 24, 2011
Messages
84
Re: 1955 Johnson 5.5 CD-12 project

jmendoza your motor looks really good, maybe someday i could repaint my motor and tank.
 

tbone303

Petty Officer 3rd Class
Joined
Jun 24, 2011
Messages
84
Re: 1955 Johnson 5.5 CD-12 project

The last thing to do before attaching the carb back on is applying some grease to the gasket between the carb and the intake manifold to help prevent air leaks. Cut and fill the excess gasket (that seperates both halves of carb) where the carb connects to manifold and where carb connects to air silencer you want the carb to be flush with gasket, and mate evenly.


IMG_0110.jpg
 

jmendoza

Petty Officer 1st Class
Joined
Jun 9, 2008
Messages
314
Re: 1955 Johnson 5.5 CD-12 project

Couple tips I found useful:

1. If you have Yamabond, or Three Bond 1104, use it in place of silicone based Permatex form-a-gasket because gasoline will eventually soften up silicone sealants and you'll get a leak. The stuff is fine for oil and water, but not that good for sealing gasoline fittings in the long run. The Three Bond 1104 is gasoline proof, and availlable at most motorcycle shops....it's a little trade secret i learned about the hard way :)

2. Lap the flange of the carb on a surface plate using wet/dry sandpaper until it's uniform and flat; most are warped and this ensures a good seal to the manifold.

If you have a local automotive paint shop, they can match the paint for you and put it in spray cans, making it really easy to do a refinish job at home. I clear coated over mine using some clear in a spray can they sold me at the Auto paint store, it adds gloss, and UV protection. Spent about $70.00 doing the re-fininsh, and decals were about $50.00. Here is a link to decals and paint from a guy in Canada: http://www.nymarine.ca/

Decals in America: http://www.americanoutboard.com/decals/index.html
 

tbone303

Petty Officer 3rd Class
Joined
Jun 24, 2011
Messages
84
Re: 1955 Johnson 5.5 CD-12 project

I bookmarked the website thanks
 

tbone303

Petty Officer 3rd Class
Joined
Jun 24, 2011
Messages
84
Re: 1955 Johnson 5.5 CD-12 project

The powerhead was the first thing i worked on and should have wrote this before the carburater. You have to make sure that the powerhead is not warped, remove both spark plugs, and remove the 10 screws that hold the head on, take it off, and rotate the head on 220 grit sandpaper (i used 120) on a flat surface like glass untill you see bare metal all the way around on the head that way you know it is even. Clean the inside of the head and a bit around the pistons you don't want it to be completely clean some residue is what you want to not create hot spots. Then put the head back on and with a new powerhead gasket i got mine at napa paid $8 for 2, but you only need one so the other is a spare. The part # for the gasket is 18-2885 that # did not work with me i used no dash 182885.
 

tbone303

Petty Officer 3rd Class
Joined
Jun 24, 2011
Messages
84
Re: 1955 Johnson 5.5 CD-12 project

Got my tank kit today and repaired the tank. I already had the tank apart but it is easy, but the advice i can give is there are 2 springs in the components of the tank and things can go flying when you take it apart. So have a clean workspace. Here is a parts diagram for the tank
http://www.marineengine.com/parts/v...ntage-evinrude-johnson/376397/37639700001.htm
The tank kit basic diaphragm and gasket
IMG_0112.jpg

Here is my procedure to put the tank back together

Here is the new diaphragm and first step, yours should look like this
IMG_0113.jpg

IMG_0114.jpg

Diaphragm and components back on top of tank.Notice the 2 springs.
IMG_0116.jpg

attach the gas suction nozzle, it has a bend in it i found out that if the bend is the wrong way it will affect the gas gage. The right way is in the pic.
IMG_0118.jpg
 

tbone303

Petty Officer 3rd Class
Joined
Jun 24, 2011
Messages
84
Re: 1955 Johnson 5.5 CD-12 project

Then it came to the tank cap chain
IMG_0120.jpg

put on new gasket
IMG_0121.jpg

Finished tank, no leaks out the push rode hole, and it did not hold pressure.
IMG_0122.jpg

IMG_0123.jpg

IMG_0124.jpg
 

223nbecker45

Recruit
Joined
Aug 3, 2011
Messages
4
Re: 1955 Johnson 5.5 CD-12 project

Great thread! I just picked up a 1960 5.5hp johnson and I'm going to go through it now. The older outboards apeal to me nore then the newer motors do.
 

1946Zephyr

Vice Admiral
Joined
Oct 21, 2008
Messages
5,556
Re: 1955 Johnson 5.5 CD-12 project

Yea, I have a '55 CD-12 and a '58 Fisherman. The styling is more appealing than the new ones, to me too. Fortunately, the CD-11 and CD-12's are still pretty common, for being almost 60 years old. It goes to show you that the best motors were built in this era.

Excellent input on this thread, tbone303. :cool:
 

tbone303

Petty Officer 3rd Class
Joined
Jun 24, 2011
Messages
84
Re: 1955 Johnson 5.5 CD-12 project

thanks guys I am trying my best to post everything i am doing but i might miss some stuff. I still can't figure out the tank i can't get it to hold pressure i have a new tank gasket and diaphragm, where else would air be leaking out the tank, any help would be much appreciated. thanks
 

jmendoza

Petty Officer 1st Class
Joined
Jun 9, 2008
Messages
314
Re: 1955 Johnson 5.5 CD-12 project

Maybe it's leaking around the screws. Use some soapy water in a sprayer, spray the whole are where the cork gasket it while pumping pressure into the tank and look for bulles which will indicate the leakage...good luck, and check the fuel line fittings with the soapy solution too. I myself did not have a pressure tank, so I added a Mikuni pump and changed out the fuel line fitting and modified the pressure taps on the manifold to produce pulses for the pump.
Jay
 
Top