Silverline transom and stringer repair

Silverline19

Cadet
Joined
Jul 8, 2010
Messages
9
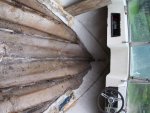
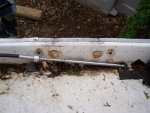
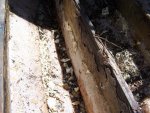
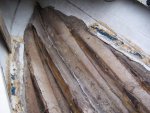
Well I Started with the rebuild on my 72 silverline. The weather finally started to cooperate. Last summer I removed the deck, floatation foam. Recently I took out the center stringer and cleaned out most of the fiber holding it in. Found a combination of a good chisel and flat bar works best for the large pieces followed by a belt sander to smooth it out. My plan is to replace and secure the center stringer first and work out out towards the sides evenly so I don't loose the integrity of the hull. The transom looked good and solid but as I got closer to the back of the boat and removed the tiedown hooks and engine mounts that the transom is pretty bad in places. So off to another adventure. I am cutting the removing the top of the boat just forward of the rear fairing. that way I can replace the transom ad put the rear faring back on with little trouble. My question is 1st: Is this the best course of action and 2nd is there any suggestions to re-attach the top two pieces together?
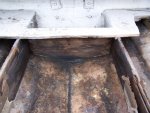
100_9319.jpg100_9325.jpg100_9328.jpg100_9326.jpg100_9319.jpg
 

ezmobee

Supreme Mariner
Joined
Mar 26, 2007
Messages
23,767
Re: Silverline transom and stringer repair

If it was mine I'd pop the cap to give better access to the transom, build a cradle for it to prevent the hull distortion you're concerned about, remove everything down to the hull glass (get a grinder), glass in a new transom, glass in new stringers, recap, deck.
 

saltwaterbluefish

Petty Officer 2nd Class
Joined
Dec 14, 2010
Messages
156
Re: Silverline transom and stringer repair

The idea of replacing one stringer at a time is good to make sure the hull keeps its shape, especially if you don't have it supported. If possible I would get a few buddies and remove the entire cap of the boat instead of cutting just the back section off. You will need to watch it, with it being a 72 the gelcoat will start crazing under any stress, so make sure it is supported when you lift it off. Since you are replacing the stringers I would start by removing about a foot of the stringers you already have in there and start on the transom. After you finish the transom, lay in the stringers and tab them to the transom. You could also go the opposite way (stringer then transom), but for myself I have always found it easier to fit a stringer against the transom then to fit a transom to a stringer.
 

Silverline19

Cadet
Joined
Jul 8, 2010
Messages
9
Re: Silverline transom and stringer repair

Well I passed the point of no return. I decided to cut the the aft 1/4 of the top allowing me access to the transom. It was even worse than I thought so its good I went ahead and did the rebuild. I cut the Stringers about 2-3 feet back from the transom and removed all the delaminated plywood from the old transom. It was easier than I thought separating the outer skin form the plywood. So now I am in the process of removing all the loose fiber and cleaning so it will be prepped for the new fiber. I will have pics and will post later.....
 
Top