Intermediate Mariner
Petty Officer 2nd Class
- Joined
- Apr 24, 2010
- Messages
- 190
I don't know what I would do without these boards! All help is greatly appreciated. Don't know what they did 20 years ago (probably went to the library.. the internet is the age of do-it-yourselfers)!!
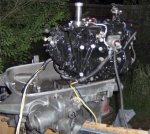
I am in the middle of a complete overhaul and restore on a 1962 'rude lark IV 40hp. Will do one thread when finished to show all progress.
Right now I am at step million of a billion and ready to install magneto and had a couple questions.
The first thing to install on the top of the bare powerhead is an aluminum "retaining ring" that goes on upside-down followed by a brass "armature plate support". There is a square notch in the retaining ring... what the heck is this for and which way does it face/go on???
Question 2: There is an "oiler clip" and "oiler wick"... correct me if I am wrong but the oiler clip is under one of the coils, correct? Is the little part circled in the photo of the oiler clip?? It appears the wick is missing... alot of stuff was missing on this motor so I can't take anything for granted.
Also I can save this for another thread but does anyone know if there is a way to "test" the coils without any specail tools, like with a multi-meter or something? This motor got extremely hot... so hot that that aluminum retaining ring was melted to the bottom of the magneto (on the underside). One of the coils had a little burnt spot on the tip of the lamination... plus the green paint is missing from the coil laminations (there is some flaked-off paint residue left on them, probably from cleaning chemicals).. do the coils need to be repainted or varnished???
Thanks a bunch, wish I was on the water!
Shawn T
Wichita, KS