Finally began my summer project and I am already confused...

jonesg

Admiral
Joined
Feb 22, 2008
Messages
7,174
Re: Finally began my summer project and I am already confused...

The tubes are for rigidity, just look at the weight of the glass over them.
Using them for drains wouldn't hurt anything. At least the one along the keel, the fwd tubes aren't draining anything even if they were open.
 

fishKILLER1987

Petty Officer 3rd Class
Joined
Mar 22, 2010
Messages
86
Re: Finally began my summer project and I am already confused...

Wow. Ok. So my dad was right. I knew the front two tubes could not possible drain any water. So should I leave those tubes in place?

The only reason I would remov the front two is so I can have better access to the front stringer. The tube tube that runs directly down the middle I would only remove to install a new PVC drain tube.

So I'm guessing that no water ever drained through any of those tubes ever. Along the stringers there is a series of cut-outs to allow for drainage so I guess the water would simply drain through the foam and eventually make it's way to the bildge.

As I continue this rebuild I would like to implement a more sophisticated drainage system. Any ideas???

Thank you.
 

jonesg

Admiral
Joined
Feb 22, 2008
Messages
7,174
Re: Finally began my summer project and I am already confused...

Drainage only has to exist and be functional, if there are closed compartments, such as the bow area then they might need a seperate pump w/ auto switch and access for service.

Its better to just allow for drainage and install dual pumps in the bilge, one on auto switch, the other manual switched.

Whatever ribs you add with limber holes, they won't work for beans if they get clogged so access is important as you plan the layout.
Once its all installed, pour a couple of gals of water in the bow and watch to see if it drains to the bilge. Limber holes where there is no access can be bigger so they don't get clogged by 2 leaves.

If you remove the stiffener tubes I suspect the hull will beat like a drum on the water.:D

Robalo's, if we believe the magazine ads, are designed to pound through the 4 footers. You can see how they accomplish it without cracking the hull now.

If you don't fill it with foam it will drain just fine, foam doesn't drain well, capillary action tends to make water wick upward rather than flow down.

The coast guard advises foam under the gunnels, as you now have.
Foam in the keel area just makes a hull go turtle up, foam under the gunnels keeps it floating upright even if swamped.
 

fishKILLER1987

Petty Officer 3rd Class
Joined
Mar 22, 2010
Messages
86
Re: Finally began my summer project and I am already confused...

My thoughts exactly. Along each stringer there are large limber holes that looks like they were originally designed as a makeshift drainage system. However, the holes are not all the same size and they look like a two-year old cut them out with a hammer and a chissle. Not the kind of craftsmanship I would expect from a reputable ship building company. Not only that, but the hull was so packed with foam that every single limber hole was completeley blocked. I just cannot see how any water would have ever drained to the bildge in this boat. It just seems so strange to me that a company would design a boat in such a way.

In any case, so is there any point to putting foam in the keel area of the boat??

It just seems to me that all the foam that was packed so tightly in the boat would make it so much more solid on the water and cut down on noise. But, I cant see how the boat could possibly drain properly with all the foam inside.

So do I just put foam on the sides and leave the keel area open?? I would prefer to do it this way however I am worried that the boat will not be near as solid as it used to be before the rebuild.

Any thoughts??
 

jonesg

Admiral
Joined
Feb 22, 2008
Messages
7,174
Re: Finally began my summer project and I am already confused...

Thats an astute consideration, I would map out the new tank area, place the vertical stringers alongside, allow at least 2 inches either side of the tank for circulation and you know you're gonna drop your car keys in there at least once. The rest of the area can be done with loose foam block, spaced off the hull for drainage....if you want foam.
But yeh, I would keep it away from the keel area.

If you add a rib or two that will compensate for the foam that was bonded to the hull. You could also add more half pipe and glass for rigidity.
A large tranverse former or rib from side to side at the rear of the fuel tank will add a lot of strength, do it similar to the front one near the bow.
I did mine with 2x8 PT pine, heavily glassed with poly resin and mat, end grain saturated with multiple coats of straight resin.
Notch the vertical stringer and the rib so they interlock rather than depend on butt joints and glass.

If you feel the hull is not built heavy enough you can always add a layer of 1708 glass and resin to build it up a bit. My glass in the original hull is quite thick, they used to build em heavy, like old cars.

If sound deadening is your concern, you can ALWAYS shoot some foam in there later, it goes in a lot easier than it comes out.:D
 

fishKILLER1987

Petty Officer 3rd Class
Joined
Mar 22, 2010
Messages
86
Re: Finally began my summer project and I am already confused...

Oh ok. I think building up the hull with 1708 and resin is a great idea. It wouldnt take much time and would give me peace of mind while boating in rough seas.

I would like to have the keel area of the boat virtually foam free because I intend to build a deck over the existing bench-style seating at the bow and install an insulated fishbox within the newly decked section. My only concern is draining the fish box. If I go back with foam in the keel section as it was before, there will be no way the fish box could drain properly. I would be dumping gallons of fresh water into the foam and be right back where I started from. I just cant help but worry that without foam the boat will not be as structurally sound as it could be. So I intend to build multiple ribs running from side to side to add to the structural integrity of the boat.

My intensions for draining the fish box is to have a plug at the bottom of the insulated compartment that I will pull when the boat is in a sloping position towards the stern. This will then dump the any water in the fish box down into the keel area of the hull which will then drain to the bildge area.

Does this sound like a good way to drain the fish box? Or is there a better way??

Also, the more I look at the design of this boat, the more I wonder how water could ever get to the bow of the boat to begin with. Its almost like everything under the deck was intended to be completeley sealed and water free. So how does water usually get into the bow of a boat if there are no holes in the hull??

I know this question is a little off topic but I cant help but ask.

Thanks Jones.
 

jonesg

Admiral
Joined
Feb 22, 2008
Messages
7,174
Re: Finally began my summer project and I am already confused...

Water gets in through incorrectly installed hardware and the cap joint.
Some mfgers use screws to secure the cap, there really is no suitable place for using screws in any major structural joint in boats, nuts and bolts with backing plates is the right way. Water gets in under the rub rail at the bow, through screw mounts for cleats etc.
http://www.yachtsurvey.com/Screwit.htm

I sealed my cap joint with PL and glassed over it then re-installed the rub rail.


Consoles that are screwed to the deck are bad offenders, T-Tops with deck screws are just silly, theres no way they will hold up.
http://www.yachtsurvey.com/leaky_boats.htm

The only drawback to slapping a layer of glass on the hull is the grinding of the old glass and the dust.

Don't know for sure but I think the smart money is to put baitwells above deck, that what I see on the better renovation jobs.
 

fishKILLER1987

Petty Officer 3rd Class
Joined
Mar 22, 2010
Messages
86
Re: Finally began my summer project and I am already confused...

Ahh...I see. Man, my boat had everything you just mentioned. Screws at the cap to hull joint, screws to mount the console and t-top, pretty much had screws everywhere. I now understand how water could work its way under the deck.

I plan on putting the fish box above the deck, however all the water from the melted ice used to keep the fish cold will be drained into the hull. So I am trying to devise a sophisticated drainage system so that when I pull the plug inside the box, the 5 gallons or so of water that will drain into the hull will make it to the bildge area and eventually drain out of the boat.

I too plan on sealing the cap to hull joint together and then glassing over it. How exactly did you glass over it? Did it come out ok cosmetically speaking?? Do you happen to have any pics??
 

jonesg

Admiral
Joined
Feb 22, 2008
Messages
7,174
Re: Finally began my summer project and I am already confused...

You need to have a chat with someone who knows how to plumb that fishbox, I don't have any experience there. You can bet theres a trick to it.
I have a natural aversion to plumbing that isn't accessible.

I don't have foam under my gunnels so access is just a matter of lying down and reaching up. I glassed underneath where possible and used glass strips on the outside where it was not possible to reach under.
The rubrail hides it so theres nothing to see.
You might have to use stainless anchor bolts instead of screws. It depends if you can find something suitable, if not just do as the surveyor advises, remove the screws and glue the joint with sealant (PL) then reinstall the screws with sealant.

I find the PL to be plenty strong for lap joints along the cap,
the rear corners of my boat took a beating at some point and the cap was loose on both top rear joints, I lifted it an inch and shot the PL in there and it set solid, then glassed the inside, seemed like a good idea at the time but I don't know if it really needed the glass.
 

fishKILLER1987

Petty Officer 3rd Class
Joined
Mar 22, 2010
Messages
86
Re: Finally began my summer project and I am already confused...

Oh ok. As you know, my gunnels are packed with foam so access to the cap/hull joint from the inside is virtually impossible. After reading both articles from the surveyor (great read by the way), I am absolutely against any kind of hardware to seal the joint together. I want to go with PL or Epoxy to seal the join and then glass over it. So my only option is to glass from the outside all the way around the boat. Not looking forward to that.

I am trying to learn as much as I can about fiberglass boat repair before I actually begin the fiberglass work. I am afraid that when I attempt to lay glass over the cap/hull joint, I will never be able to sand it down just right to where it will look as if thats how it was manufactured.

In a situation like this, when sanding fiberglass in order to make it match the surface level of what you are fiberglassing, how much can you actually sand it until you begin to get into the fibers of the cloth you layed down??

Is it just the resin that gets sanded or can you actually sand down the cloth as well??
 

jonesg

Admiral
Joined
Feb 22, 2008
Messages
7,174
Re: Finally began my summer project and I am already confused...

Oh ok. As you know, my gunnels are packed with foam so access to the cap/hull joint from the inside is virtually impossible. After reading both articles from the surveyor (great read by the way), I am absolutely against any kind of hardware to seal the joint together. I want to go with PL or Epoxy to seal the join and then glass over it. So my only option is to glass from the outside all the way around the boat. Not looking forward to that.

I am trying to learn as much as I can about fiberglass boat repair before I actually begin the fiberglass work. I am afraid that when I attempt to lay glass over the cap/hull joint, I will never be able to sand it down just right to where it will look as if thats how it was manufactured.

In a situation like this, when sanding fiberglass in order to make it match the surface level of what you are fiberglassing, how much can you actually sand it until you begin to get into the fibers of the cloth you layed down??

Is it just the resin that gets sanded or can you actually sand down the cloth as well??

LEave the cap joint til later on, you'll find the best way after more consideration. I suspect the cap will not lift at all due to the foam bonding it.
If all the water is getting in thru hardware screws then just bed the threads and seal them up, some water will always find a way in, thats expected and normal. The big problem is when water cannot find a way OUT.

You don't have a cuddy cabin full of rugs and furniture to protect so as long as the water can drain downwards...run with it.

A stronger way to bed screws is drill the hole a bit bigger ,inject epoxy putty like marinetex, let it cure and drill a small pilot hole, bed the hole with 5200 sealant and zip the screw home. Most of the strength in the cap joint comes from the fit of the joint and the bond anyway. Like this , even if water gets into the screw threads it can't go anywhere because of the epoxy.

If you glass the cap joint don't extend the glass down the hull, keep it limited to 1/2 inch either side of the joint, the alum rail will cover it.

" when sanding fiberglass in order to make it match the surface level of what you are fiberglassing, how much can you actually sand it until you begin to get into the fibers of the cloth you layed down?"

Generally you grind the original surface down so the new glass sits almost flush when in place, then fill and fair it level with the original surface,

you don't just lay new glass on the original surface.
 

fishKILLER1987

Petty Officer 3rd Class
Joined
Mar 22, 2010
Messages
86
Re: Finally began my summer project and I am already confused...

Oh ok. So if I decide to glass the cap/hull joint I need to make sure that the rub rail can hide whatever mess I may make. I will deff save that part for later on, I think I need to get a little fiberglass experience under my belt before I tackle that section of the boat.

Well, I have spent the last couple of days removing every ounce of foam I could get to. Because I am leaving the cap on and a section of the deck at the stern I have had to tunnle my way through layers of foam to get to the rest of the stringers as well as the transom. After finally getting to the transom, I found that the stringers are not connected to the transom at all. They stop about 6 inches before the transom. I dont really understand that and Im not sure if I should construct the new stringers like that or extend them to the transom. Any ideas??

Today I started the process of removing the stringers. I used a grinder with a 7" cutting disk and cut the glass away from the stinger then used a prybar and hammer to pry the stringer losse. After removing the majority of the glass that incased the stringers I discovered that the wood underneath was completeley soaked and beginning to rot. That just goes to show you that looks can be very decieving and just because you hit the stringers with a hammer a time or two and they feel solid doesnt mean that they are.

Here are some pics of the stern area:

boattransom002.jpg


This is the area where I had to crawl on my stomach to get in there and gut the rest of the foam to get to the transom. Ventilation was really a problem in there when I began cutting out the stringers.

boattransom001.jpg


It is a little hard to see but this is where the stringer stops about 6 inches before the transom. The stringer ends right where the wall of foam begins and the transom is about 6 inches behind that wall of foam. I'll have more pics soon to better explain the situation.

My goals for the weekend is to have all the stringers removed and any old fiberglass remnance from the old stringers ground down and have the hull ready for new strigers by Monday.

May be wishfull thinking, but I think I can get it done.
 

jonesg

Admiral
Joined
Feb 22, 2008
Messages
7,174
Re: Finally began my summer project and I am already confused...

Sounds like a plan, try to leave a bit of glass on the hull to locate the new stringers, an inch or two will leave a channel.

If the stringer doesn't reach the transom its fine to replace as the original was, the stern area probably was designed stronger than typical.

Whats the plan for the transom?
 

83mulligan

Senior Chief Petty Officer
Joined
Feb 7, 2009
Messages
687
Re: Finally began my summer project and I am already confused...

Hey there Fishkiller, just read your thread last night. Man, a lot of water and foam!!!! Good luck with this. I think it will be an awesome fishing rig when you are finished. I look forward to following along.
 

fishKILLER1987

Petty Officer 3rd Class
Joined
Mar 22, 2010
Messages
86
Re: Finally began my summer project and I am already confused...

Excellent. Its always good to see that more people are becomming interested in my restoration project. I hope that people can use this thread as a resource for information and also learn from any mistakes that I may make as the project continues.

Today was a hell of a day! My father and I were in the boat by 8:00am this morning, cutting out the remaining portion of the stringers. I understand now why projects like these can be so time consuimg. Its not the amount of work that slows you down, its the unexpected snags that slow you down along the way.

As you know I had to tunnel my way through foam underneath a portion of the deck to get to the transom. I had counted on being able to replace the stringers and transom with this portion of the deck intact. Well, it had become clear to me this morning that the amount of space under the deck did not give me enough clearance to finish cutting out the stringers let alone fiberglass the new ones in which will be much larger. You can guess where this is going...the deck had to come up.

My father and I spent the rest of today cutting up the rest of the deck and removing it in one piece. You can see in the pics that I have posted that this portion of the deck had the livewell, fishbox, and battery compartment all attached. This made the piece that had to be removed very, very heavy. The cutting took probably 30 minutes, but prying the deck off the foam and getting this piece out of the boat took the rest of the day.

After the piece was removed we decided to go ahead and remove a portion of the cap so we could have better access to the transom. Our original plan was to nida-core a new transom but after calculating how much nida-core it would take we unfortunately had to seek an alternate route. It was going to take roughly 28 gallons of nida-core to do the transom which would have cost $900 - $1000 with shipping. This is a rebuild on a budget so I suppose we will be constructing the new transom out of marine plywood.

So with the rest of the deck removed and the portion of the cap at the stern removed it shouldnt be too difficult to install a new plywood transom. The only bad thing is that I didnt reach my original goal of having all the stringers removed and the hull ready for new stringers. So I plan on working extra hard next week to keep this rebuild on schedule.

Heres a pic of what was accomplished:

transomshot.jpg


Here you can see the stern area and the transom. After the deck was removed I simply placed my hand on the transom to catch my balance and what looked like just extremely wet wood turned to dust with just the weight of my hand being against it. It is amazing how wood can turn to dirt when not properly protected from water. Also, as unbelievable as it may sound, the transom was not covered by a layer of fiberglass. It was just regular old plywood. I cant believe a boat manufacturer would do such a thing.

The 2x4's running across the boat were used as a precautionary measure to make sure the hull kept its shape once the stern deck piece was removed. Good thing too because the hull became extremely flexible once the cap was removed.

Well guys, as sad as it may seem this was all that accomplished this weekend. Hopefully more will get accomplished this week.
 

jonesg

Admiral
Joined
Feb 22, 2008
Messages
7,174
Re: Finally began my summer project and I am already confused...

Its always more work and time consuming to pick and peck at it, the best approach is gut it asap then its a rebuild job rather than pulling teeth one by one.

I'm certain you have your nidacore numbers way off, mine used seacast which is twice the price of nida and I spent $500 total. ( 2 x 5 gal pails)
I could have done it with nida for less than $300.

But if the rear cap is off , wood is a cheap way out.

When re-joining the cap you could cover the joint with an anti slip stepping pad , that will save on cosmetic finish work.
 

fishKILLER1987

Petty Officer 3rd Class
Joined
Mar 22, 2010
Messages
86
Re: Finally began my summer project and I am already confused...

Exactly. And thats just what it came down to. We could have spent days working in a tight space chipping and grinding away at the stringers inch by inch, but instead we decided to spend one day removing the rest of the deck which will save a tone of time and countless hours of hard labor.

Never considered putting an anti-slip step pad to conseal some of the cosmetic work on the cap. Thats an excellent idea. Guess it all just depends on how well the fiberglass work turns out. I hope to have alot of practice by then after glassing the stringers and fixing the damage to the side of the hull.

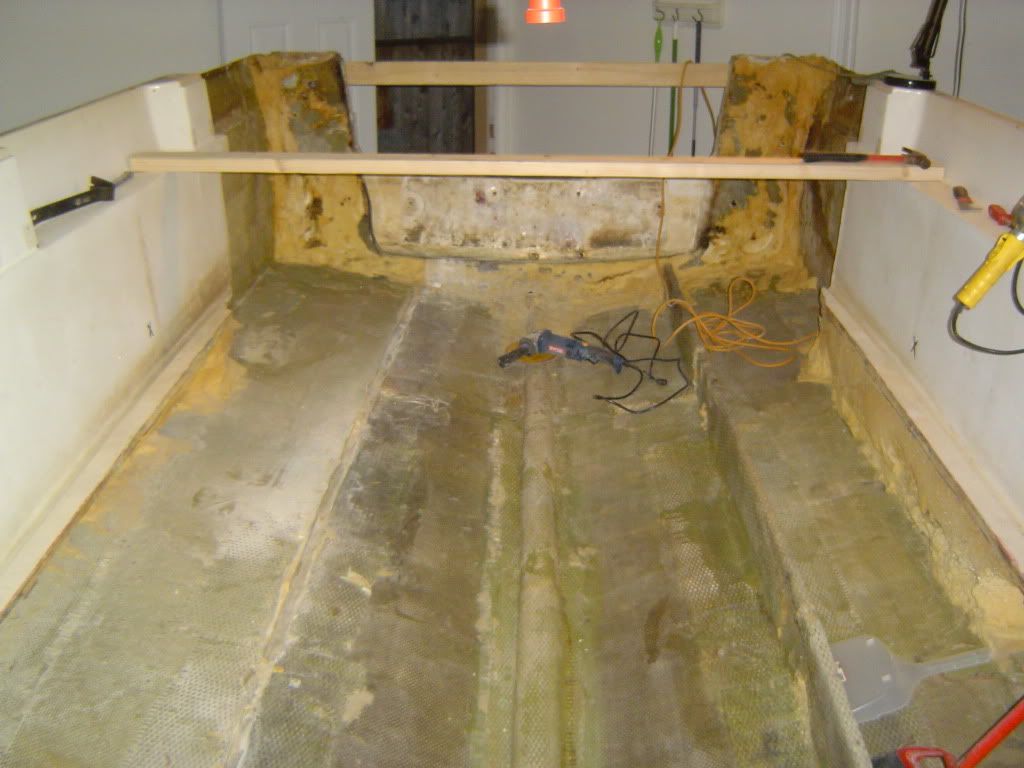
So today was a much better day than yesterday. I made a fairly good amount of progress in a relatively short amount of time. I finished chipping away most of the foam that was underneath the removed deck piece and scraped off alot of foam that was sticking to the transom. I then finished removing the first stringer and began grinding on some of the fiberglass that had originally incased it.

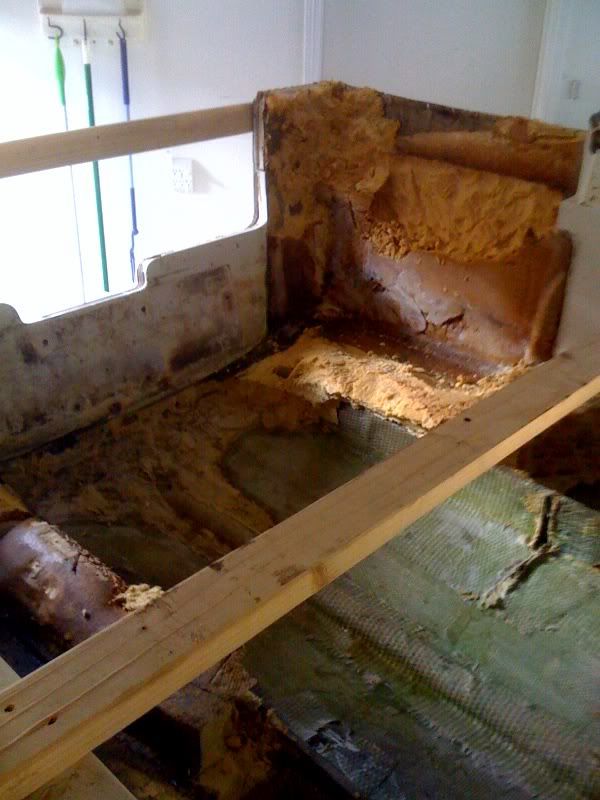
My goal was to remove the transom in one piece so I could use it as a template to cut out the new transom. But, as soon as you touch the transom it crumbles to pieces. I'll probably end up using cardboard to make a template of the transom as it sits in the boat. By the way, when installing the new transom, do you bed it down with a 1/4 inch of epoxy like you do with the stringers?

Also, there was some kind of substance that looks like it was poured in on top of the transom before the cap was put on. It almost looks like seacast and its hard as a rock. Not sure why anyone would pour seacast over the top of a plywood transom. Any ideas on what this may be? I meant to take pics of it but forgot to.

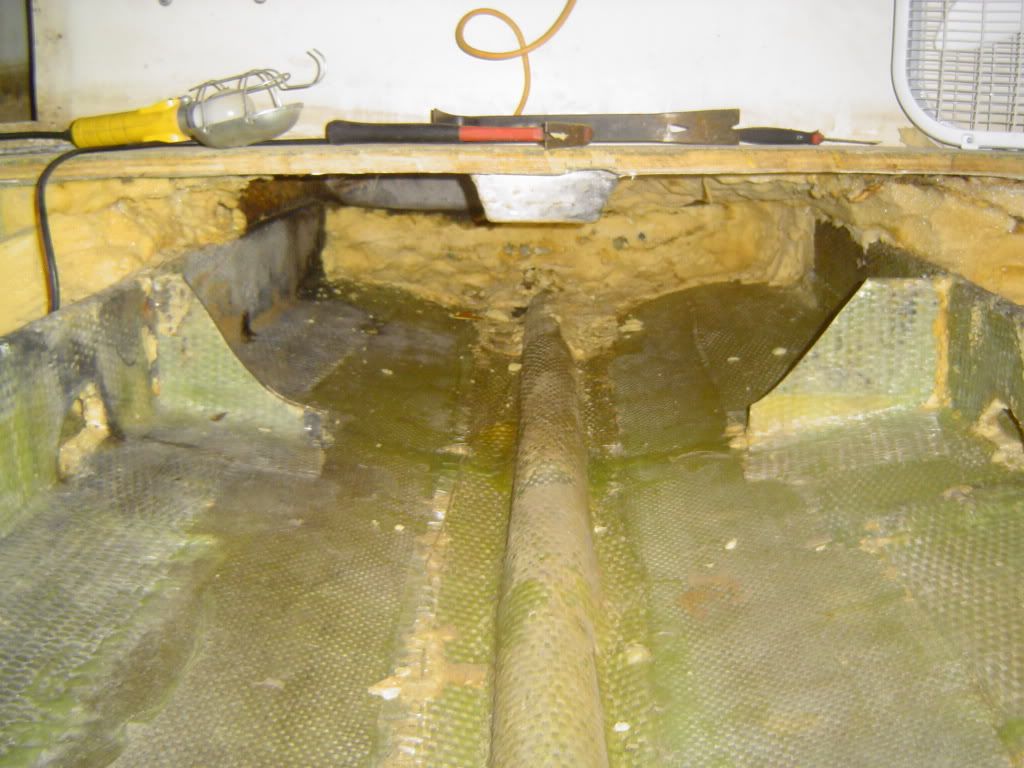
In any case, here are some pics of what was accomplished today:

boatstringer003.jpg


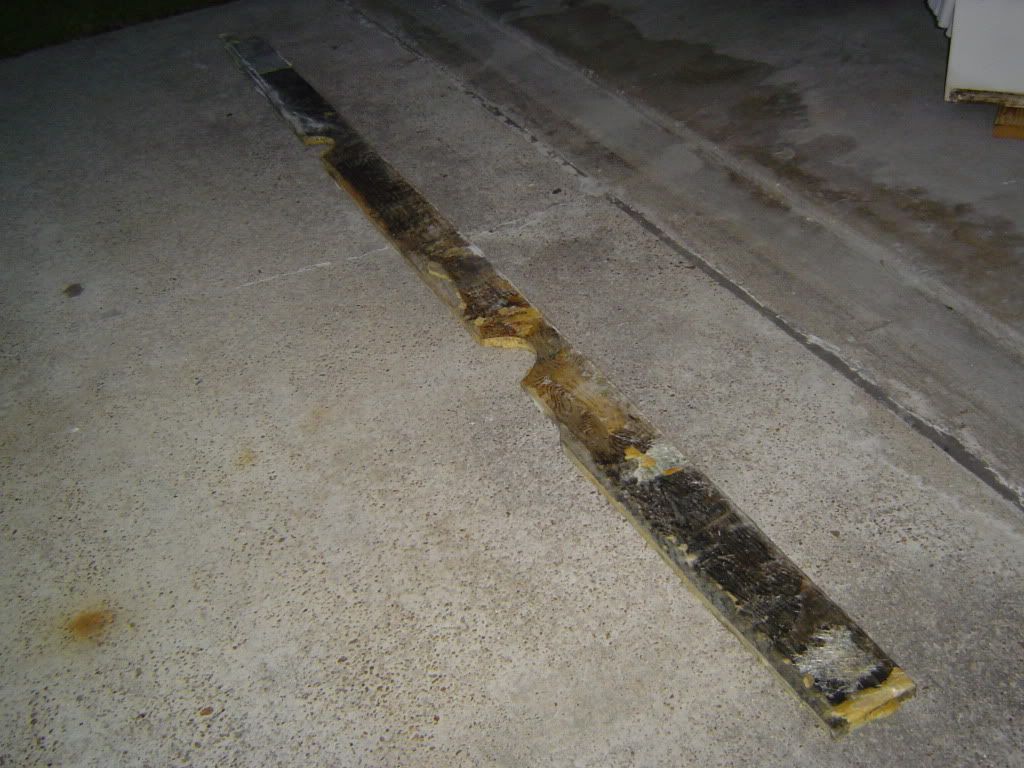
This is what she looks like as she sits now. I think Im only going to remove one stringer at a time because the boat really started to move around quite a bit since the rear part of the cap has been removed. I dont want to take a chance on the hull loosing its original shape.

boatstringer001.jpg


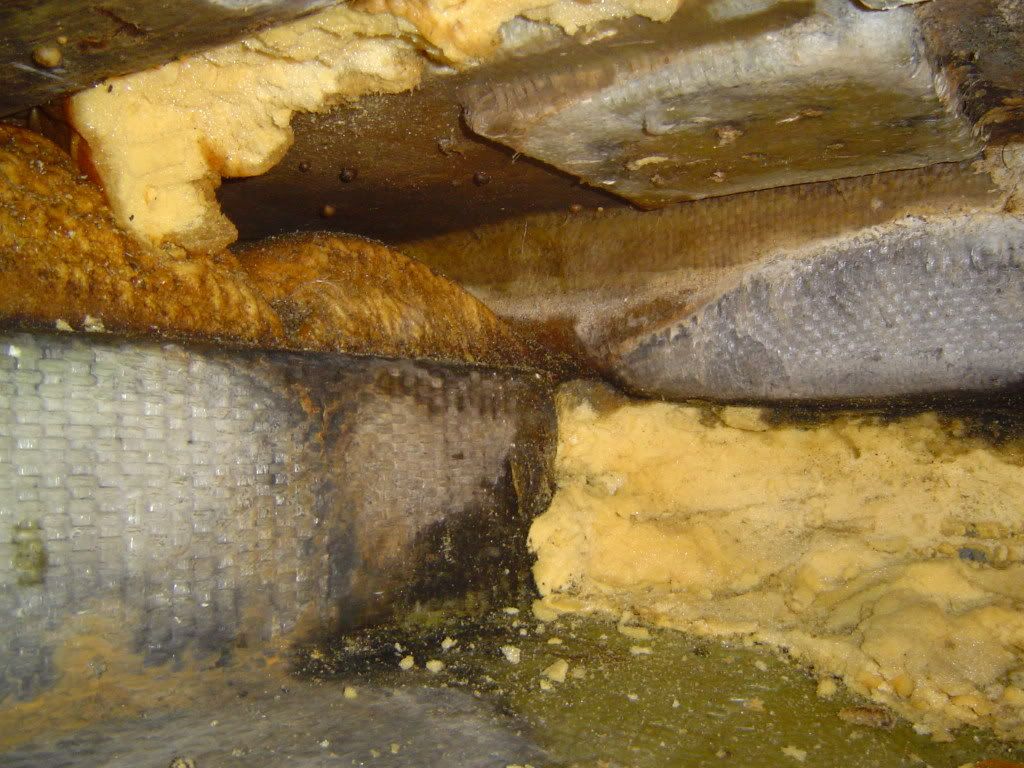
This is the first removed stringer. Nothing fancy, just plywood. A little small for the size of the boat if you ask me.

boatstringer002.jpg


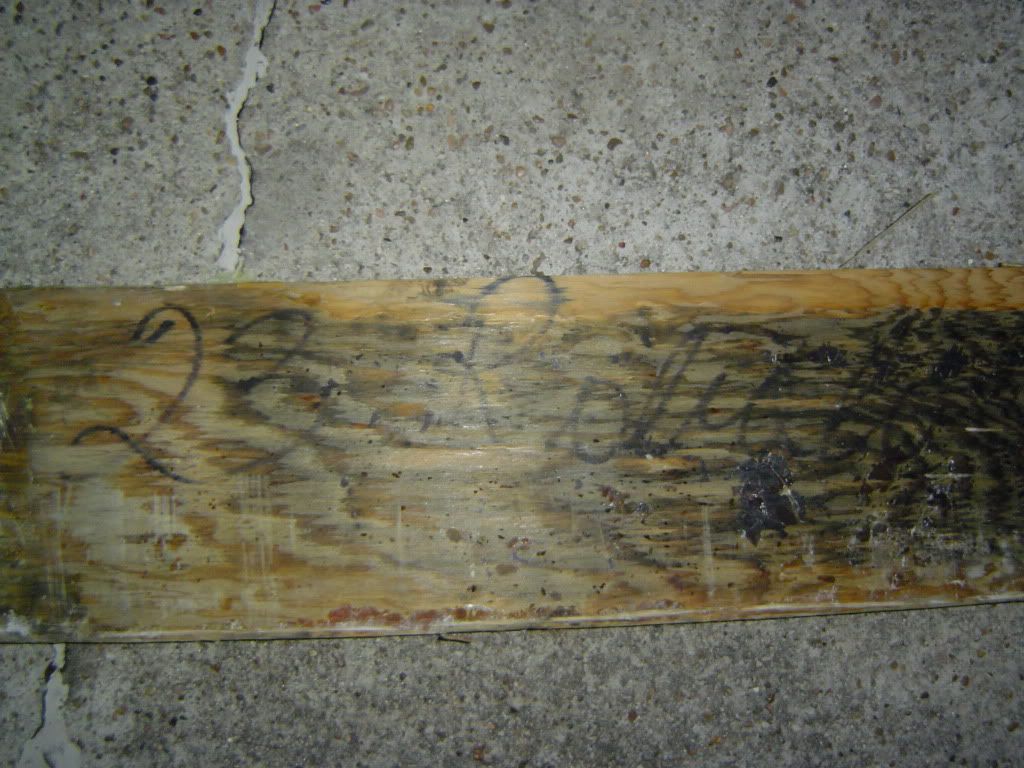
This is just something I found written in permanemt marker on the stringer. It is hard to see in the pic, but it actually says "23ft Robalo". I thought that was kinda cool.

Alright guys, new stringer will be in by this weekend. So now theres the question of what wood to use. I would like to go with a board instead of just plywood. Something with that is about 2 inches thick, 12 inches tall, and roughly 16ft long. Any ideas on what kind of wood to use??

I saw a rebuild in the completed boats section where the guy had used FIR boards as it was what the manufacturer had originally put in his boat. Could I use the same kind of wood. Or is there possibly something better out there?

Thanks.
 

jonesg

Admiral
Joined
Feb 22, 2008
Messages
7,174
Re: Finally began my summer project and I am already confused...

Straight grain wood will tend to warp, ply has a lot less tendency.
But I know some boats use straight wood, white oak is the best but rather pricey. Vertical plywood stringers as you have are quite strong once glassed.
USing PT or marine is the trick but you'd have to wait for the PT to dry out.
 

fishKILLER1987

Petty Officer 3rd Class
Joined
Mar 22, 2010
Messages
86
Re: Finally began my summer project and I am already confused...

Oh ok. So there is a difference between pressure treated and marine wood??
 

tdrudd87

Petty Officer 1st Class
Joined
May 28, 2009
Messages
288
Re: Finally began my summer project and I am already confused...

Yep.

PT is soaked with chemicals to resist the rotting process. It takes a long time to dry suitably to accept resin. The wood itself is of no special quality.

Marine is made with water-resistant glue and has few to no voids in the plys. It is not treated to prevent rot. Good where voids are unaaceptable, such as the outer surface of a hull.

Exterior grade is made with water-resistant glue, but the amount of voids is less controlled, and depends on the general quality, as well as rating. It is a good, economical choice for boatbuilding, except for hull skins.

HTH,
Terry
 
Top