1983 Bayliner Capri project

capri1600

Petty Officer 2nd Class
Joined
Apr 20, 2009
Messages
150
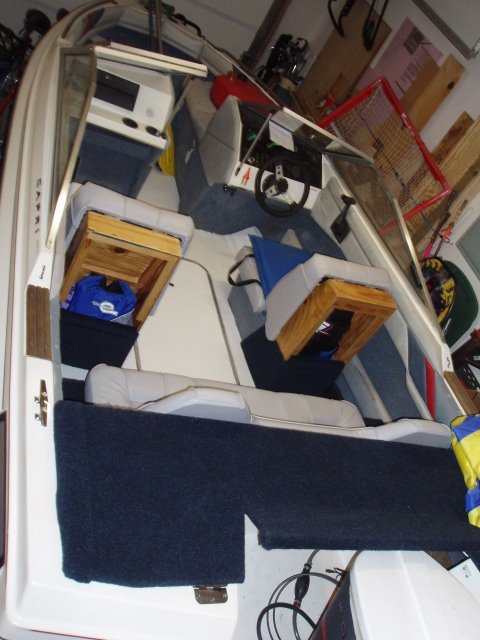
I bought a Force 85hp ($800) outboard a few years ago that came attached to a free 1983 Capri project boat on a nice trailer ($200). I really just wanted the engine as a lower horsepower backup/alternative for my Bayliner 1950 but when I went to pickup the engine, the seller offered me the boat and trailer for another $200. That saved us from having to unbolt the thing in his driveway. I have composite experience so I thought I;d at least hauil it home and look over the hull. I ground around on the hull a bit when I got it home and saved what I could of the wood for use as templates. I parked the project until just a couple weeks ago when we got the outboard motor up on a stand and running. That was enough to look over the hull again and decide to dive in. My motivation for the restoration was the wild looking seqencial lift hull. It's the most dramatic I've seen in a Bayliner and other than where the previous owner ran a grinding wheel right through the side of the hull, the fiberglass looks to be in pretty good shape. There is something screwy on the bottom where the previous guy does seem to have epoxied over some damage. I guess I'll be grinding that out to see whats in there too. The wood is wasted of course and is 100% slated to be replaced. Here she was after the outboard was removed. I brought her to the dumpster to empty the trash before the restoration began. This is how I found her. A free boat on a $200 trailer with an $800 outboard.

bayliner.jpg

bayliner002.jpg

bayliner003.jpg
 

capri1600

Petty Officer 2nd Class
Joined
Apr 20, 2009
Messages
150
Re: 1983 Bayliner Capri project

I'm hosting my pictures of the project on Photobucket and from here forward the resolution will be 640 X 480 unless someone has a special request. Here are a couple shots of grinding the deck and bow wood. A cup style wire wheel on a 4 1/2" grinder made very sort work of removing the old foam! It was amazing even at slow rpm how fast and easy it was to grind that out of there!
bayliner005.jpg


bayliner004.jpg
 

proshadetree

Lieutenant Commander
Joined
Jul 19, 2008
Messages
1,887
Re: 1983 Bayliner Capri project

Host picts on photobucket then use the img code here.Cant wait to see another bayliner project.
 

ezmobee

Supreme Mariner
Joined
Mar 26, 2007
Messages
23,767
Re: 1983 Bayliner Capri project

yeah definitely use photobucket. you can resize your photos right on there to the forum-acceptable size of 640x480.
 

Mark42

Fleet Admiral
Joined
Oct 8, 2003
Messages
9,334
Re: 1983 Bayliner Capri project

Welcome to iboats.com! There are dozens of boat forums on the web, but iboats.com is the right place to be for boat restoration.

Nice to see another 1600 on the forum! You didn't say if its a Cuddy Cabin or Bow Rider, but they share the same hull. And you're right, for a 16' boat the 1600 line has a really deep V hull. I can tell you that with the 85hp Force, I was topping out at 40mph and slicing right through chop. It really felt like a much larger boat.

Photobucket for photos is good advice. Looking forward to seeing some photos of the project.

Keep posting!
 

capri1600

Petty Officer 2nd Class
Joined
Apr 20, 2009
Messages
150
Re: 1983 Bayliner Capri project

Well, the other night a buddy and I mounted the Force 85 on a great engine stand he built for me. The engine fired right up! It sounds great, idles perfectly and doesnt make any wierd noises in gear, forward or reverse. Wow, was I impressed! I ordered a new Michigan Wheel 13 1/4 X 17 pitch prop for it. The prop that was on it has a big chip out of one of the three blades. It is a 13 1/4 X 15 pitch. I'll cut the other blades to match, shape and then store it away as an onboard spare, good enough to get me home sometime should I have a problem with the new propeller. I also ordered a complete water pump overhaul kit and a seperate extra water pump impeller too.
Here is a picture of the passenger side lounge seat base seam I was working on grinding out. You can see the haphazard pour of foam along the outboard edge of the stringer. Thats how I found it when the deck was pulled up. Note how the fiberglass has seperated from the sides of the stringer. The stringer can come right out of that with NO grinding.

bayliner006.jpg
 

capri1600

Petty Officer 2nd Class
Joined
Apr 20, 2009
Messages
150
Re: 1983 Bayliner Capri project

I finished grinding all the seams saturday! Whoo Hooo. The only wood still in the boat is the stringers and cross members, the transom and that back bulkhead/seat area in the back. I dont have to do any of that to do the stringers, the hull repairs or to begin the redecking and rebuilding of the bow. I'm saving the back end and the transom for last. The stringers are sitting in channels of dry, unattached fiberglass. It was a very dry layup to begin with and at some point it released. I can pull the stringer out without doing any grinding, thats how loose they are! I started repairing a couple factory dry spots in the hull. I have the first two ground out and repaired using 2 coats of gelcoat then 5 or 6 layers of alternating mat and cloth with US Composites 404 polyester resin. Next hole to get fixed is the original one created by the previous owner when he ran the grinder right through the side of the hull while cutting out decking.

Finally, I can see the backside of the epoxy repair the previous owner did on the outside of the lower hull on the driver's side. It looks like they had hit something. There is one breach through all layers of the hull then a couple rotted glass spots. I'm going to treat each one individually then put a layer of mat over the whole thing when done. It'll be good. If you cant tell, I'm very excited to be doing repairs now and not just grinding and removing stuff!
 

Mark42

Fleet Admiral
Joined
Oct 8, 2003
Messages
9,334
Re: 1983 Bayliner Capri project

I saw a photo of your boat on another thread. Sounds like your moving right along. Would like to see some photos of the work you've done so far. I'm interested in where the foam is under the deck, and some stringer details. I don't have rot, but its nice to see how things were constructed.

Mark.
 

capri1600

Petty Officer 2nd Class
Joined
Apr 20, 2009
Messages
150
Re: 1983 Bayliner Capri project

On my 1983 Capri 1600 the foam filled the two enclosed areas under each console so thats from the driver and passenger's knees to the floor. Under the floor there was only foam outboard of the two main stringers and none under the front bow floor. There is foam all the way around on the underside of the cap that gets hidden by the upholstery. I plan on puting the foam back under the consoles and replace and add more under the floor. It was sort of haphazard where a little foam was poured here and there. I plan to improve upon that some. I don't think this model had a ski locker between the stringers originally but that part of the decking was up before I got the boat so not sure. I plan on adding one for storage of a paddle and whatever can afford to potentially get wet. The floor spans two stringers and the side of the hull. There are 4 cross members total. Now that bulk of the grinding is done I am enjoying the repair part so far. I did order a pair seats for the driver/passenger possitions. We are going with two high back buckets with TEAL accents on swivel/slide pedestals instead of the double lounges. Here's some related pictures. The first picture is the hull from the front. It's pretty much cleaned out inside. The next picture is the first dry spot I found in the hull and ground out the bad glass. Here it is after repair. The next picture is of the same repair but shows the gelcoat on the outside. Mylar film was taped to the hull as a releasable backing for the work. Ignore all of the red. Thats residue from the cheap plastic tape I used to hold the mylar in place.
bayliner009.jpg

bayliner008.jpg

bayliner007.jpg

tealseat.jpg
 

Mark42

Fleet Admiral
Joined
Oct 8, 2003
Messages
9,334
Re: 1983 Bayliner Capri project

Now I see all the photos! I don't know why, but none of them showed before. Thats why I asked about pics of the foam, etc, I just didn't see it! LOL!

Nice work I see there are a few differences in how Bayliner foamed the bow rider vs cuddy using the same hull. I see the bow rider has the seat bases in the bow half filled. In the cuddy, they are completely empty. No foam forward of the dash, except for maybe under the cuddy floor (I can't see in there). All the seat/v-birth cushons come off in the cuddy, and everything is open right up to the bow eye. I think they just relocated the foam to the cabin seats. The cabin seats bases are easilly twice the height of the bow rider seat bases, so there is more foam. Also the chines are box in on the inside and are foamed in there. The bow rider has rear jump seats, but the cuddy does not because the bow rider cockpit sits farther forward, leaving more space in the aft.

The patch jobs on the holes look great. Nice and clean. I like the captians chairs and would like to do that to my Capri too. Instead of putting the jump seats back, how about a short section of bench seat against the gunnels behind the captians chairs. Could probably seat 2 on each bench seat, plus either foam the base or use it as storage space.

The cuddy had a ski locker, don't see why you can't add one to the bow rider. If you just want it for storage, think about making it the full width of the stringers. I doubled up the 5/8" ply to make the recessed deck and its super rigid, even without any center supports.

8727.jpg


That would give a lot of storage space!

BTW, what's the plan for a fuel tank? Did yours come with the 9 gallon portable under the splashwell? I think the space between the stringers is too shallow for a belly tank when I looked into it.
 

capri1600

Petty Officer 2nd Class
Joined
Apr 20, 2009
Messages
150
Re: 1983 Bayliner Capri project

In terms of seating, It's going to be the two captains chairs and the two seats at the transom. That will really open up the deck area. We looked at a 2001 Capri 160 and it's amazing the room it had partly because of that seating arrangement. The open bow will be stock so more seating up there. In terms of ski locker, yes, definately looking at doing that. The captains chairs will still need to be on some sort of seat box because the side of the hull begins it's taper right there but I am debating if I want to make it real small to preserve the space or make it larger and use it for storage. I am leaning towards going small and preserving the open look.
In terms of fueltank, my project didnt come with one but it was supposed to have the tank you mention. I have an 18 gallon Tempo plastic marine tank that just barely fits in the area in the center of the transom. I havent decided if I want to make that work, look for a small belly tank OR, run a 15 gallon side tank on the passenger side in place of that sides sidewall storage bin. I'm also looking at relocating the 35.5lb. battery from under one of the rear transom seats to under the passenger console for better weight distribution. If I can fit the fueltank back there properly, I'll definately move the battery up under the passenger compartment. I know I give up a couple pounds to heavier cables on that long of a run but I'm being weight conscious everywhere else. I come from an aircraft background so I am always considering weight and am careful not to just pile stuff on.
 

Mark42

Fleet Admiral
Joined
Oct 8, 2003
Messages
9,334
Re: 1983 Bayliner Capri project

I like the idea of having open space, especially in smaller boats. Sounds like a good design, and with the bow seating, you won't be caught short.

Regarding weight, the spec for the bow rider is 1090lbs, w/outboard. About 790lbs just for the boat. That's a fairly light weight boat to start with. By removing the seat boxes, and the lounge seats, that should give a nice weight savings. Especially if you use plastic framed seat and aluminum posts.

But remember how much weight will go back with the better quality stringers and glass work. A gallon of resin is about 9 lbs (just checked the can). But that is weight well worth having, right? :D

The idea to put a wedge reinforcement to level the floor for the seats is a good one. I think you should do it, and make it as large an area as the bottom of the seat. Pedestal seats really put a lot of strain on the floor.

Keep posting photos!

Mark.
 

capri1600

Petty Officer 2nd Class
Joined
Apr 20, 2009
Messages
150
Re: 1983 Bayliner Capri project

Totally agree about the strain of a pedestal seat on the deck. I'm thinking of a shallow seatbox that will be tied into the hull side and glassed to the deck. The seatbox top will be a high quality 3/4" ply and I might convince myself to back that with a 1/4" aluminum plate on the underside of the 3/4" ply to help spread the load. If I am making sense, there will be no breach through the decking to mount the seats. The pedestal will be bolted from inside the seat box.
By removing the lounge seats and the large seat boxes I do save weight so giving a little back to move the battery forward seems reasonable and I think I need to get some weight forward anyhow. I'm about 185 pounds and my girlfriend weighs about 50 pounds less than me so placing the battery under the passenger side console can only help weight distribution both laterally and fore/aft whether she is onboard or not.
I think the hull side storage which was hanging down as part of the side upholstry will instead be fabb'ed from 1/4" ply and glassed to the side of the hull and the floor instead if I replace it at all.
 

capri1600

Petty Officer 2nd Class
Joined
Apr 20, 2009
Messages
150
Re: 1983 Bayliner Capri project

I couldnt stand it any longer. That Force 85 laying on the floor idle was driving me nuts so we ran up to NY state and drug home a 1972 Galstron Gt150 to run it on. Long story short the engine turned out to be a sweetheart. It started right up from the very first try and required no cleaning of carbs, no synching, nothing. It idles perfectly and forever. I ddi change the water pump just because it's been laying dry for more than the 4 years I have owned it. Anyway, given what I went through to make that motor fit the Glastron, it's not coming back off. So.....I just bought a 1986 Force 125 for the Bayliner project. It's coming home attached to an old Glaspar with a weak transom and soft floor. When will it end?! :eek:;)
 

ezmobee

Supreme Mariner
Joined
Mar 26, 2007
Messages
23,767
Re: 1983 Bayliner Capri project

Wow, you've got multiple boat syndrome bad :) I think that old Forces (still Chrysler) were actually pretty decent motors. The later ones were pretty **** poor.
 

jkust

Rear Admiral
Joined
Aug 2, 2008
Messages
4,942
Re: 1983 Bayliner Capri project

In the first pics it looks like the hull has been repainted before. To my recollection, those are not the 1983 colors. We have the same boat but an 84 purchased new and I think it is funny that even back then they advertised/promoted their hull design with a catchy name like sequential lift with a sticker right on it denoting that. I never quite understood what sequential lift is but those old BL's really get up quickly.
 

capri1600

Petty Officer 2nd Class
Joined
Apr 20, 2009
Messages
150
Re: 1983 Bayliner Capri project

Wow, you've got multiple boat syndrome bad :) I think that old Forces (still Chrysler) were actually pretty decent motors. The later ones were pretty **** poor.

Yes, I had a 1989 Bayliner with a Force 125 (the black version) and it sucked. It ran ok but it was hard started, coughed and shook and no one could make it idle properly. Three different dealers and even a change of carbs never fixed it. The older white Force motors like my 85 have been praised by a number of people on here and at least from physical appearances, the design seems very simple and soild. The Force 125 I just bought looks just like my 85 with an additional cylinder added.
 

capri1600

Petty Officer 2nd Class
Joined
Apr 20, 2009
Messages
150
Re: 1983 Bayliner Capri project

In the first pics it looks like the hull has been repainted before. To my recollection, those are not the 1983 colors. We have the same boat but an 84 purchased new and I think it is funny that even back then they advertised/promoted their hull design with a catchy name like sequential lift with a sticker right on it denoting that. I never quite understood what sequential lift is but those old BL's really get up quickly.

I dont think it's been previously painted. Even under the interior pieces it is all the same color and appears to be gelcoat. Grinding has never revealed another color either.
My boat has the little sticker on it too advertising the sequential lift hull and the hull shape is the reason I'm saving it from it's previous owner. It is quite unique if you really stop and look down it's lines from the bow.

A 1983 Force 85 weighs 262 pounds and the Force 125 I'm going to hang on it weighs 300 pounds. I worried a little about the additional 38 pounds until I read the weights of some of the current 90hp engines! The hull is rated for 90hp but the transom will be beefed up AND the engine will be left loafing mostly. I'm not ham handed with the power so I'm sure she'll be fine.
 

Osage76

Seaman Apprentice
Joined
May 21, 2010
Messages
42
Re: 1983 Bayliner Capri project

Same issue on my 83 capri bow rider. traded the Chrysler 85 for a us marine 90.
I replaced the deck and carpet some years ago with 3/4 inch marine grade and coated it with spray on bed liner then re carpeted. I of course had to sand and grind out the seat stands that were molded in to the glass.

I dint remember what the strings looked like and now the little section of decking in the bow has rotted thru ( i didn't replace that section) but also the bow seat stands are starting to rot and the bow eye is pulling loose. So I am trying to decide if I want to rip it all up and to the strings ( i shudder to think about the transom) or do I do a patch job on the bow deck and bow eye ( any suggestions on the eye?) Or do I simply put down some new decking and cushions on top of the bow seats and prolong the inevitable??? suggestions?

I have never worked with fiberglass or gel coat. I have no idea how to replace the transom but I have been reading about how you have to remove the cap. Never done that before either... I am very much a do it yourself but I also know how impatient I can be... Also did anyone use nails or screws on the bow and stern seats or did the glass just glue everything in??? I can do it but I need more details about the grunt work.
 

dorelse

Chief Petty Officer
Joined
Feb 24, 2003
Messages
624
Re: 1983 Bayliner Capri project

Well, I always like seeing another Capri 1600!

I also skipped pedestals and built my own bases, but I also didn't have to pull the floor. I then put in a rear bench. I miss that boat.

P7090191.JPG


P6150101.JPG


P6130102.JPG
 
Top