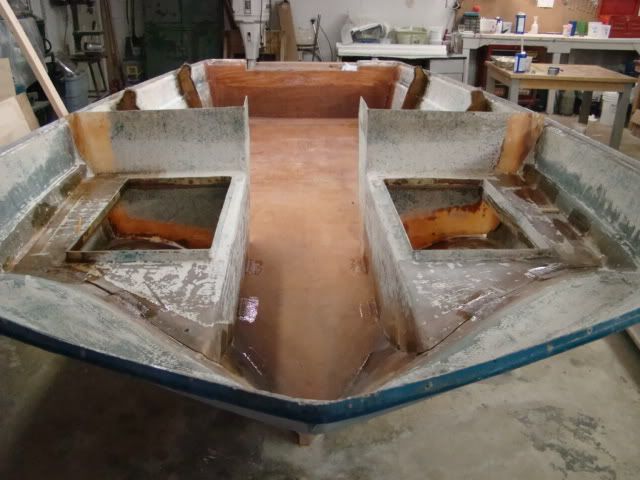
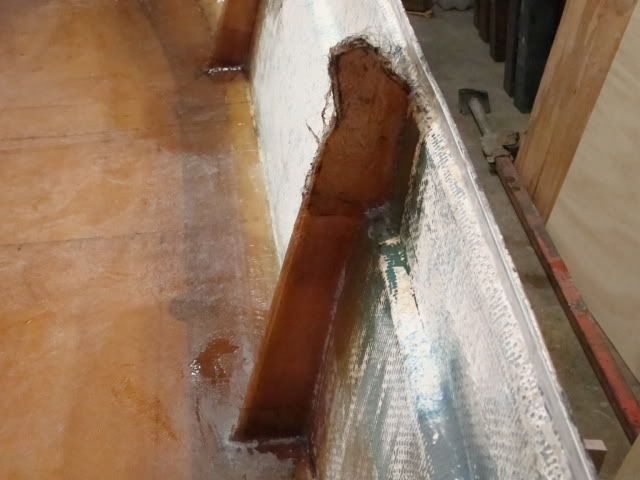
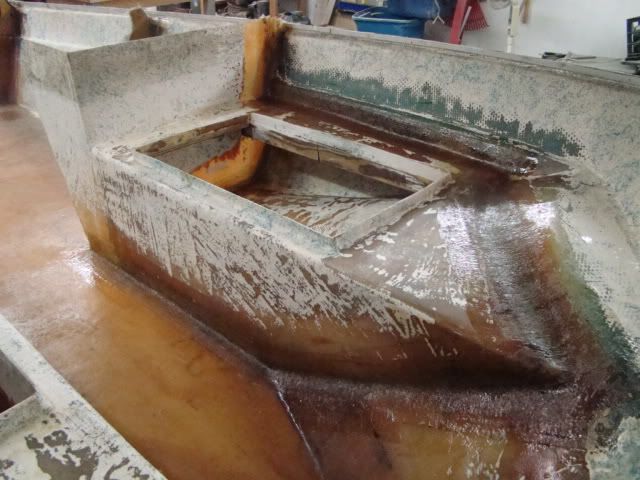
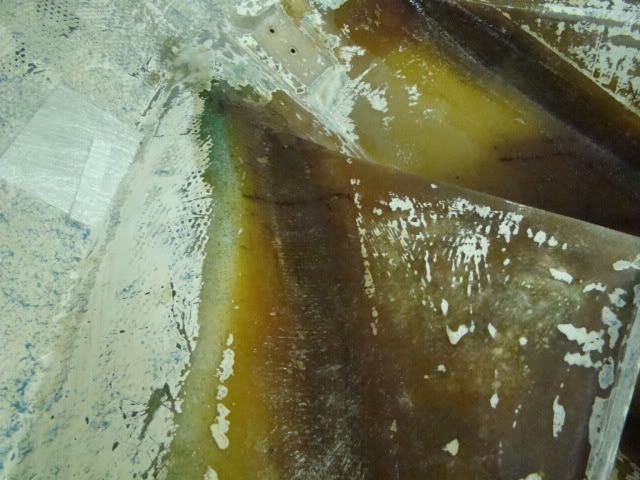
My tri-hull transom replacement w/ pics

Status
Not open for further replies.

drewpster

Commander
Joined
Oct 17, 2006
Messages
2,059
Re: My tri-hull transom replacement w/ pics

Thanks ezmobee.
I found another trick I want to share. It may help someone out. I mentioned in earlier posts that I made templates out of tempered hardboard (pegboard without holes) to shape the plywood for the deck. If you do the same, keep the templates! They came in very handy when I did the layout for cutting all those big pieces of CSM and roving for the deck. Seems obvious I know, but I alomost cut mine. Glad I kept it.:rolleyes:
 

chrishayes

Senior Chief Petty Officer
Joined
Apr 9, 2009
Messages
691
Re: My tri-hull transom replacement w/ pics

Nice work man! Looks extremly solid and NICE! Pro work so far. Cant wait to see where she goes from here with interior work!
 

thrillhouse700

Senior Chief Petty Officer
Joined
Aug 5, 2009
Messages
778
Re: My tri-hull transom replacement w/ pics

Drewp that deck looks top notch! I cant wait to see the bow tabbed in.
 

redfury

Commander
Joined
Jul 16, 2006
Messages
2,655
Re: My tri-hull transom replacement w/ pics

didn't think about saving the templates for the fiberglass....seems like common sense, but it's only common if you know about it!
 

showcase

Cadet
Joined
Jul 26, 2009
Messages
6
Re: My tri-hull transom replacement w/ pics

Drew great job on the deck. If not too much trouble could you please post some pics of your bilge area? Im a little at a loss on how to lay mine back in when I get to that point. thanks. your work is what keeps me going. I am at that wonderful point of grinding:( grinding is just wrong.....wrong

Keep up the great work.
 

drewpster

Commander
Joined
Oct 17, 2006
Messages
2,059
Re: My tri-hull transom replacement w/ pics

Drew great job on the deck. If not too much trouble could you please post some pics of your bilge area? Im a little at a loss on how to lay mine back in when I get to that point. thanks. your work is what keeps me going. I am at that wonderful point of grinding:( grinding is just wrong.....wrong

Keep up the great work.

Never too much trouble.
Aint' that dust a blast! :mad:
What part are you having trouble with? Do you have a link to your project? If you have a thread started, it may easier to screw you up....I mean help you.... there.
drewp
 

drewpster

Commander
Joined
Oct 17, 2006
Messages
2,059
Re: My tri-hull transom replacement w/ pics

Well time allowed for some grinding this weekend. I got the seat boxes ground down at the edges to prep them for install. I also did some grinding where the deck meets the hull in prep to tie them together. Man the shop is a total mess again! I really hate grinding yanno!:mad: It is amazing to me how the dust gets blown around.
My wife's minivan was parked in front of the shop doors. It is painted
dark blue. Now it has a distinct white glaze over it.:eek: Guess who's going be pissed.:D
 

drewpster

Commander
Joined
Oct 17, 2006
Messages
2,059
Re: My tri-hull transom replacement w/ pics

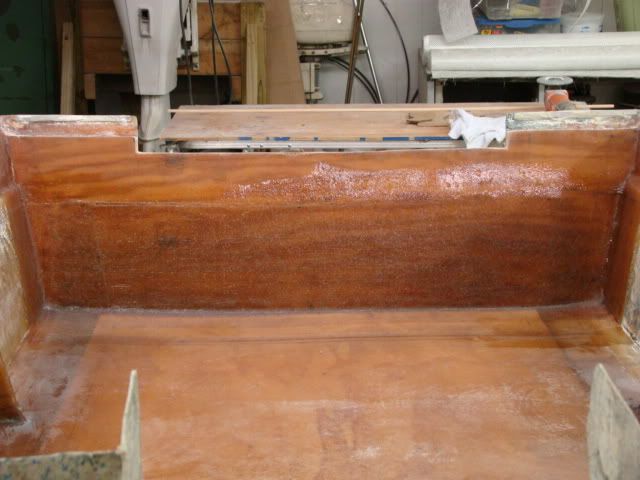
I finally finished tying the deck to the transom. I used two layers of CSM and a layer of roving to tie the lower corner of the deck under the splashwell to the transom. I also added another layer of tabbing in the transom corners using CSM. As far as I am concerned the deck fiberglass is done! Whoopie!!

You can just make out where the glass fills the lower corner.
DSC05106.jpg


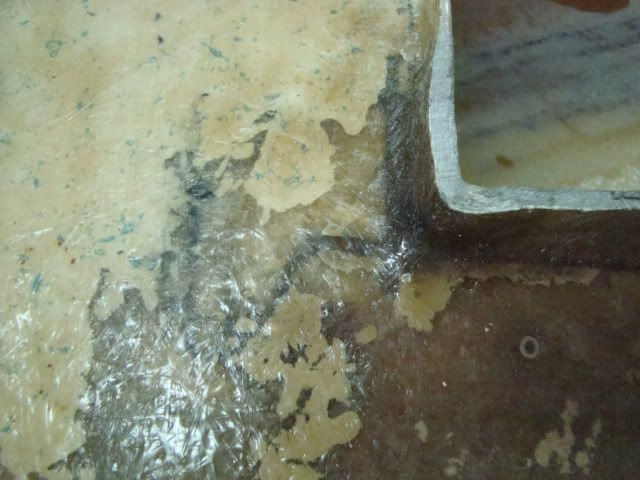
Here you can see a final layer of tabbing at the transom sides.
DSC05117.jpg


I found while grinding the seat boxes that they needed some repairs. I found some cracks at the corners of the openings the needed to be reinforced. I glassed some 3/8 ply strips under the openings on the inside of each box to firm them up. (no pics here wifey hogging cam)

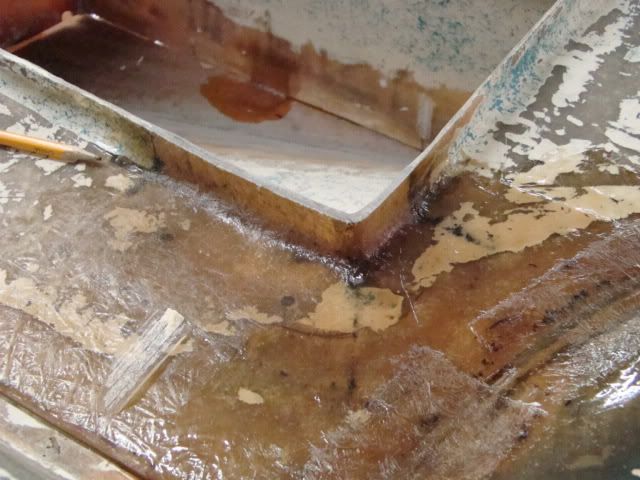
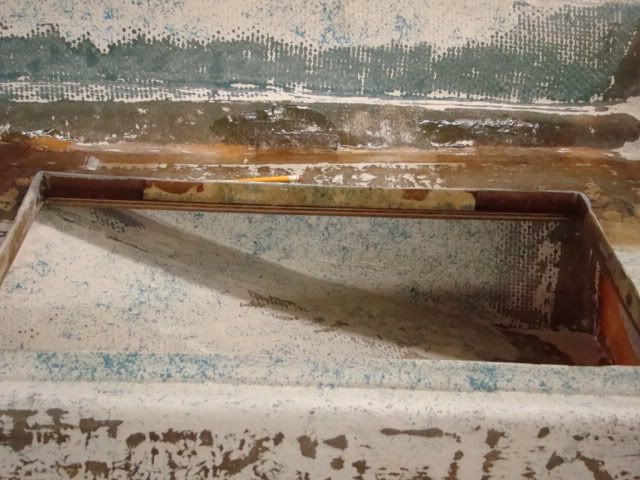
I also reglassed a couple of places where the factory had cut out the ridge around the top. They had made cut outs so that some cheesey aluminum hinges could be flush mounted for the original seat cushions. (no pics here sorry) I used some pieces of ply to make forms to glass in the cut out part of the openings. In the pic below at the end of the pencil you can see where the new corner was built back up. If you look close you can make out the two holes they had drilled to screw the hinges to the box.

After these get ground to shape and painted you wont be able to tell this area was once missing. I love fiberglass.
DSC05119.jpg


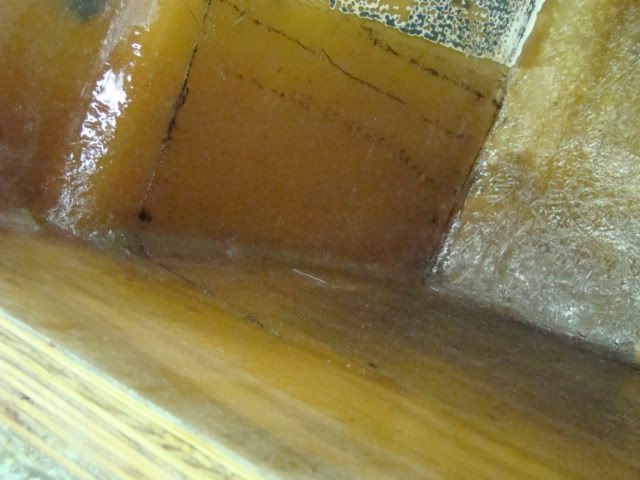
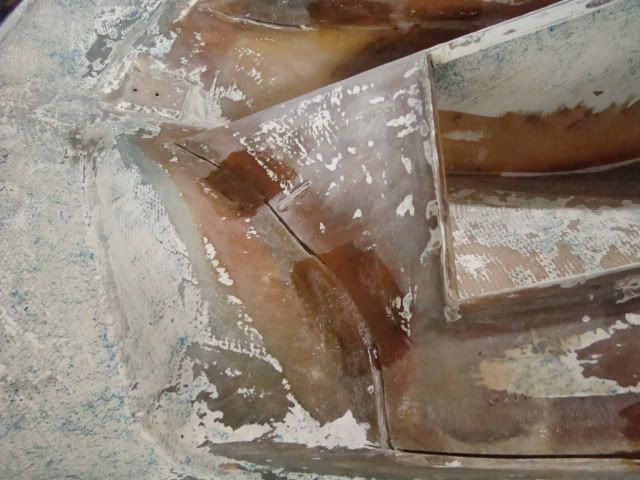
At the other end of the box you can see the rather large crack formed by an endless array of heavy hind ends crashing down on it in rough seas. The whole perimeter of the opening is backed with ply and glassed from underneath.

I bet even my mother-in-law wont crack it now. (Shhh, remember the code)
DSC05110.jpg


Once this area is all prepped and painted the repairs will be a memory.
DSC05112.jpg
 

drewpster

Commander
Joined
Oct 17, 2006
Messages
2,059
Re: My tri-hull transom replacement w/ pics

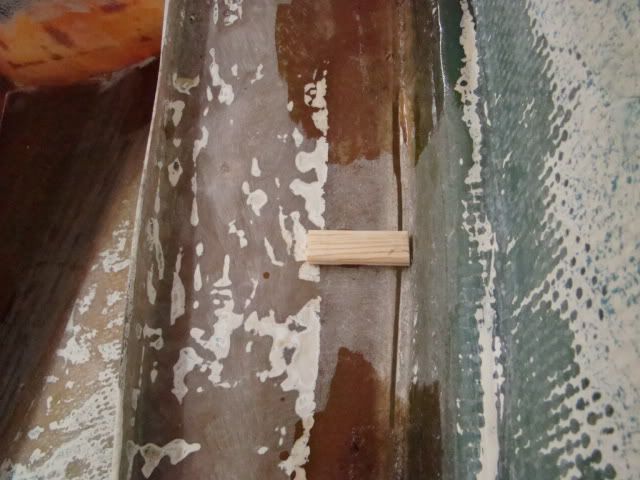
To hold the seat boxes in place for tabbing I cut some small pins out of some trim molding I had laying around. I used duct tape to hold them in position while the pins held the proper gap around the perimeter of the seat boxes.
I used some dabs of cheap 5 minute epoxy to hold the pins in place while I positioned and double checked my measurements.

There were several of these pins temporarily glued around the inside and outside of the seat boxes. It took several attempts to get everything where I wanted and taped in place. After the fiberglass tabs around the boxes cured I popped the pins off with a screw driver. The epoxy that held the pins in place will get ground off during the prep process.

DSC05113.jpg


I used a long piece of duct tape to hold the sides of the hull in slightly while the box tabbing cured. It popped out a little when the boxes were cut away during tear down. I used several fiberglass tabs to make sure the boxes are firmly in place.

DSC05114.jpg


You can tell by the number of tabs that I really don?t want these to move. I will finish this install by glassing all the perimeters inside and out.

DSC05118.jpg


I am happy about how these went in. They are actually straighter and more level than the factory installed them.

DSC05111.jpg


While the cap is out of the way (again) I finished glassing he tops of the side supports in the hull. They still need to be ground down. (more stinking dust) That why they look a little hairy.

DSC05116.jpg


I am still hammering away and motivated. My wife is closing the paperwork on a new car tomorrow. That means dadddyo gets to go engine shopping. Im seeing a 90horse E-Tec in my future. hmmm maybe......?
 

redfury

Commander
Joined
Jul 16, 2006
Messages
2,655
Re: My tri-hull transom replacement w/ pics

Drewp, that glass work is just top notch looking. It makes me feel like I'm doing something horribly, horribly wrong!:D I'm going to be going gangbusters on glasswork once I get this grinding thing done proper this time...:rolleyes: I doubt I'm going to get that last stringer in before it gets too nasty outside to get anything accomplished, but I'm going to get out there and get that hull ground down fully so that when the time comes, I can glass to my hearts content! I hope my deck turns out as nice as your does...that thing looks like it could take a direct harpoon hit!
 

drewpster

Commander
Joined
Oct 17, 2006
Messages
2,059
Re: My tri-hull transom replacement w/ pics

Thanks Redfury
I have found through all of this that doing glass work is allot like doing paint work. It is all in the prep. Unfortunately that means spending the majority of the time doing the part of the job that is the least fun to do. I really hate sanding and grinding. It is my least favorite task. But the fact is, grinding and sanding is the biggest part of the job.
 

drewpster

Commander
Joined
Oct 17, 2006
Messages
2,059
Re: My tri-hull transom replacement w/ pics

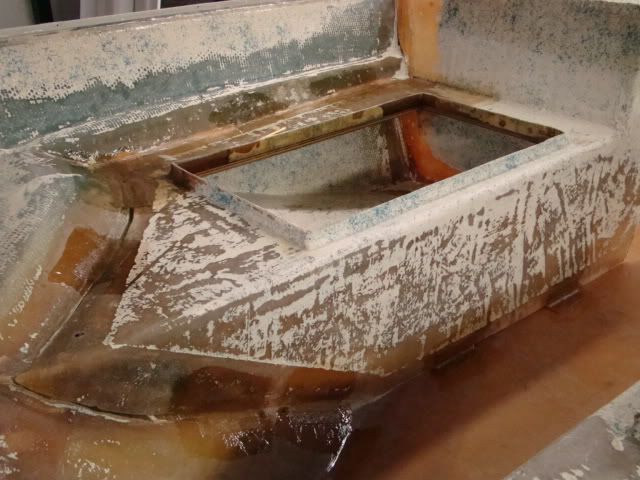
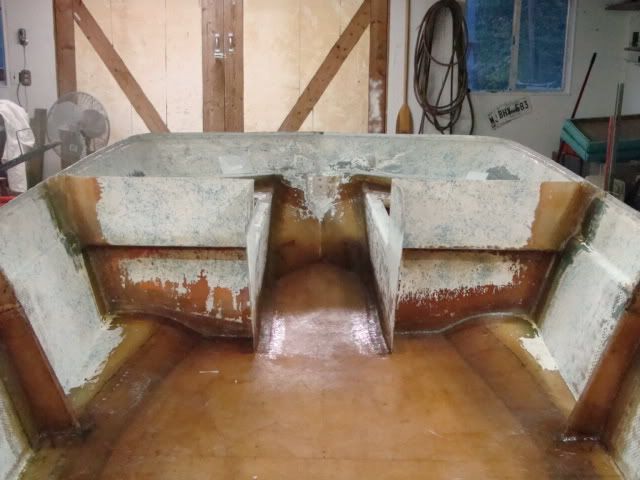
The seat boxes are all glassed in!

DSC05141.jpg


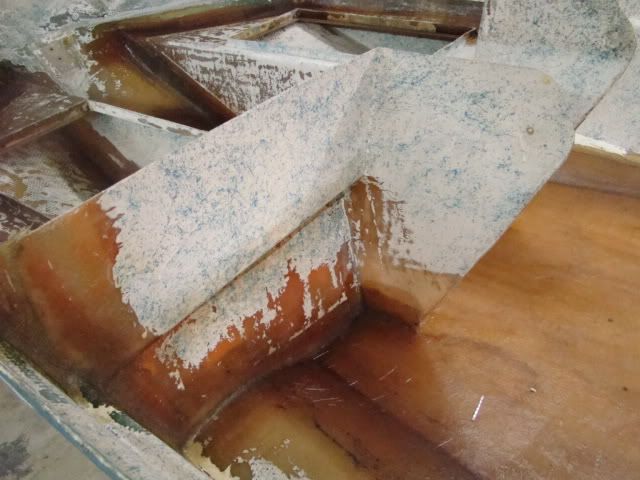
I used strips of Woven roving sandwiched between two layers of CSM to tie the boxes to the hull. This time I did it a little differently. In the other installations I started with a narrow strip and built up the layup using progressively wider strips to promote adhesion. That works best for structural pieces in my opinion. Given that these boxes have to be finished smooth I started with wide pieces and built up the seam using narrower strips.

DSC05142.jpg


These seams have to be sanded to an almost smooth condition then faired and painted. If you start with a narrow strip the final layup will be built up in the center. If you start with a wide strip then only the edges of each exposed layer need be sanded off to make the area smooth. It is much easier, and leaves a stronger joint, if only the edges are sanded away. The structural pieces were only sanded for adhesion purposes. They do not need to be smooth enough for paint. So the humps do not matter. On structural layups use narrow strips and work each layer wider. On pieces getting finished paint, start wide and work to narrow layers. The kind of joint you want to make will dictate which technique you use.

These corners will finish off smooth and be ready for fairing. Again I used a wide strip to bond the piece, then used narrow strips on the next layers to build up the joint. The boxes a very solid and wont go anywhere.

DSC05143.jpg


I sealed the inside of the boxes to the deck first by filleting the corners using thickened resin. I then used strips of CSM to cover the fillets.
I am happy about the way the boxes turned out. They look good so far and are solid.

DSC05145.jpg
 

drewpster

Commander
Joined
Oct 17, 2006
Messages
2,059
Re: My tri-hull transom replacement w/ pics

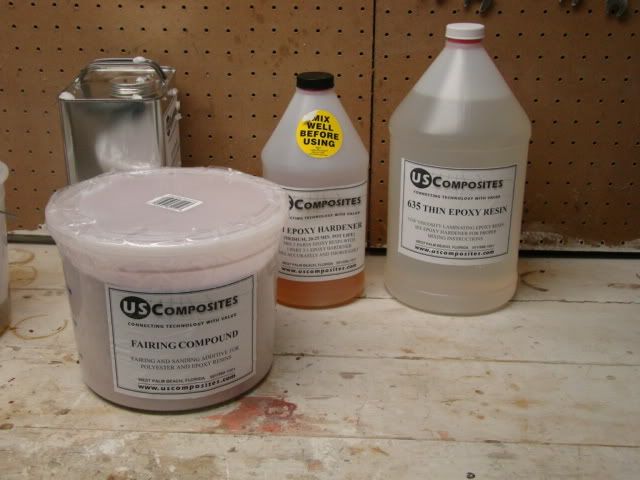
Next I will re-install the cap permanently and start fairing for paint. To do the fairing I am going to use epoxy. I feel epoxy will work best to build up a smooth surface for paint. I plan to get all the surfaces to an almost smooth condition. After skim coating with the epoxy fairing mixture I will need to sand it all smooth for paint. Most of the inside of the hull will be painted. I will use the gelcoat to cover the inside of the boxes or to fill areas prior to fairing.
I am going to start with a single gallon. If all goes right (sure!, right!) a gallon is all I will need.

US Composites 635 epoxy and their fairing compound powder.

DSC05144.jpg
 

BobsGlasstream

Commander
Joined
Sep 11, 2009
Messages
2,128
Re: My tri-hull transom replacement w/ pics

Hey Drewpster,
Great looking boat, and as Redfury said that is a great looking glass job. I hope mine turns out that good.
I do have one question for you. I was reading an article the other night from a link on another thread and it said to use gel coat over epoxy you have to use another material on the epoxy first to get the gelcoat to bond?
I'm not an expert, that's why it's a question and not a statement. Or did I miss something?
Very nice work.
 

jcsercsa

Captain
Joined
May 21, 2007
Messages
3,401
Re: My tri-hull transom replacement w/ pics

yep nice job there drewpster !!!!! she is getting there !! keep it up John
 

drewpster

Commander
Joined
Oct 17, 2006
Messages
2,059
Re: My tri-hull transom replacement w/ pics

I do have one question for you. I was reading an article the other night from a link on another thread and it said to use gel coat over epoxy you have to use another material on the epoxy first to get the gelcoat to bond?

My project boats are (or going to be) painted. I have never looked in to using polyester gelcoat over epoxy because I plan to paint. I have read that there are products that will help polyester gelcoat bond to epoxy. (BPO-cured fairing compounds being one)
 

drewpster

Commander
Joined
Oct 17, 2006
Messages
2,059
Re: My tri-hull transom replacement w/ pics

yep nice job there drewpster !!!!! she is getting there !! keep it up John

thanks John
Slowly but surely it will be done. I have been shopping engines this week as well. My wife bought a new car so Daddy got the green light! :D
 

thrillhouse700

Senior Chief Petty Officer
Joined
Aug 5, 2009
Messages
778
Re: My tri-hull transom replacement w/ pics

Dang drewp! looking good. Can't wait for you to paint yours hahaha. If u need help wet sanding Im basically a pro now.
 

drewpster

Commander
Joined
Oct 17, 2006
Messages
2,059
Re: My tri-hull transom replacement w/ pics

Thats ok thriller. I made my bones on the big boat. Wet sanding is second nature. The trick is going to be the dark blue I will be using on the little boat. We'll see.
 

bigredinohio

Chief Petty Officer
Joined
Jun 18, 2009
Messages
604
Re: My tri-hull transom replacement w/ pics

I can't wait to see how it turn out. All your work has been top notch!
 
Status
Not open for further replies.
Top