My tri-hull transom replacement w/ pics

Status
Not open for further replies.

allpoints360

Petty Officer 1st Class
Joined
Jul 23, 2009
Messages
342
Re: My tri-hull transom replacement w/ pics

Many thanks Drewpster, for your reply! You're an asset to this site!

I can't help but think how much time and material would be saved if the resin were sprayed? Or am I wrong here? (And I certainly don't mind being wrong... happens all the time. Ask my wife.)

I used more than half a quart of resin for a 2x2 foot square of 24 oz roving between two 1.5 oz mat. It seemed like a lot to me, but I don't have a frame of reference, really.

Thanks again for your counsel. It is much appreciated.
 

tlovelandka

Petty Officer 3rd Class
Joined
Jul 5, 2009
Messages
82
Re: My tri-hull transom replacement w/ pics

Hey Drewp,

Got a question that I think you've already answered, but I can't find it so I'll ask anyway.

How much of each kind of glass (tape, csm, woven, etc.) did you order? Or should I say, How much glass will you end up needing by the time it's all said and done.

The reason I ask is cause I'm trying to budget for how much I'll need, and since we have similar boats I'll use your counts to guestimate how much I'll need.

-TLove
 

drewpster

Commander
Joined
Oct 17, 2006
Messages
2,059
Re: My tri-hull transom replacement w/ pics

Chopped strand mat uses a ton of resin. The amount of resin you described sounds about right for the layers you were working with. I have found that you never have enough resin, so buy more than you think you need.
Spraying is a great way of applying the resin. Most commercial shops do it that way for a reason. I think the amount of resin actually used, spraying versus rolling, is about the same. But spraying is far more time effective. Most shade tree boat restorers (including me) do not have the expensive spray equipment that is needed to spray resin so the roller is the next best option. Truth is, if I owned a good commercial airless spray system I would spray the resin. But I bet the cost of acetone for clean up would go through the roof!
 

drewpster

Commander
Joined
Oct 17, 2006
Messages
2,059
Re: My tri-hull transom replacement w/ pics

Hey Drewp,

Got a question that I think you've already answered, but I can't find it so I'll ask anyway.

How much of each kind of glass (tape, csm, woven, etc.) did you order? Or should I say, How much glass will you end up needing by the time it's all said and done.

The reason I ask is cause I'm trying to budget for how much I'll need, and since we have similar boats I'll use your counts to guesstimate how much I'll need.

-TLove

Lemmi see- I started with 10 yards 38" 1.5oz. CSM and 10 yards of 38" 18 oz woven roving. I also bought 5 gallons of laminating resin. I have since bought 10 more gallons of resin, 20 yards of 1.5oz. CSM and 20 yards of 16oz. Woven Roving in 50" width. I also bought a roll of 12" 1.5 oz CSM tape. My guess at this point is that I have plenty of fiberglass. I may run a little short of resin. (maybe 2 additional gallons to finish)

I bought the fiberglass anticipating that I would have some left over for another project. The amounts I bought were based on the cost effectiveness of buying quantity over specific cuts of running length.
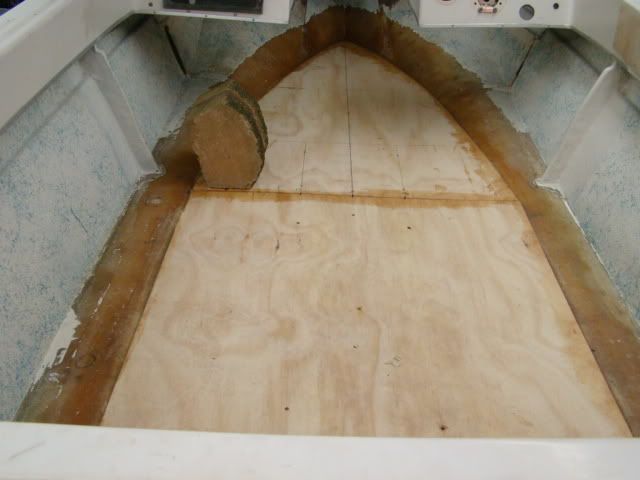
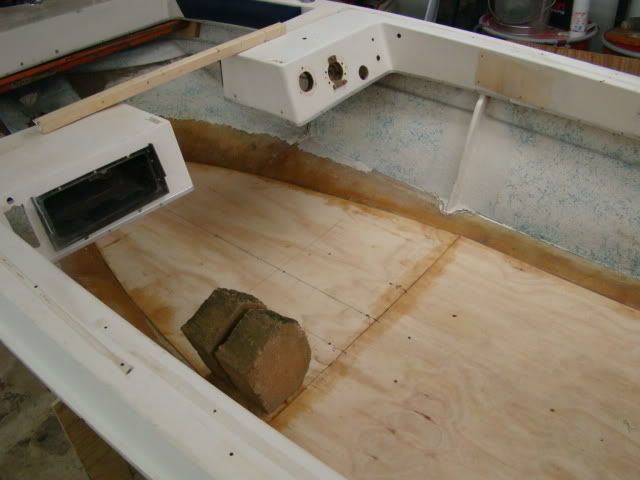
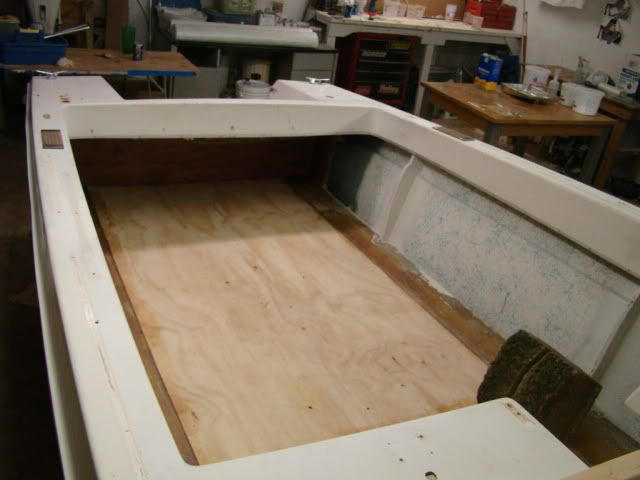
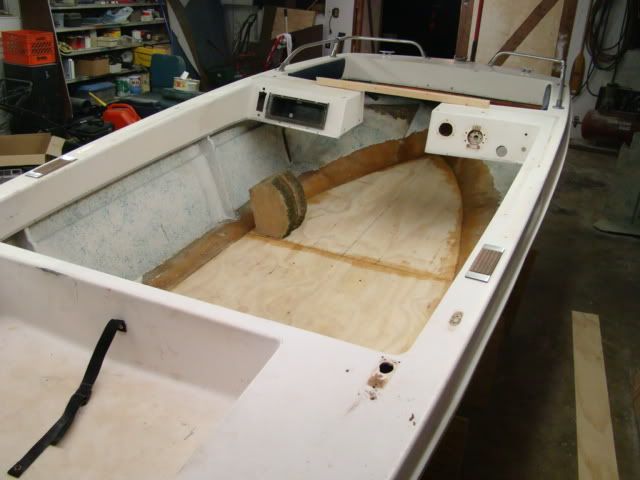
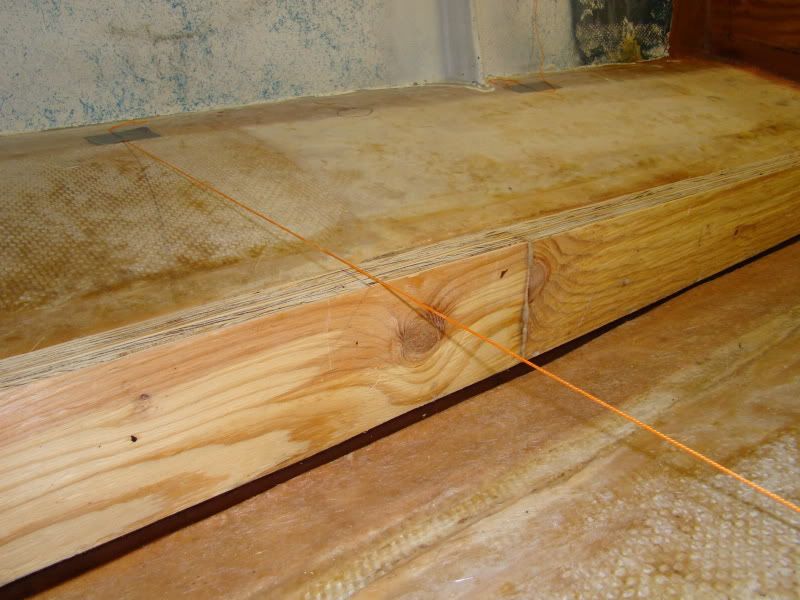
The best advice I can offer is this- If you are doing transom, stringers and deck start by buying 20 yards of 1.5 CSM and 10 yards of 16 oz. Woven Roving. Buy 10 gallons of laminating resin without wax. That should be a good start. You will likely need more resin down the road. Also get 1/4" chopped fibers, Cabosil and a pint of finishing wax. You will need the fillers for fillets in tight corners. A roll of CSM tape (12") is great to have for stringers and for edges of decks as well as tabbing stringers and around the transom. It saves a ton of time not having to cut all those narrow lengths. BTW- I started with 18 oz Woven Roving, the 16 oz. works much better in tight turns layed over wet CSM.
I wish I could be more specific but here is a synopsis,

15 gallons laminating resin (polyester)
20-30 yards 1.5 CSM (38" and 50" widths)
10- 15 Yards 16 oz. Woven Roving (38" and 50" widths) forget 18 oz
1/2 gallon container of Cabosil (aerosil, fumed silica its all the same)
1/2 gallon container of talc powder (saves on cabosil for thickening and its cheaper)
2-3 qt container of 1/4" chopped fibers (for strengthening fillets)
 

tlovelandka

Petty Officer 3rd Class
Joined
Jul 5, 2009
Messages
82
Re: My tri-hull transom replacement w/ pics

Brilliant...! That's exactly what I was looking for.

Thanks Buddy,

-TLove
 

tlovelandka

Petty Officer 3rd Class
Joined
Jul 5, 2009
Messages
82
Re: My tri-hull transom replacement w/ pics

Where did you get the 16 oz Roving from? I don't see it on US Composites...
 

brospano177

Cadet
Joined
Aug 10, 2009
Messages
6
Re: My tri-hull transom replacement w/ pics

Man you have done an amazing job!!! I have a 17 ft Cobia Monte Carlo that I'm working on and posting in Iboats.You have answered a lot of questions for me.
 

drewpster

Commander
Joined
Oct 17, 2006
Messages
2,059
Re: My tri-hull transom replacement w/ pics

Where did you get the 16 oz Roving from? I don't see it on US Composites...

I may have been mistaken about my roving weight. I went back and looked at all the websites I had saved and could not find one that carries 16 oz. I know I was looking at a lighter weight roving to try on these stringers. I also know the roving I have been using is not as heavy as the woven roving I bought initially. The two websites I have ordered fiberglass from are;

US composites
http://www.uscomposites.com/

And

Fiberglass Supply
http://www.fiberglasssupply.com/

The second batch of roving I bought was from Fiberglass Supply. It is much easier to work with than the roving from US Composites. I recommend using roving from Fiberglass Supply. The packaging is gone so I am not certain but, it must be 18 oz. It seems lighter and is easier to bend around those tight corners. I also highly recommend you lay down wet CSM immediately followed by the roving. It makes a huge difference in the way it lays down. The quality of each batch of roving is equal in my opinion. Its just that the Fiberglass Supply stuff is easier to work with.
 

drewpster

Commander
Joined
Oct 17, 2006
Messages
2,059
Re: My tri-hull transom replacement w/ pics

Man you have done an amazing job!!! I have a 17 ft Cobia Monte Carlo that I'm working on and posting in Iboats.You have answered a lot of questions for me.

Thanks for the kind words. I am certainly proud of it so far. The work may be huge overkill but I wanted to learn how to use the materials in prep for the structural work in my other project. I am glad to be of help, I have recieved allot of help myself from folks on here.

The next challenge
perfect1.jpg


"Nostalgic" Our little cruiser.
 

redfury

Commander
Joined
Jul 16, 2006
Messages
2,655
Re: My tri-hull transom replacement w/ pics

:eek: I almost forgot that you were doing the little boat in prep for this one :eek:
 

joeseif

Seaman Apprentice
Joined
Aug 14, 2009
Messages
33
Re: My tri-hull transom replacement w/ pics

how many hours do you have into the project so far?
 

drewpster

Commander
Joined
Oct 17, 2006
Messages
2,059
Re: My tri-hull transom replacement w/ pics

I do not want to turn anybody off from doing there own project. Keep in mind that I have spent allot of time working on every little nit-picking detail of this in order to learn as much as I can about working with fiberglass. I left no stone un-turned. I would guess may 180-200 hrs working in my spare time. That's probably terrible but also keep in mind I have a 3 yr old and an 18 yr old I am keeping up with. I also have a job that takes way more time than I want it to. And a wife that insists I participate in the family.:rolleyes: If I could just get her to do everything, I would work on the boat all the time. :D
 

scrawnyronny

Seaman Apprentice
Joined
Jul 19, 2009
Messages
47
Re: My tri-hull transom replacement w/ pics

And a wife that insists I participate in the family.:rolleyes: If I could just get her to do everything, I would work on the boat all the time. :D

Might have the ol' lady read this just so she can see that i'm not the only "horrible" man who thinks that way.:rolleyes: But, ... i won't break the code.:D
 

drewpster

Commander
Joined
Oct 17, 2006
Messages
2,059
Re: My tri-hull transom replacement w/ pics

Well kids the deck is in! Man another milestone passes. Just another bit of the puzzle gets done. I'm tired, but now I am really getting excited!

DSC04876.jpg


My next move will be to glass it in. The bricks in the picture are there to hold down a slightly warped corner.

DSC04874.jpg


I started by fitting the aft section of deck. This was pretty easy considering it was a simple square. The only complication to it was the part you cannot see. At the edges of the deck board the deadrise, (taper), is very shallow. That is to say the angle where the board lays on the hull is very sharp and shallow. In order to fit the deck properly I had to use a grinder and taper the edges of the board. This took some time fitting after the basic shape was cut out.

DSC04877.jpg


The forward section was a whole other matter. It was a little more complex to fit in to shape. Instead of fitting the deck board itself I made a template. I went to the home center and bought a 4x8 sheet of tempered hardboard for about $6. It is a thin hard sheet, just like pegboard without the holes. I used it to pre-shape the piece before cutting the deck out of the plywood. This turned out to be a real time saver considering how many times I had to fit and cut, fit and cut, fit and cut....... After grinding the edges in the same way I did the aft section I mixed up some PB and screwed it down. (of course I used stainless screws and epoxy to seal them)

DSC04878.jpg


I made a grid in ten inch sections up the middle of the template. I then measured the distance from center to the outside edge along ten inch sections up the middle of the center stringer in the boat. I transferred the measurements to the template and got a general shape of the hull. When making large templates like this the measurements are meant as a general reference, not and accurate shape. Draw the general shape outside your initial marks and work in to the final shape. That way you can avoid over cutting and ruining your template. (Although at $6 it would not hurt to buy a backup sheet of template board just in case you get over ambitious in your cutting.) After finally getting the template fitted I used it to cut out the final deck shape. After that it was just a matter of grinding the tapers at the board's edges. (fit grind, fit grind, fit grind :rolleyes:)
 

chrishayes

Senior Chief Petty Officer
Joined
Apr 9, 2009
Messages
691
Re: My tri-hull transom replacement w/ pics

nice work, been following along since day one with you. Just want to make sure you know that the work you are putting in is being noticed! Way to go. Hope mine turns out as nice as that! You seem to be ready to take that next step to your larger boat! I have confidence in ya. And congrats on the promo! Not a bad time to move up;)
 

allpoints360

Petty Officer 1st Class
Joined
Jul 23, 2009
Messages
342
Re: My tri-hull transom replacement w/ pics

How do you make sure the deck is level, or did you put in a grade?
 

drewpster

Commander
Joined
Oct 17, 2006
Messages
2,059
Re: My tri-hull transom replacement w/ pics

How do you make sure the deck is level, or did you put in a grade?

I put the deck back in the same place, and grade as the factory built it. In relation to the keel the deck actually runs uphill from stern to bow. The stringers get wider as the span from transom to bow making the deck run uphill. The reason for this is so that the deck will rest level as the boat floats in the water.

I measured the stringers using the line that was left inside the hull when the old deck was removed. I was careful not to grind out the line so I could use it as reference later.

In the picture below you can see the process I used. Can you see the line where the original deck met the sides of the hull?

DSC01810.jpg


I used tape to hold string lines in place to represent the finish elevation of the deck inside the hull. The string is the finished deck height. I then measured the distance from the string down to the keel where the stringer rests in the bottom of the hull. I subtracted 1 inch from that measurement giving me the width of the stringer. (1/4" stringer bedding, 1/4" glass covering stringer, 1/2" for deck and glass covering deck= 1")
I did these measurements all along the length of the stringers. That gave me the proper taper for the stringers which gave me the proper grade of the finished deck.
I did these measurements after making sure that the hull was level and the keel was as flat as I could get it.
 

drewpster

Commander
Joined
Oct 17, 2006
Messages
2,059
Re: My tri-hull transom replacement w/ pics

nice work, been following along since day one with you. Just want to make sure you know that the work you are putting in is being noticed! Way to go. Hope mine turns out as nice as that! You seem to be ready to take that next step to your larger boat! I have confidence in ya. And congrats on the promo! Not a bad time to move up;)

That is a huge compliment chris and I appreciate it very much. I am always willing to share what I have learned, just like others have along the way. Thats what this forum is all about.
 

allpoints360

Petty Officer 1st Class
Joined
Jul 23, 2009
Messages
342
Re: My tri-hull transom replacement w/ pics

The stringers get wider as the span from transom to bow making the deck run uphill.

Right! (It really is a bit of rocket science...)
 

showcase

Cadet
Joined
Jul 26, 2009
Messages
6
Re: My tri-hull transom replacement w/ pics

Great Job Drewster. Got my 79' tri-hull finally and with your motivation tore into it right away. Got the deck torn out. Stringers still look good... debating if I should repace them or not. Transom definately will have to be replaced. I just have one question that seems to go back and forth in the forums...and that is "foam or no foam" under the deck. My tri-hull had no foam in it and to me is a big reason why the stringers are still in good shape. It seems though that most everyone uses foam in their restores. maybe I missed it but did you add foam under the deck? What are the positives and negatives? please give me some help. thanks
 
Status
Not open for further replies.
Top