74 Starcraft Holiday resto

SkidRowBill

Petty Officer 1st Class
Joined
Jun 8, 2015
Messages
295
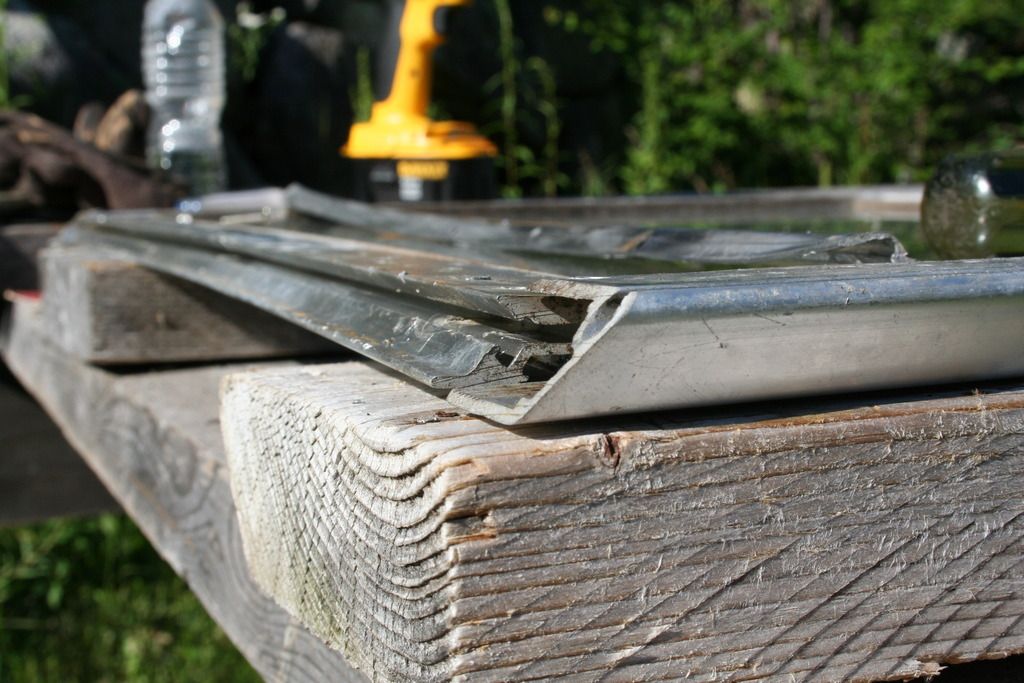
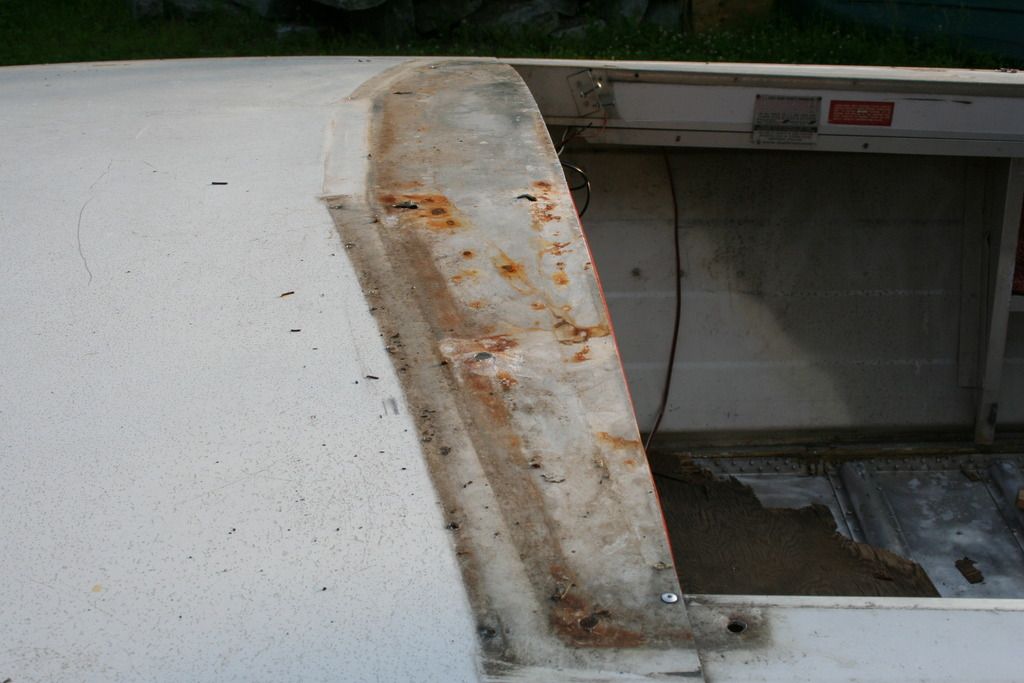
On the inside of the top frame rail is a small V grove... which can be seen in the third picture... it appears to coinside with the lower frame rail groove so that the T bolts will be pointed in the correct angle to match the winshield angle(angled back as opposed to standing straight up) I ordered another package of T bolt in case I grind one a little short... I will be ripping the port side off once I know that this will work on the starboard side... the transome plywood has arrived and the 1/4 inch diamond is on its way... now all I need to do it convince myself that I need to take some time off... I never worked so hard as I did once I retired... the weather here really sucks... every other day we have rain and thunder showers... low 60's today with clouds, tommorow better but wensday, friday, and sunday rain... I will be happy when this weather breaks... all my best... and thanks for the help... I will include pics soon... Bill
 

Grandad

Lieutenant Commander
Joined
Jun 7, 2011
Messages
1,504
OK. I think I understand. When you say the top frame rail, you're referring to the frame rail that connects to the bottom of the glass, but you refer to it as the "top" rail because it sits above some other custom mounted extrusion. OK. Start by discarding the very bottom one that was connected directly to the deck. You don't need it. Why it's there at all is unclear to me unless it was someone's attempt to avoid using the proper T-bolt hardware or accommodate a particular weatherstrip. You want it to end up like in the picture below.
- Grandad
 
Last edited:

SkidRowBill

Petty Officer 1st Class
Joined
Jun 8, 2015
Messages
295
Thanks Grandad... in this pic I am calling the rail that has the grove for the T bolts the bottom rail... Just above the T bolt grove in the bottom rail there is a very small grove in the top rail that appears to want to accept the top of the T bolt... the groves are opposit in a fashion that when the T bolt is installed the threaded shaft of the T bolt that will go down through the bow to accept a nut and hold the winghield in place at the propper angle...
 

SkidRowBill

Petty Officer 1st Class
Joined
Jun 8, 2015
Messages
295
It has rained here all day but I did get the transom cleared of all nuts, bolts, and screws last night... I will use a hand file and fashion one T bolt and set it into these groves and photograph so that we can decide if this is a GO... thank you for your patience... all my best... Bill
 

g0nef1sshn

Lieutenant
Joined
Feb 24, 2015
Messages
1,291
Keep at it Bill, I never put my windshields back in so I have nothing to offer on that stuff, But im following along!
 

Watermann

Starmada Splash of the Year 2014
Joined
Jan 12, 2013
Messages
13,753
That's amazing Bill, that channel of yours looks nothing like the one in my Chief. Sorry I can't help.
 

SkidRowBill

Petty Officer 1st Class
Joined
Jun 8, 2015
Messages
295
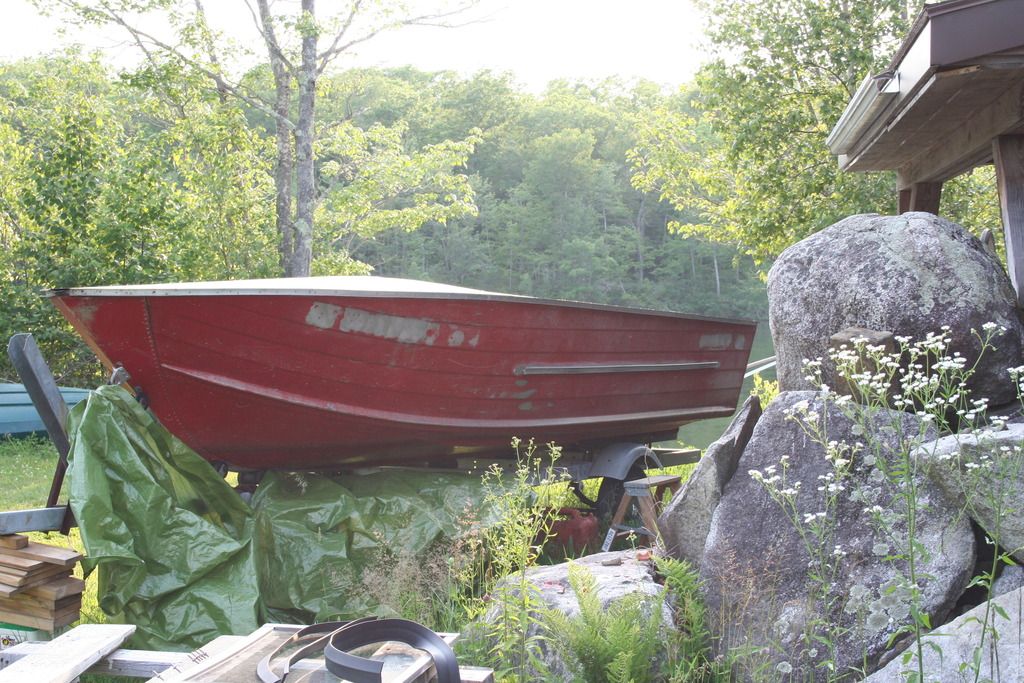
Thanks guys... leave it to me to find a mungrul... By the way... what you see in this last pic is the entire bottom of the windshield... wide open... no base plate... I have been looking at gasket material... I like Grandad's foam gasket but I think that something with a little more body is in order... I have a very cheap garage door bottom seal made of a very soft foam rubber... since I already own it I am going to try my best to make it work(with a great deal of customizing)... but I am open to suggestions... I think that if I fill the void between the inner and outer bottom rails with a little hanging out the inside, toward the dash, and squish it firmly that I will have a seal and a solid mounting solution... I hope to enjoy this Holiday(Independance day) working on my latest dream... This 1974 Starcraft Holiday... I would like to hear from you all on colors... at presant she is red outside with white gunwales, bow top and under the bow, with red pannels and red vinyl in the side storeage area's in the main deck area, along with a red dash... I will be fishing with this boat and feel queer running a dark bottom fishing boat... to me it is like wearing a black coverall trying to sneek up on an elk in the snow in an open area 5 miles square... I am leaning towards all white bottom, all white bow and gunwhales, splashwell area... the dash and pannels are red with red pockets and likely to stay that way... the panels look near new... the dash is a mess and I will likely jump into that but I have read what it takes to remove the verticle face dash and it is very unlikely that I will attack that... but intend to do what I can to purdy it up... also I have decided to go with 2 sheets of 1/4 inch diamond plate aluminum... My cost delivered $570.00 I will start the rear plate 24 inches forward of the transom... the forward end of the second sheet will end up under the bow about 16 inches or so...(each sheet is 48x96 inches I will cut each sheet to 48"x601/2", from the drop I will cut two 48"x4" and use them for the edges to make up the 1/2 inch hieght, the remaining 48x27 plus inches will cover with plenty extra the two beams that run up the center(each side) of the boat, then rivet the hell out of it... I will complete the rear under the splashwell with new 1/2 inch plywood(24"X601/2"), This is under the spashwell which will be closed in and I may use thicker plywood to accept 2, 80LB batteries and one 12 gallon fuel tank, I am thinking of covering it completely with Ice and Water shield... and use the piece that came from the bow after cutting nearly half of it(the rotted section below the helmsman's seat) away... is this insane or what... I figure that I will end up with what I want for the least amount of MOOOLAAA(the exposed area of the boat done in diamond plate and needing no maintainance but replacing the carpet or vinyl covering) and two very small pieces of plywood that can easily be replaced, and are not exposed(important to longevity) very seviceable with no worries on the maine deck... I have put alot of thought into this but if I have learned anything in my life two or more heads(idea's) are always better than one... so please fell free to comment in any fashion that you have a mind to... Thanks for listening and offering advise(that is sorely needed)... All my best... Just a dumb farmer from Maine... Bill
 

laurentide

Lieutenant Commander
Joined
Jul 24, 2011
Messages
1,869
Bill, that's a very long paragraph! I think if you can address one issue at a time with photos we may be able to assist you more effectively. I don't really know where to start to answer all those questions. Maybe it's just me :watermelon:

I do say this with utmost respect, as you're obviously invested in this project, but one question at a time might get you better answers.

I can't help with the windshield thing, but I'm wondering how you're fastening the diamond plate. Over plywood?
 

jbcurt00

Moderator
Staff member
Joined
Oct 25, 2011
Messages
24,871
Bill, are you posting from a mobile device............................... there seems to be an glitch w/ paragraphs and hard returns getting eliminated and creating monster run on paragraphs when posting from a mobile device............................... If so, as Chem said, 1 question at a time may help, or at least a bunch more periods to break it up...............................

Re: W/S gasket, have you considered windshield gasket? $30+shipping for white, OEM style gasket. PM me for details.

Re: boat color, paint it whatever color you want, but I don't think a white hull will be any more sneaky then the 'black coveralls in winter' red..... Aren't most bass boats black metal flake gelcoat? hmmmm...

Not sure what (where and how too) exactly you plan to put ice and water shield on, so that'll need a better description...

Sounds like you plan to use the aluminum diamond plate as a decking material, but cover it w/ vinyl or carpet?

The details of your splashwell layout and plan seem ok pending that ice and water shield details.
 

SkidRowBill

Petty Officer 1st Class
Joined
Jun 8, 2015
Messages
295
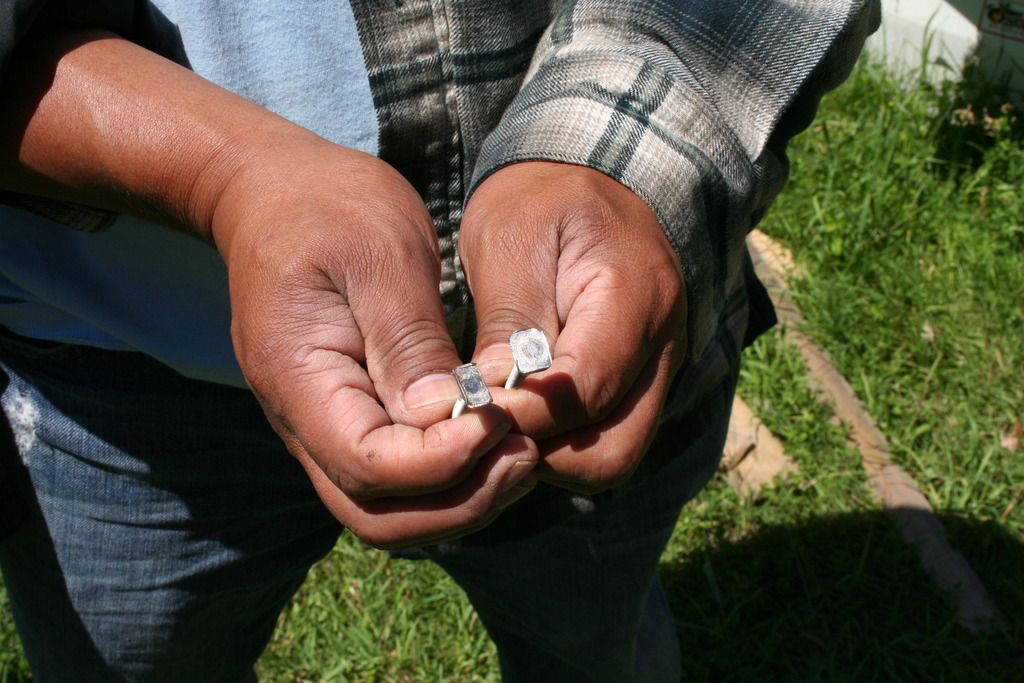
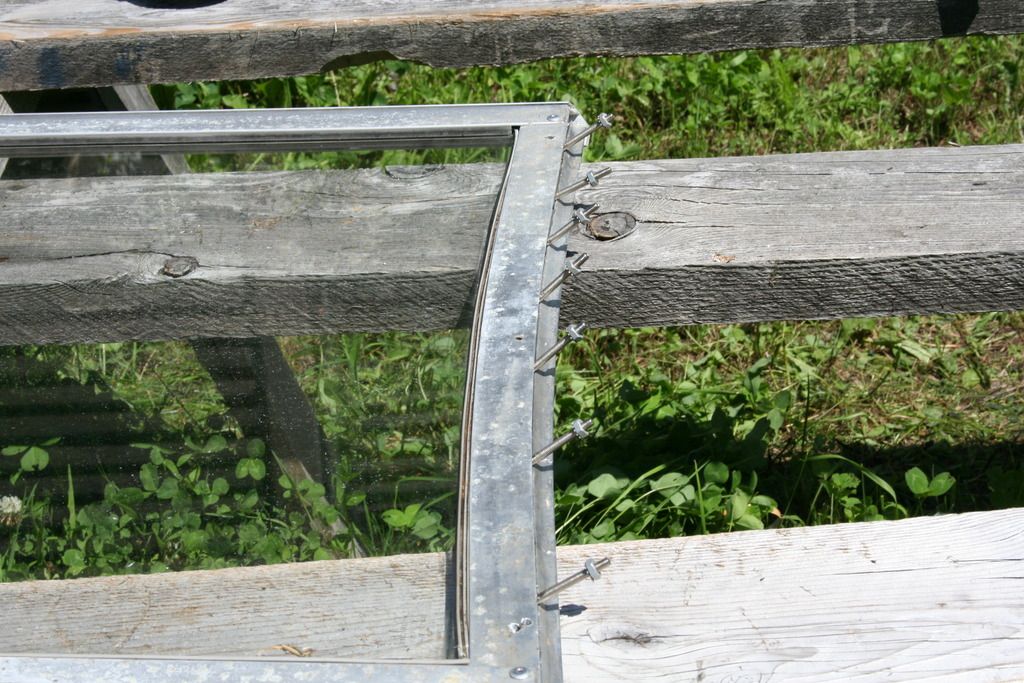
Sorry Fella's.. I have a track phone that my daughter made me have when we sent her to college... I don't know where it is, and never set up the voice mail... needless to say it did'nt work out... but I tried... really I did... Okay... screw the too big post... we will take this one step at a time... I have stripped the boat except the wood in the transom, pics to follow as subject arrises... windshield is on the ajenda now... as you all thought the T bolts would install... I had to grind... and grind some more... and then grind again... the bolt on the right is where I started... the bolt on the left is where I had to be for a proper instalation... this is what it looked like when completed... there was 7 revits so I put 7 T bolts... I tested and after drilling all the bow holes just a little larger I believe that with a proper gasket all will be co-pasetic...
 

SkidRowBill

Petty Officer 1st Class
Joined
Jun 8, 2015
Messages
295
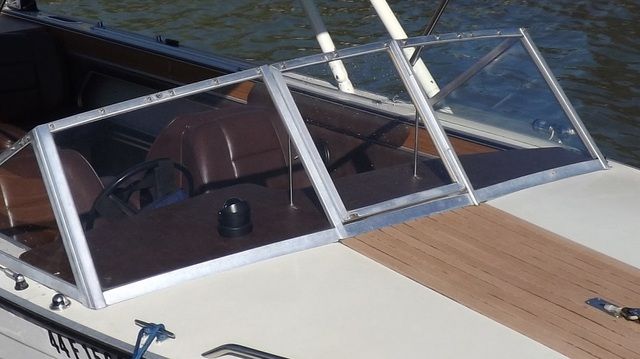
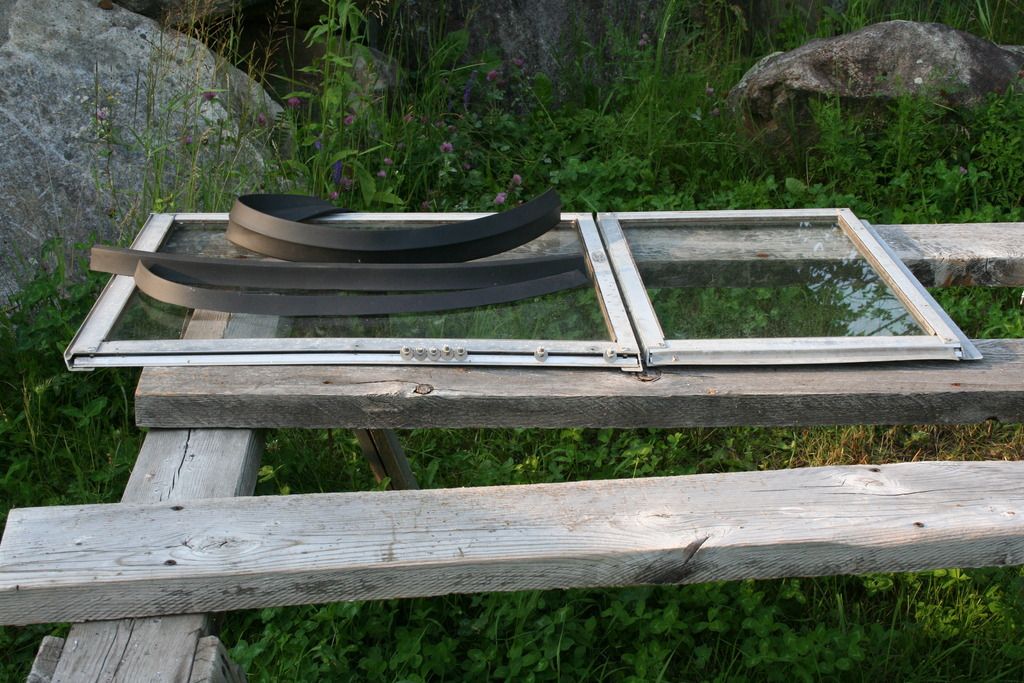
I totally disassembled the windshield frames and cleaned the glass gaskets before re-assembly... by looking at the pics I can see that I should have polished the frames... what a drag... but being a cadet I am not embarassed... nor shall I ever be detored... I want to tell you all that it has been a long time since I have enjoyed any project this much... I owe it all to you... It makes that much of a difference... I will tell you that I am very happy with the desisions that I have made... I could not experience such a sence of accomplishment without your inquiories or your encouragement... all my best... SkidRowBill
 

hayko1971

Starmada Splash of the Year 2015
Joined
May 24, 2013
Messages
448
Your modified t bolts turned out just like mine looked, but on my split windshield, I have only 3 per side along the front edge. Your windshield isn't going anywhere! Well done. I used butyl tape as a gasket for my windshield. A roll of it was $20 but was way more than I needed, so I purchesd an RV vent sealant kit for $7.50 with more than enough to do the job. The local RV store supplied many items on my boat, don't over look them as an alternative resource.
 

SkidRowBill

Petty Officer 1st Class
Joined
Jun 8, 2015
Messages
295
Roger that... thanks for the info Rob... we have three or more RV stores local... I will check them out... the garage door bottom gasket has little or no UV protection... I am not sure if I will need such protection but have time so I am going to look at all I can... some pics from you and others would be helpful... it just does not seem rite to put the aluminum frame against the bow skin but it is what I have seen without exception... All My Best... Bill
 

Grandad

Lieutenant Commander
Joined
Jun 7, 2011
Messages
1,504
I don't think the original weatherstrip was exposed to sunshine. If you don't put in some form of gasket material (or caulk), it'll leak water back under your padded plywood on the dash and may never dry. There are a couple of caulking products that I have used as a temporary/permanent fix that would at least form a rudimentary dam under the windshield. One is called "Draft Stop"; the other "Draft Attack". It's relatively inexpensive stuff that is intended to seal around windows for winter storm protection. I have used it for years to seal around a sliding glass door. When Spring returns, I just peel it off the door track as a clear stretchy rubber strip. I think that's some of it in the picture I already posted somewhere above in this thread showing a tape measure. I used it for a temporary seal at the the top of my transom as a very temporary fix of rotten wood before actually replacing the entire transom. It was still doing the job after several years. - Grandad
 

Watermann

Starmada Splash of the Year 2014
Joined
Jan 12, 2013
Messages
13,753
So many options, here's another one for you, a 'wet seal' or use of a product called sikaflex. Window companies use it all the time and is what I used on my Chief. The gray colored sikaflex blends right in with the natural color of aluminum too and doesn't turn into a dirt clod colored mess like white does.
 

SkidRowBill

Petty Officer 1st Class
Joined
Jun 8, 2015
Messages
295
so... another day another 25 cents... the second winshield was a breeze... less than 1/2 hour... I believe that I will lay a thin rubber gasket and fill the rest with silicon... says it lasts forever without degrade, shrinkage, and a hole bunch of other crap... should be more than adequate...
 

SkidRowBill

Petty Officer 1st Class
Joined
Jun 8, 2015
Messages
295
Drilled out all the rivets and snaps and screws and whatever else was on the gunwhales... gona need alot of JB weld... I wonder... do you think that he is related to Jim Bean??? Ripped out the dash.. most all the plywood is rotten... I have worked scratch that... womans Team USA has won the world cup beating Japan 5-2... 3rd world cup title for the good ol USA.. as I was saying I have worked with wood most of my life in one fashion or another... this dash is covered with red fake something... I wouder how it would look in red anodised diamond plate??? I also have finished stripping the transom and the plywood is ready to come out... once that is done its on to the paint...
 

SkidRowBill

Petty Officer 1st Class
Joined
Jun 8, 2015
Messages
295
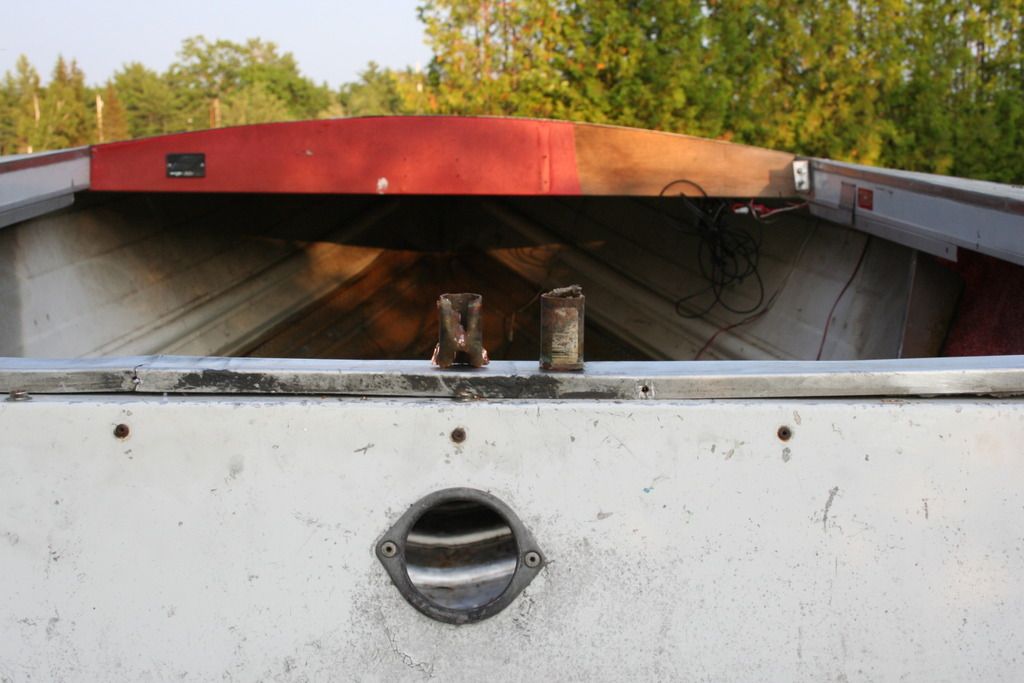
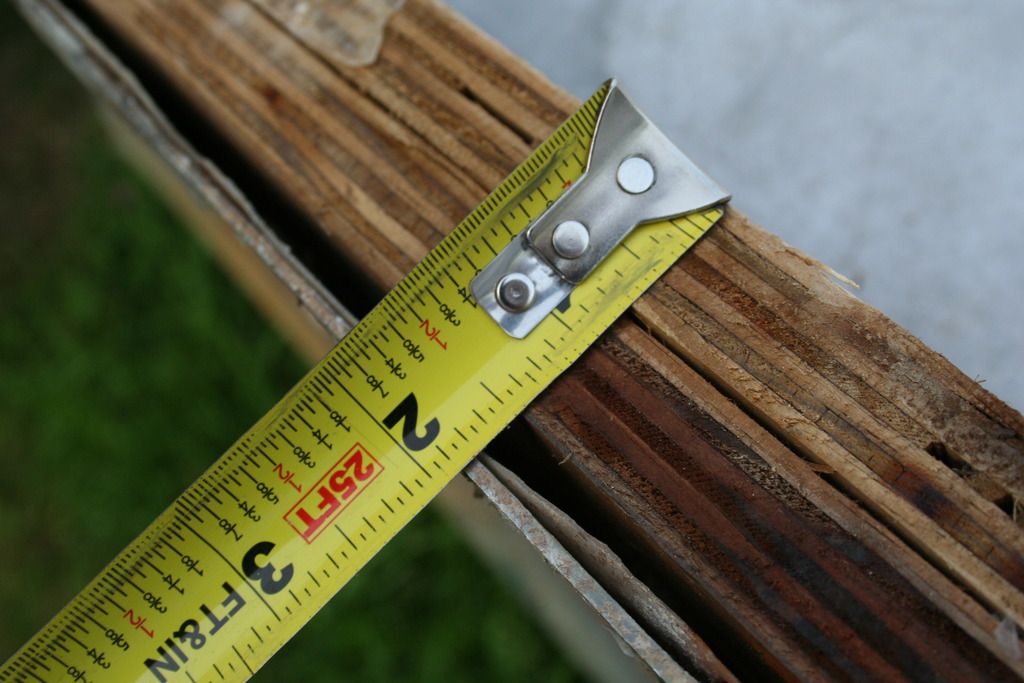
as you can see here the splashwell drain tubes were just a piece of copper pipe... you can also see that one of them gave me a bit of trouble... you can also see that it should not have messed with me... the aluminum cap is in very rough shape... none of my doing can I purchase another one of these... we have a local tin knocker and I have left him a message asking if he would whip up a new splashwell... I f he returns my call I will ask him about this cap... also you can see that this wood is a full 1 1/2 inches...
 

SkidRowBill

Petty Officer 1st Class
Joined
Jun 8, 2015
Messages
295
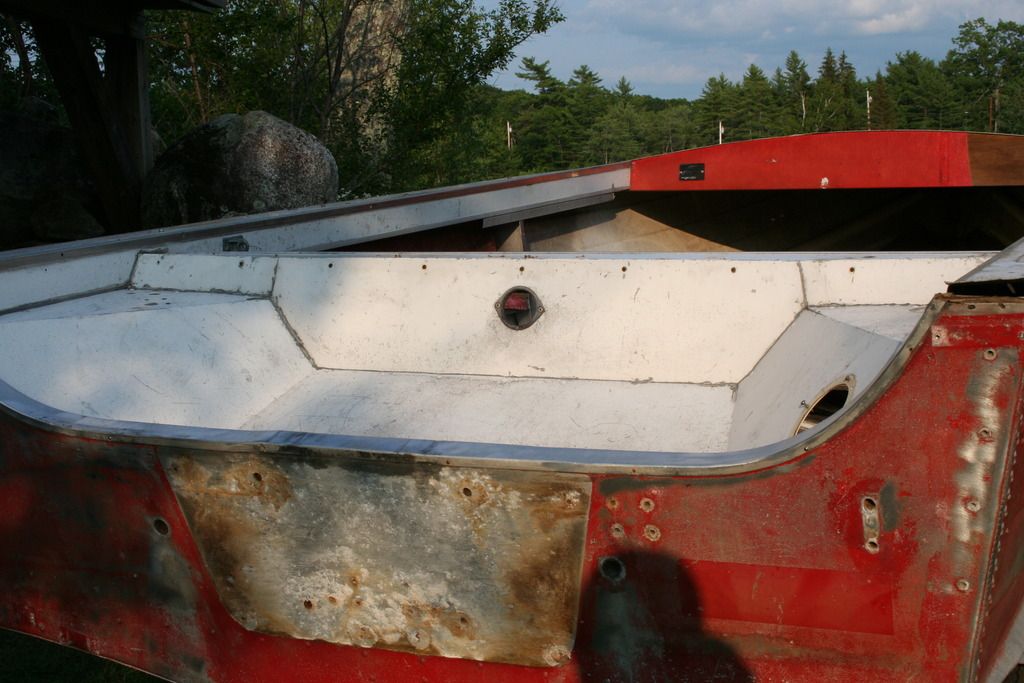
this is the well beat up splashwell... all the grey line stuff is JB himself... the tab on the port side where the cross bar attaches to the gunwhale is broken off... easy fix but the whole thing is really beat, cracked, and generally a mess... I could pretty it up but I feel that with some use it is going to show its age...
 
Top