1981 Starcraft Super Sport 180 - Gonna try a Restore

Candutch

Chief Petty Officer
Joined
May 8, 2015
Messages
637
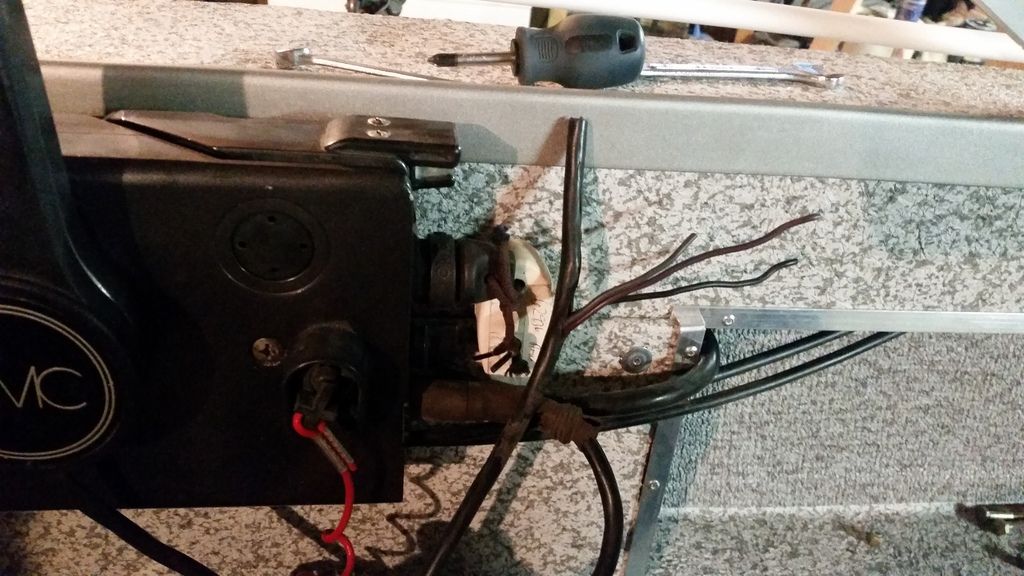
Today my plan is to install the steering and run the cable and maybe get some wiring hooked up but I have run into a bit of a problem. I can't find any of the photos that I took of the tear down and don't know how the steering goes back together or the wiring from the controls hooks up.
I know the main with the red plug goes back to the engine but the other 2 have me stumped. One to the guages maybe? I tried searching wiring diagrams but haven't had any luck as they just seem to show the main cable hooked up inside the controls. Any help would be greatly appreciated.


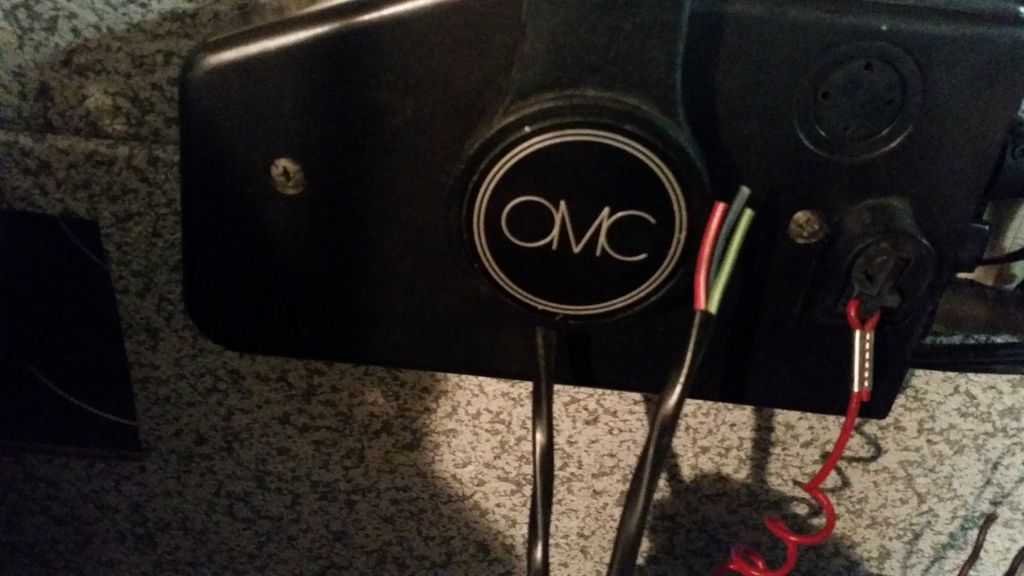
This one comes from the rear of the controls and looks like green, red and black wires.


This one comes from the trottle handle and are blue, green and red.

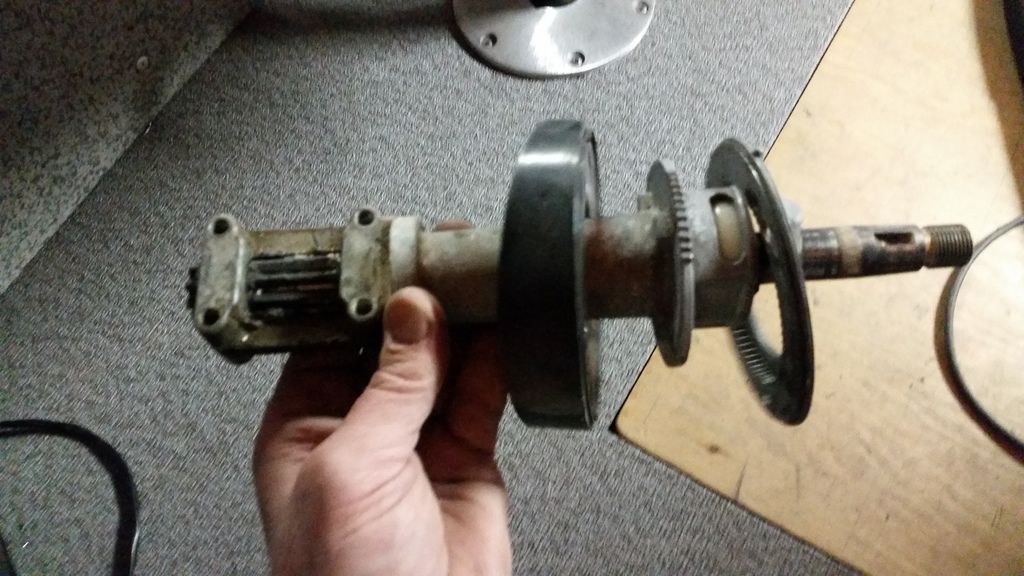
Is this how the steering parts go together?


Watermann

Starmada Splash of the Year 2014
Joined
Jan 12, 2013
Messages
13,753
The rack steering is pretty simple, my SN has one but it looks to me like you have is backwards as the backer plate that goes inside the cutout that the 3 bolts screw into and the bezel on the outside.
 

Candutch

Chief Petty Officer
Joined
May 8, 2015
Messages
637
So the plastic bezel on the outside of the dash and the backer plate on the inside?
 

Candutch

Chief Petty Officer
Joined
May 8, 2015
Messages
637
My brain isn't working today, this is the only way I see this going back together.
 

Watermann

Starmada Splash of the Year 2014
Joined
Jan 12, 2013
Messages
13,753
The shaft goes through the hole from the inside, the collar on it stays behind the dash panel, the metal ring bolts on the outside through the panel into the collar and the bezel fits over the ring and snaps into place.
r&p.jpg
 

Candutch

Chief Petty Officer
Joined
May 8, 2015
Messages
637
Thanks Rob, I don't think this one works like that. There are teeth on the ring and the plate on the shaft. I assume those fit together. The plastic bezel is just a spacer to adjust for the angle of the dash. I also have that plastic cover that goes between the wheel and the metal ring to cover the assembly.
 

Watermann

Starmada Splash of the Year 2014
Joined
Jan 12, 2013
Messages
13,753
There should be a metal ring on the outside to go with the set up if not then... Put the shaft in from the backside with the ring already on it with the bolts through the dash panel with washers and screw them into the ring. I'm guessing the plastic ring is what the bezel connects to. Do your bolts for the set up have nuts or are the plates holes threaded? It should tighten up just fine.

It goes without saying that when taking the stuff apart it's best to reassemble it in the same order it came apart with the nuts and or bolts.
 
Last edited:

Candutch

Chief Petty Officer
Joined
May 8, 2015
Messages
637
Thanks for helping Rob. I did have it assembled as in the first photo and took photos which I can't find where I saved them now.
The bolts go through with locking nuts and washers. I believe the heads were on the inside with a he shaped washer and the locking nuts toward the steering wheel on that plate.
Looking closely at the plastic spacer I can see an out line of the teeth from the shaft so I think that is the was it was together before. The PO may have put it together wrong though.
 

Candutch

Chief Petty Officer
Joined
May 8, 2015
Messages
637
Well here is the order I came up with. It all goes on the outside of the dash panel. The bezel next to the steering wheel has a hole on the underside where a thumb screw goes through and into the shaft where the collar is to tighten the steering. All I can think of is that I am missing a plate that goes on the backside of the dash.
 

Candutch

Chief Petty Officer
Joined
May 8, 2015
Messages
637
Last edited:

Candutch

Chief Petty Officer
Joined
May 8, 2015
Messages
637
I did lose the pin for the steering shaft that holds the wheel in place so I need to find another one of those. Any ideas where I can pick one up?
 

Watermann

Starmada Splash of the Year 2014
Joined
Jan 12, 2013
Messages
13,753
Hey no problem, glad you got it back together. I guess they use those square washers then?

That pin you need should be a woodruff key, you may have to pick up a few different sizes to get the right one. I know Ace hardware has drawer full of them in all different sizes.
 
Last edited:

Candutch

Chief Petty Officer
Joined
May 8, 2015
Messages
637
I replaced all the bolts, locking nuts and washers with stainless as they were rusty. It now has regular washers in place of the hexagon ones.
I'll check the local hardware stores tomorrow for the woodruff key. Thanks for the proper name.
 

Candutch

Chief Petty Officer
Joined
May 8, 2015
Messages
637
Another rainy cool day so no painting will get done. I did get the rest off the paint stripped off of the sides and washed the boat off yesterday before the rain came. Today I taped it all off and wiped it down with acetone so tomorrow I'll hit the bare spots with self etching primer. Hopefully Sunday will be warm enough to prime.
I got the transom cap fabricated and installed today as well. I used 1/16 th aluminum sheet cut to 2 3/4 inch width and used my break to make it into channel.I had to make it in 5 pieces but I overlapped at the corners and used plenty of 4200 underneath then screwed it into the transom with #6 x 3/4" stainles screws. It should be good and sealed from any water intrusion and shouldn't come off unless pried off.

View attachment y4mZisaWIiNKSLbNa5IJ5mfrv8IzWBUA_uYe1voMXJixWnyOrUDxtQK9o00KLx-g1zDzJcHt2mvoHa_xfi6tHj80NZMAjIv32C1p
 
Last edited:

dozerII

Admiral
Joined
Oct 25, 2009
Messages
6,527
Nice job on the cap Rob, I hear ya on the weather it hasn't quit raining for more than about 18 hours here in the last two weeks.
 

Candutch

Chief Petty Officer
Joined
May 8, 2015
Messages
637
Thanks Glen, it's nice so far this morning here but cold (2 degrees). We do need rain, it's been a very dry winter and spring, I just wish it wasn't on my days off.
 

Watermann

Starmada Splash of the Year 2014
Joined
Jan 12, 2013
Messages
13,753
Hope you have some nice weather in future so I can see that paint go on the ole gal. :joyous:

Nice job on the cap :thumb:
 
Top