"New" '69 Offshore 18ft redo

Buckeye72

Cadet
Joined
Nov 14, 2014
Messages
20
Hello all...... Been lurking around here for a while now, but now I'm official. Just tore into my (and the boys) winter project. Have it all gutted down to hull and transom. Found a few post on ripping out transom, however I still have one last question. THE GUNNEL TOP!!!!!!! You guys pull everything apart until you can lift the wood out. Or do you trim away some of the aluminum, which looks like the corner bracket will hide. I'd like to leave gunnel alone and just polish the trim in place, tape and paint. But to do it right looks like all trim comes off and top plate till I have enough room to bend up and take out transom. I'll post pics soon
 

Watermann

Starmada Splash of the Year 2014
Joined
Jan 12, 2013
Messages
13,753
:welcome: to iboats and the SC tin division!

Looking forward to seeing some pics. There's 3 different methods of transom wood removal when it comes to gunnels.

1; Cut enough away to remove the wood and the end caps cover the cuts.
2. Bend the gunnel up enough to remove the wood and then bend it back.
3. Pull the rub rail vinyl enough to expose the screw heads holding on the rub rail trim and remove enough of the bolts to where you can lift the gunnel up and out of the way to remove the wood.
 

GA_Boater

Honorary Moderator Emeritus
Joined
May 24, 2011
Messages
49,038
Welcome to the Land Of Tin, Buckeye. H2O has you covered. Which method is best? The one that works for you. :D The easiest might be to trim. I had a heck of a time trying to work the kinks out after bending.
 

classiccat

"Captain" + Starmada Splash Of The Year 2020
Joined
Dec 20, 2010
Messages
3,405
Welcome! :welcome:

Thats one awesome, classic hull you supposedly got yourself there....

If you've been lurking around the starmada...you know the drill. :photo:
 

SigSaurP229

Commander
Joined
Oct 1, 2008
Messages
2,123
Can't see the pics but I really like the deep deadrise on the offshore hulls should ride very very smooth.

As far as the caps, trim them with the grinder, Ga is right they are a serious PIA to bend back straight.
 

Buckeye72

Cadet
Joined
Nov 14, 2014
Messages
20
Hey guys, well this is the second time I've had to type this cause of my tablet. Anyhow, we have her in the garage with everything but the transom on the burn pile. Man is that a pain to get out. I went with the grind/cut and looks good. Have some heat on it tonight to try to dry it out. Hope she comes out tomorrow.

I have some pics on my iPad now from my phone so I can post soon, but looks like they are too big for upload......figure that out next

Two questions for u. 1) Recommendations on epoxy for deck/transom. 2). I've seen guys on here pre finish their deck with vinyl/carpet before install so if they ever have to pull up its only one section. Only reason I'm asking is I have no idea what shape this hull is in, yes I will do a water test and gluvit (if she needs it or not) but I don't want to do all this work over winter then beat her up on Erie and have things loosen up this spring. I think she has sat for many years......am I just being anal?

Thanks
 

Weep'n Willy

Master Chief Petty Officer
Joined
Jun 12, 2012
Messages
831
Nice progress on the tear down. As far as coating deck and transom I used West Marine two part epoxy but others have used spar. As far as installing your deck that is up to you. Only thing below my deck is foam so I have no real need to remove the deck. I installed the entire deck then applied the Nautolex to which I ran it up each side of the hull a couple inches in the thought that all water would run to the rear and into the bilge and not under the deck.
 

dozerII

Admiral
Joined
Oct 25, 2009
Messages
6,527
Great looking project. Looks like lots of wildlife has called the under floor area home for a long time.:grumpy:
 

Buckeye72

Cadet
Joined
Nov 14, 2014
Messages
20
Thanks will!

And yes Doz. I could have floated her with just the walnuts in it, no foam required
 

Watermann

Starmada Splash of the Year 2014
Joined
Jan 12, 2013
Messages
13,753
Great platform you have there, she looks real solid and very worthy of restoration. :thumb:

I used spar to seal the decking and individual pieces of vinyl flooring since I have a below deck belly fuel tank installed.
 

Buckeye72

Cadet
Joined
Nov 14, 2014
Messages
20
Well all. Thanks for the help. Got the transom ready to go in


Now almost done with the trailer, however had to sent out a few parts for some welding. I do weld however, leaving the important stuff for a buddy who does it For a living


Did do a water test and all seemed good. Just some very small drips every couple minutes..........well rolled to boat back in to the garage to start some striping and cleaning to get ready for paint and ran into this!!!!!!! Thot it was a loose rivet till I got her over and started removing paint. I've got the same stress crack on same set of rivets on other side. Think it was a poor set up of roller bunks by PO


Any help comments would be a great help
 

jbcurt00

Moderator
Staff member
Joined
Oct 25, 2011
Messages
24,871
Look thru classicCats topic the stress cracks beneath the ribs are common. Starcraft even modified how they built the hulls because of it. Some even have hulls that were retro fitted by SC at some point.

Look carefully at the rest of those rivets along the chine, several have found others once they found a crack or 2....
 

elkhunter338

Master Chief Petty Officer
Joined
Jun 27, 2009
Messages
818
put some bunks on the trailer with carpet to better support the hull while on the trailer.
How do you plan to repair those stress cracks? Cracks normally need holes drilled in the end to prevent further cracking. Can you rivit a plate on the inside and use some sealer between the hull and plate?
Does your buddy weld alum? Would love to see pictures on how you fix it.
 

jbcurt00

Moderator
Staff member
Joined
Oct 25, 2011
Messages
24,871
Before:
Re: My First StarCraft; 1975 18' SuperSport

Rib-3 (AFT) was ok.

Rib-4 (cracks starting on the forward rivet...and yes, that is a pop-rivet under the rib):


Rib-5:


Rib-6:


Rib-7 (Worst):


Rib-8:


Rib-9:


Rib-10 had a small crack and Rib-11 was OK.

That hull kink was worse than we thought and it's interesting because you don't see any cracking from the inside.

There's no question that I'll need to add reinforcement under each rib end (simlar to Granddad's MO).

I believe that I'll get a better seal from the inside if I straighten-out the kink using GaB's "BFH-MO".

Before I start swinging again, I'll drill small holes at the ends of the cracks.

Any other advice, criticism, numbers for good psychologists, etc.?
In process:
Re: My First StarCraft; 1975 18' SuperSport

Ok guys, thanks for stayin' with me on this. I'm actually off from work this week so hopefully I can get this structural stuff banged-out (<= see what I did there).

After another 100+ swings with the sledge / 4X4 on the Ribs...with heat...I realized that the only thing bending is the top of the ribs.

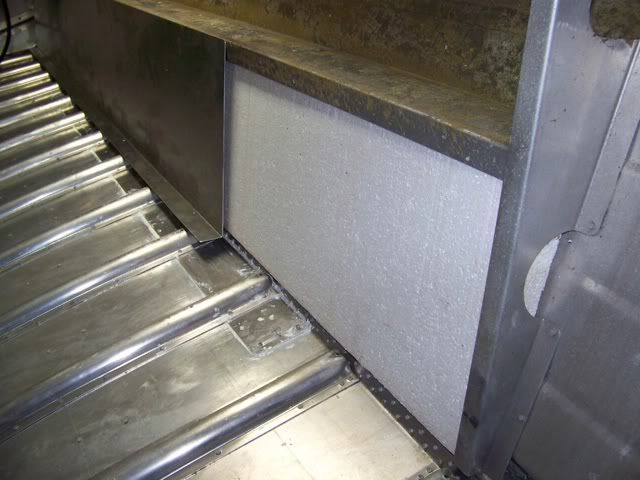
So...I decided to cautiously attack the hull skin.

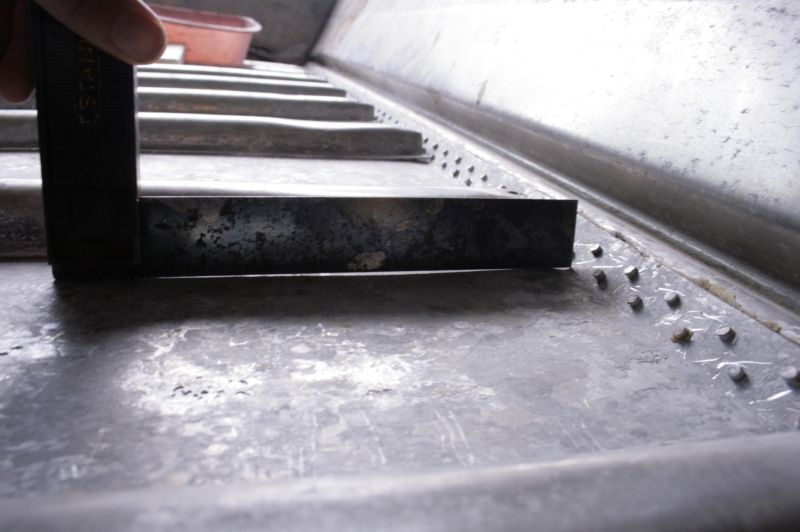
Starting from from the aft-most rib space, I worked my forward using a 2x4 and light hits with the BFH...and I'm very pleased with the results. Here's a shot of the skin next to Rib#7 after the 1st pass...nearly matches the starboard chine profile.


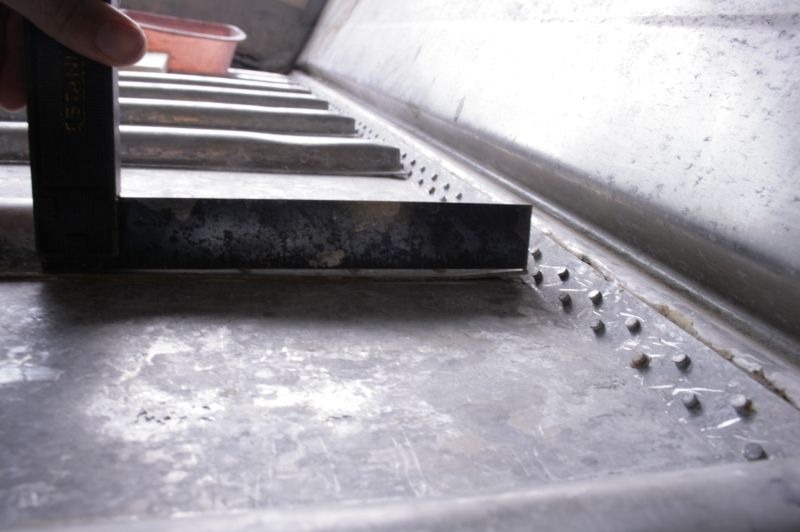
What I also noticed is that the rib-end tabs are bent upwards from all of the flex...THIS IS CRAZY if you consider how much the hull skin was being displaced...Like a big aluminum accordion! Rib#7 tab:


I stopped after Rib-8 because I wanted to run upstairs to share my excitement with my buddies :lol:

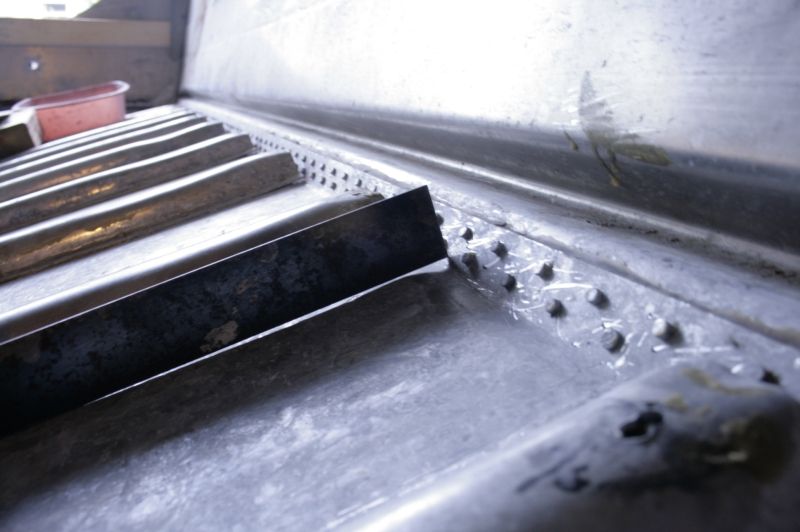
Here's a shot of kink next to Rib-9.


Now Bob really opened my eyes about introducing more holes in the hull skin...particularly in a part of the skin that's been stressed, bent, cracked, etc. So I'm starting to re-think the entire bracing strategy. The braces are useless if I secure them away from the chine because the brace angle will flex.

If I tapped into the seam-only, I'm only locking-in the outer-portion of the chine + spray-rail. If I put a brace directly on top the rib, I'm locking the entire chine + spray-rail...and I don't introduce anymore holes....aka Grandad's approach.
100_3381Reduced.jpg
 

classiccat

"Captain" + Starmada Splash Of The Year 2020
Joined
Dec 20, 2010
Messages
3,405
Don't let those stress cracks scare you too! :)

there are a few ways to skin the cat here.

to address the root cause of the outer-chine flex, I'm using a brace to lock the outer chine; replace the z-brackets with triangular channels fabricated on a brace:


I haven't completed the chine bracing (Life has the restoration onhold at the moment). The only thing left for me to do is fabricate the tabs that lock the vertical braces to the ribs.
 
Top