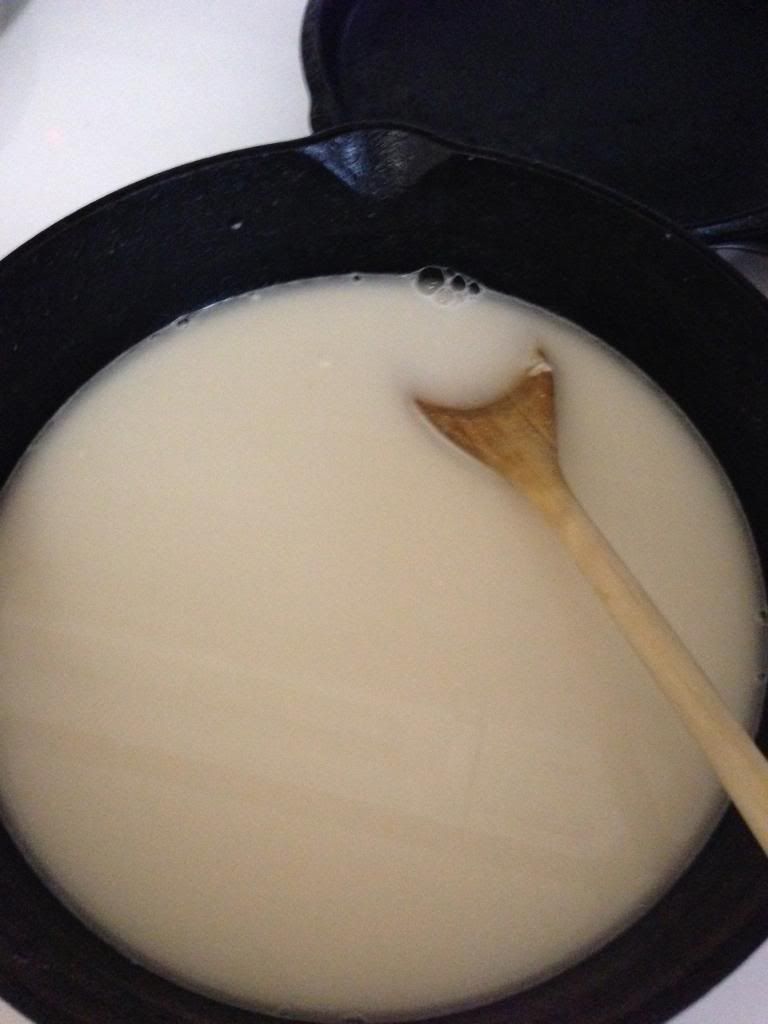
Fabricating an acrylic windshield This discussion was writen for fabricating a Charger 151 windshield from acrylic sheet. The Charger windshield is relatively simple but the process fundamentals would be the same for any acrylic part. In general the process consists of making two patterns, building a mold, building an oven, forming and trimming the part. Basic materials required included ?? and ?? plywood, several lengths of 1?x 3/4? lumber, sheetrock screws, automotive Bondo, and some flannel fabric. 1/8? cast acrylic sheet was used for the windshield itself. Although 1/8? sounds thin, this window frame will not accept anything much thicker and it seems to be plenty strong when assembled in the frame.
Resources My primary resources were
www.cyro.com technology center, a local plastics fabricator, and a friend who has experimented with acrylic himself. On the Cyro website, ?Tech Brief #10 ? Thermoforming? is a good baseline. Outside of that, an adequate knowledge of wood working, some fairly basic tools, some ?do-it-yourself? common sense, and a bit of time and patience is all that is required.
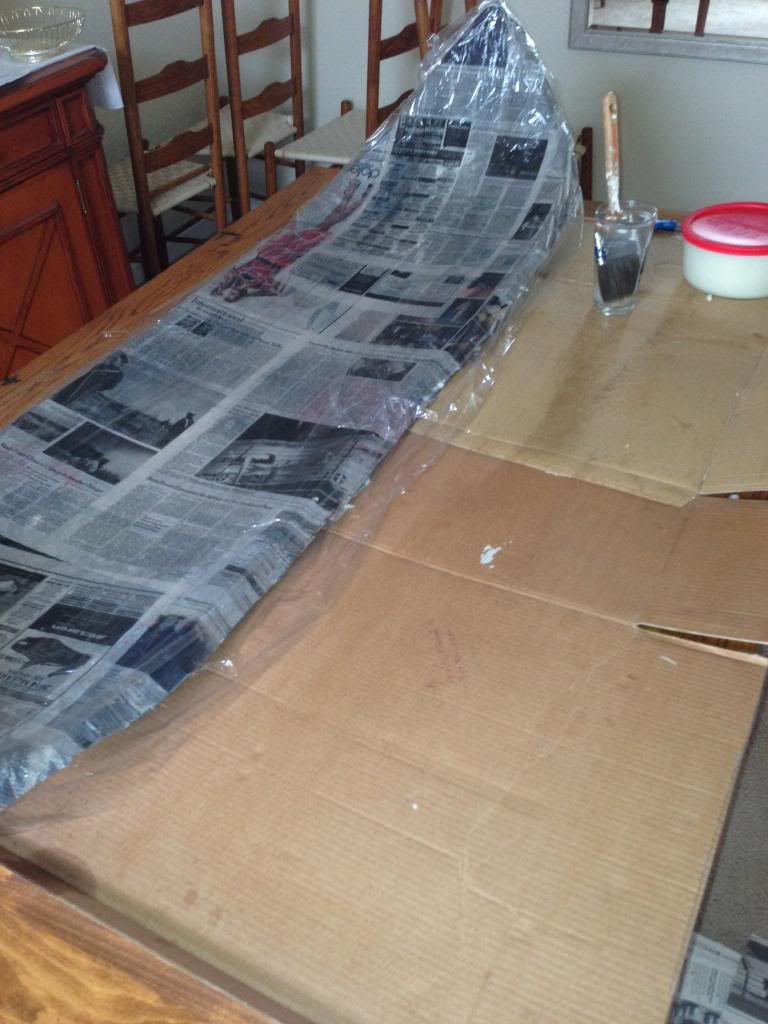
Making the patterns Two patterns are required, a flat pattern to define the perimeter shape and dimension and a pattern to define the curvature. First remove the non-broken windshield from the frame. I removed the whole frame from the boat but if I were to do it again, I would leave as much as possible assembled and fastened to the boat. Re-assembly was a whole nightmare in itself. More on that later. Flat pattern: A large piece of heavy brown shipping paper wrapped onto the good half of the windshield, traced, and cut out, makes the flat pattern. The same flat pattern can be used for making both halves of the windshield so be sure to mark which side of the flat pattern is the right and which is the left windshield. The flat pattern is used first to size the raw acrylic sheet and mold, and later to mark and cut the final product from the molded acrylic. When determining the size for the acrylic raw material, allow several inches for edge margin. The Charger 151 panel fits on a 24? by 38? sheet of acrylic. The flat pattern should look something like (Figure 1). Curvature pattern: Standing the good window on edge, trace the curve onto a heavy piece of cardboard. I used a big sheet of picture mat board. Extend the curve several inches past each end of the window. Carefully cut out the shape. The more accurately you cut this and the associated mold webs, the less Bondo and sanding will be needed later. The curvature pattern should look like one shown in (figure 2).
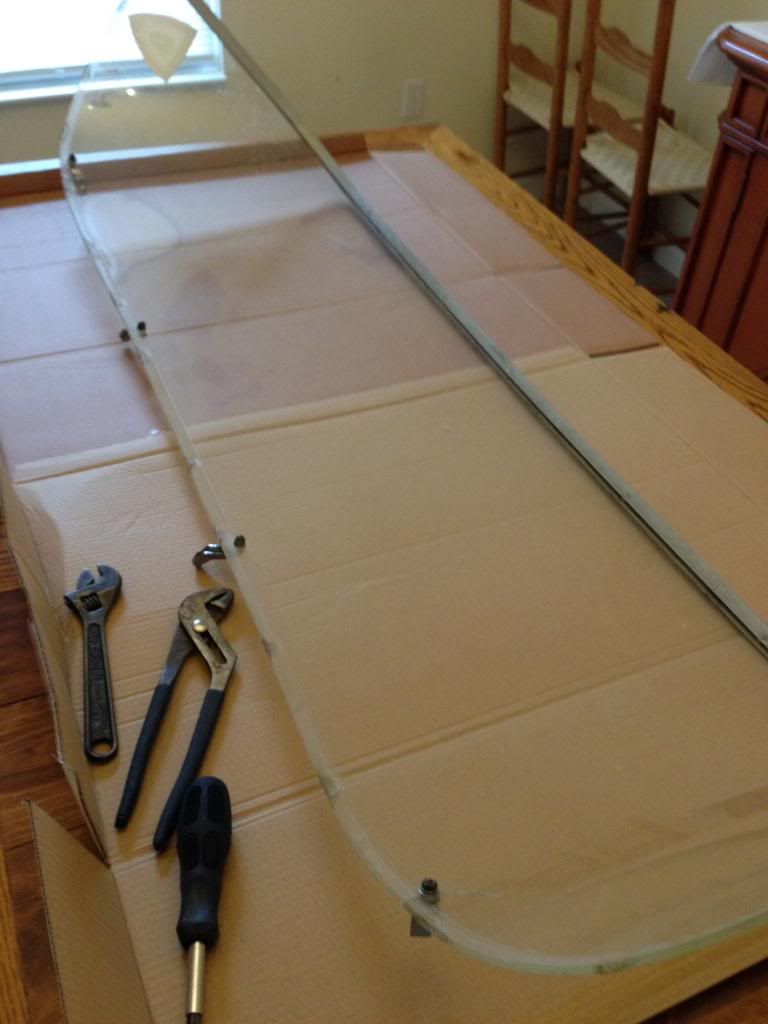
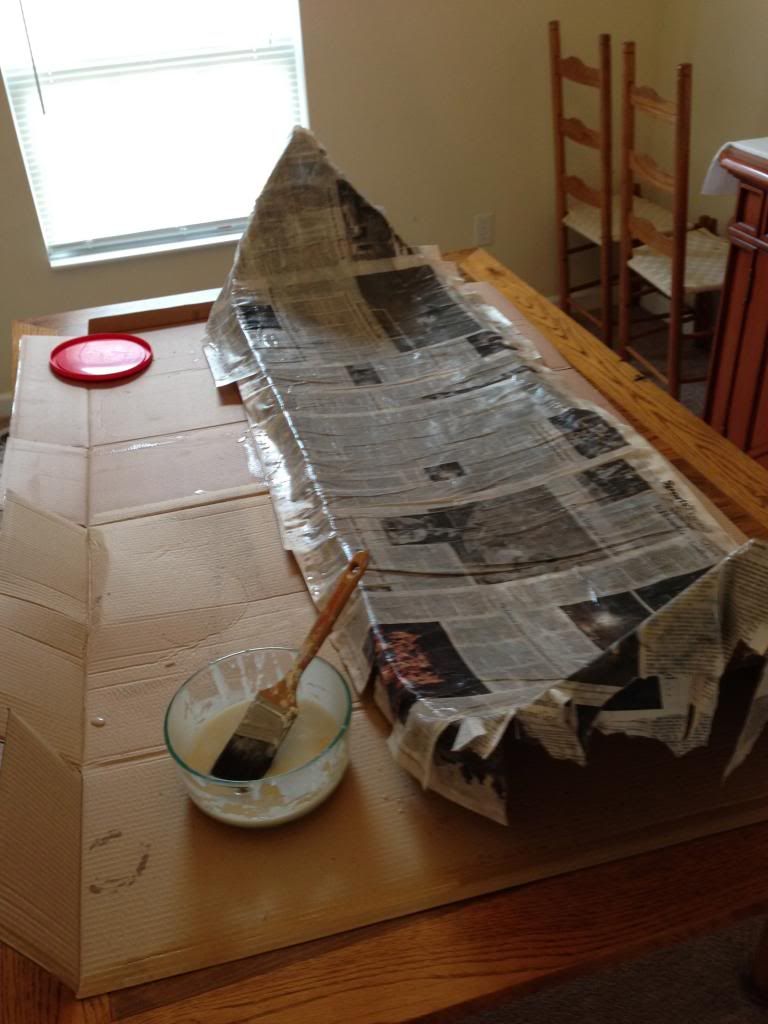
Making the mold Trace the curve onto three pieces of ?? plywood and cut them out (Figure 2). Again, accuracy here is very important. I was a bit sloppy and ended up using more Bondo than I might have otherwise. Cut two cross webs from the same ?? plywood (Figure 3). Cut the cross webbing length to match the width of the acrylic sheet (24 inches for the Charger application). Slot each of the webs (figures 2 and 3) like a cheep bookshelf so that they fit together snugly like shown in Figure 4. Cut a number of large holes in the each of the webs (Figure 2). These holes are needed so that hot air can be circulated inside the mold during processing. At each end of the curved webs cut a notch to fit a cross stringer (Figure 2). Cut two 24? cross stringers from 1?x 3/4? lumber that is dry and knot free. Any pitch still in the wood will create a lot of smoke during processing. I never had a fire but a few times I wondered and stopped to check. Once the web pieces are assembled, position the good windshield over them to make sure you have the right shape. When you are satisfied, put a few sheetrock screws into each joint to hold it together rigidly. Cut a piece of ?? finish grade plywood the width of the webbing and total length of the curve (24? x 38? for the this application). Cut the plywood so that the wood grain structure on the mold surface will run lengthwise. This is necessary to keep the curve smooth without splitting during bending. In order to bend the ?? plywood over the webbing, first make ?relief cuts? on the bottom side (Figure 5). I made the cuts 1/8? wide, spaced 1/8? apart and approximately 3/16? deep. The relief cuts are required over the entire length of any significant bend radius. Fasten plywood to the webbing cross stringer at the mold flat end with screws and work your way along towards the bent end with a screw every few inches. Counter sink each screw so that the head is below the surface. Soaking the bent part of the plywood with water prior to bending will help eliminate splitting. If you are using ?interior? grade plywood, don?t soak it so much as to cause the glue lines to fail. Once the plywood is screwed down, check the shape again?just to be sure. The hot acrylic is limp like a spaghetti noodle and will take on any irregularity in the mold surface. Use a carpenter?s square, Bondo and an automotive sanding long board to find, fill and flatten the screw heads and other bumps or dips. #60 grit sand paper will cut quickly. When sanding a problem area, be sure to use the sanding long board and sand in every direction to prevent creating a new problem. When you are done, you should be able to close your eyes and wipe your hand all around the surface without feeling any abrupt curvature changes or bumps. Position the good windshield onto the mold and trace its outline onto the mold. Remove the window and very carefully position the flat pattern onto the mold making sure it very closely fits the window outline on the mold. Flip the flat pattern over exactly as a mirror image onto the mold. Trace the flat pattern outline onto the mold a second time. This second outline is of the windshield half being replaced (Figures 6 and 7). Mark each outline ?right? or ?left? so that you don?t get confused later. If the alignment is wrong, your final product will not be curved correctly. Again, the hot acrylic will take on any shape or irregularity it comes into contact with. So to protect the acrylic from sanding and other small marks, purchase a piece of soft flannel from a fabric store and cover the mold surface with it (Figure 11).
Building an oven My oven consisted of a 39?x 26?x15? box (with no bottom) built from ?? plywood and 1? x 3/4? lumber for corner structure. Cut Holes for heat guns and vents near the side top corners (Figure 8). Position the heat gun holes so that the guns do not impinge directly on the acrylic. Cut a large ?window? for viewing in the top. Cut a strategically placed (aligned with the hole in curved web 3) heat gun hole low on the side for heating the mold interior (Figure 9). Line the interior with cardboard for insulation. I used short pieces of wire to attach the cardboard to the walls ?twist tie? style. Assuming you cut up a cardboard box, you must remove any tape or it too will melt and smoke during processing. Drill a number of holes for a BBQ thermometer. An oven this large requires several heat guns. In my case three, but four may have been better. Heat guns with a variable temperature output seemed to work best.
Processing Different types of acrylic form at different temperatures so be sure you check with your supplier. Cast acrylic works best for molding because it molds at a lower temperature and is more forgiving than extruded acrylic. Typical forming temperature is between 290F and 320F. While heating the oven, the vents may be opened or closed help regulate and balance the temperature. My oven was leaky enough around the bottom that vents were not really necessary. Because the acrylic will expand and contract through the heating/cooling cycle(s), it best not to clamp it down. I held it in place by a small hole drilled in the edge margin of the flat end. A piece of wire was inserted through the hole and a like hole in the mold (Figure 10). Last thing before processing, remove the protective face sheets from the acrylic. Be careful to not destroy at least one of the face sheets. Carefully roll it up. You will need to re-apply it later to protect the acrylic from damage during trimming. Assemble all of the components: mold, flannel, acrylic, oven, heat guns, and thermometer (Figure 11). The mold itself will take the longest to heat so give it some preheating before turning on the main heaters. Once the mold is preheated to around 200 degrees (15 minutes), turn on the main heaters and monitor the temp with a BBQ thermometer. I found heating times to be between 30 and 40 minutes. Adding a forth heater may decrease the time. Let the acrylic drape over the mold and when ready, remove the heaters, cover the holes, and close the vents. Acrylic has a bit of ?memory? and will tend to go back towards its pre-molded shape as it cools. I solved this problem by heating the part several times and each time cooling it as slowly as possible. If the center of the panel cools faster than the perimeter, a stress dimple will appear. This is why preheating the mold is critical. I left the mold heater in place and running for the first few minutes of the cooling cycle. Just to keep the mold hot. Acrylic can be re-heated many times so if it does not come out right, just process it again. I purchased two sheets of acrylic; one for experimenting and one for the final product. When satisfied with the panel shape and it is cool, remove the oven and panel from the mold. Remove the flannel sheet and reposition the panel onto the mold. Line up the flat pattern, being sure you have the correct side up, with the marks on the mold, and outline the flat pattern onto the panel. A permanent ink ?Sharpie? works well. Any erroneous marks can be removed with rubbing alcohol. Remove the panel from the mold, re-apply the protective face sheet, and trim off the edge margin. I used a band saw for the major cutting and the sanding long board for final smoothing of the edges. Knock the bur off all the edges to help facilitate re-assembly into the frame.
Assembly in the frame This is simple in principle but proved challenging in practice. Several tips: 1) Smooth the bur off the panel edges to help keep it from hanging up on the seal. 2) Get a buddy to help. 3) Retain the window rim seals to the window panel with tape before assembly. The exposed tape can be trimmed off later.
Have fun and happy boating! Steve