Here we go - Starcraft Mr 180 CC

Status
Not open for further replies.

scstar

Cadet
Joined
Jul 6, 2011
Messages
23
There is never a good time here in South Carolina to have a boat out of commission
It's either too hot or too cold to do any work or the fishing is too good, but I can't stand it any more and I've got to just do it.
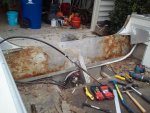
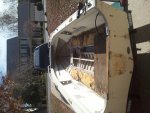
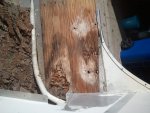
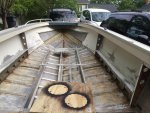
We got so much rain here this summer nothing ever dried out between fishing trips, and the soft spots in the deck have gone to all over generalized soft deck.
What's worse it I discovered the PO put the new deck on top of the old rotten deck.
Taking a week off in October for tear out
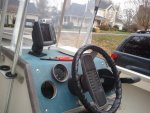
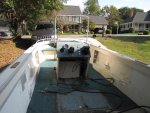
I hear you like pics so here a a few.
View attachment 212944
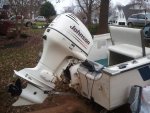
2011-11-27 13.36.46.jpg2011-11-27 13.35.27.jpg
 

classiccat

"Captain" + Starmada Splash Of The Year 2020
Joined
Dec 20, 2010
Messages
3,405
Re: Here we go - Starcraft Mr 180 CC

Welcome!

Lookin' forward to the destruction...and more pics! :hungry: :lol:
 

jasoutside

Supreme Mariner
Joined
Dec 20, 2009
Messages
13,269
Re: Here we go - Starcraft Mr 180 CC

Well all right, let's get at it!:plane:
 

barato2

Commander
Joined
Dec 7, 2010
Messages
2,956
Re: Here we go - Starcraft Mr 180 CC

the good news is that you have maybe the easiest Starcraft to rebuild this side of a 14' skiff. now is also a good time to add wire etc under the floor for any future electrical additions/upgrades.
 

scstar

Cadet
Joined
Jul 6, 2011
Messages
23
Re: Here we go - Starcraft Mr 180 CC

It's good to know it's one of the easier ones - been reading up on all the re-builds, and there is a lot of information here.
Ordered Guvit already, and starting to think about putting battery boxes up front for the trolling motor.
 

scstar

Cadet
Joined
Jul 6, 2011
Messages
23
Re: Here we go - Starcraft Mr 180 CC

Got the stand built for the motor on Saturday, and motor off on Sunday, my goal was to get the console out too, but got inturrupted by a intoxicated teenage girl smashing into my mailbox so I had to deal with that instead.

IMG_3906.jpgIMG_3909.jpg
 

classiccat

"Captain" + Starmada Splash Of The Year 2020
Joined
Dec 20, 2010
Messages
3,405
Re: Here we go - Starcraft Mr 180 CC

Nice progress! Getting the motor off can be a major hurdle!

...I bet the drunk teenager wishes that her car could hurdle... :facepalm: I hope that everyone is OK!
 

roscoe

Supreme Mariner
Joined
Oct 30, 2002
Messages
21,667
Re: Here we go - Starcraft Mr 180 CC

I've been fishing with a refurbished '73 Mariner for a few years.

Just picked up an 81 MR 180.

She is completely gutted now, and I am in the planning stages of the rebuild.

Console style and design, seating, storage, additional floatation pockets, rod storage, etc.

The main reason for the move from the 73 to the 81, is the smaller 11" splash well vs. the 25" splash well on the older model, that adds more floor space, and makes running the tiller kicker motor so much easier.

I'm looking forward to seeing your progress, and will post mine, when I actually get started.
 

scstar

Cadet
Joined
Jul 6, 2011
Messages
23
Re: Here we go - Starcraft Mr 180 CC

Hey Roscoe - look forward to seeing some pic's
I am planning on tearing out the floor on Wed - weather and work permitting.
I am interested in your plans - trying to figure out some of the same right now.

One thing I want to do is put a fuel tank under the deck but I want to make sure there is enough space before I order one.
I took the oil injection off my motor and have been premixing so I am thinking about putting that back in if I go with an under the deck tank- not sure how much that's going to set me back in the fundage dept. since I foolishly sold the oil tank, but it might get to be too much.

BTW - the girl was much better off than the mailbox and she was not a teenager like I thought - just me getting old I guess.
 
Last edited:

1973Chieftain

Lieutenant
Joined
May 31, 2010
Messages
1,298
Re: Here we go - Starcraft Mr 180 CC

Nice looking rig! I also have a newer deck atop an old rotten one, likely my winter project. Have you thought of a 12-15 gallon red plastic tank under the splashwell? Also, I've seen oil tanks on Craigslist and ebay for under $50.. not too pricey.
 

scstar

Cadet
Joined
Jul 6, 2011
Messages
23
Re: Here we go - Starcraft Mr 180 CC

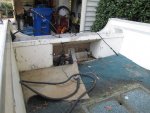
Got most of the floor out. Tear out was a chore since there were two layers of wood to tear out.

The transom looked OK until I took out the foam in the corners, and it was rotten behind there.

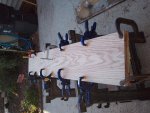
Got it out and a new one glued up still need to cut it to size and put some kind of epoxy coating on it.

Used two 3/4 planks of red oak glued together to make 1 1/2 " thickness. Should be pretty solid.

Once the transom is done I'm taking out the rest of the floor & then the foam.

IMG_20131110_152438.jpgIMG_20131109_150131.jpgIMG_20131109_124550.jpgIMG_20131109_124648.jpg
 

jbcurt00

Moderator
Staff member
Joined
Oct 25, 2011
Messages
24,871
Re: Here we go - Starcraft Mr 180 CC

Wow, what did that red oak cost ya?

Exterior plywood would have been sufficient, perhaps even a better choice. Did you remake the top angles too? Many choose to make them as a continuous part of the transom, to further spread the load applied to any part of the transom.

Looks like you used Gorilla Glue or similar polyurethane based glue, that was an excellent choice. What's your sealing plan for the transom? On dimensional lumber, I'd highly recommed using epoxy 1st, and paying extra attention to the end grain of the planks and ALL the penetrations you drill/screw into the planks......
 

scstar

Cadet
Joined
Jul 6, 2011
Messages
23
Re: Here we go - Starcraft Mr 180 CC

Thanks for the advice - it was an impulse buy.

I had a sheet of 3/4 pine sheathing that I cut out, and it had a huge 3/4" gap in the interior ply that went the full width of the board which is only 1 15/16' wide.

Probably would have worked fine, and I would have had no problem using it on the floor, but it just did not sit well with me going on the transom.

Went back to Lowes to get a better grade and all they had in stock was pressure treated exterior which won't go good with the aluminum, and the same stuff I already had, some cheap import whitewood, and some interior plywood.

I saw this and thought what the heck I can tell people it's got a solid oak transom - both pieces together were $80.

Good point about the end grain - I was thinking about sealing it with a 1/4"x1 1/2 " strip of wood glued on the ends.
I'm a little worried about warping and cupping if it gets too wet, but I am planning on sealing it good with epoxy.

The top pieces will be made out of the pine - they were separate pieces originally
 

ctswf

Chief Petty Officer
Joined
Aug 7, 2012
Messages
424
Re: Here we go - Starcraft Mr 180 CC

Nice boat, I love that tiny splashwell:)
 

scstar

Cadet
Joined
Jul 6, 2011
Messages
23
Re: Here we go - Starcraft Mr 180 CC

Go really busy at work and had to put the project on hold. Too cold this winter anyway.
It's a good thing though the red oak transom warped and cracked sitting in the garage over the winter just from the humidity.
I found a local place that sells AB marine fir plywood and that's what I made the replacement from.
I think I am going to use the red oak for a work bench in the garage so all is not lost.

foam out.jpg


All the foam is out and I am ready to start putting it back together after a final leak test.
 

scstar

Cadet
Joined
Jul 6, 2011
Messages
23
Re: Here we go - Starcraft Mr 180 CC

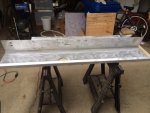
I got to work on the motor well and removed the old paint with a wire cup brush most of it was gone aready

Motor Well.jpg

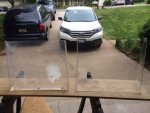
Also finished the new windsheild - made it a little wider and taller.
You could hardly see thru the old one it was fogged up so bad
Never bent plexiglas before but it's really not hard it you are patient with the heat gun

Windsheild.jpg
 

GA_Boater

Honorary Moderator Emeritus
Joined
May 24, 2011
Messages
49,038
Re: Here we go - Starcraft Mr 180 CC

You bent the W/S real nice, SC.
 

jbcurt00

Moderator
Staff member
Joined
Oct 25, 2011
Messages
24,871
Re: Here we go - Starcraft Mr 180 CC

details on bending the plexi would be great

nice work
 

Watermann

Starmada Splash of the Year 2014
Joined
Jan 12, 2013
Messages
13,753
Re: Here we go - Starcraft Mr 180 CC

Nice rare CC project you have. Lots of work ahead of you on her. Windshield looks like 3/16" polycarb, looks like you went nice and slow to keep it from cracking or distorting.
 
Status
Not open for further replies.
Top