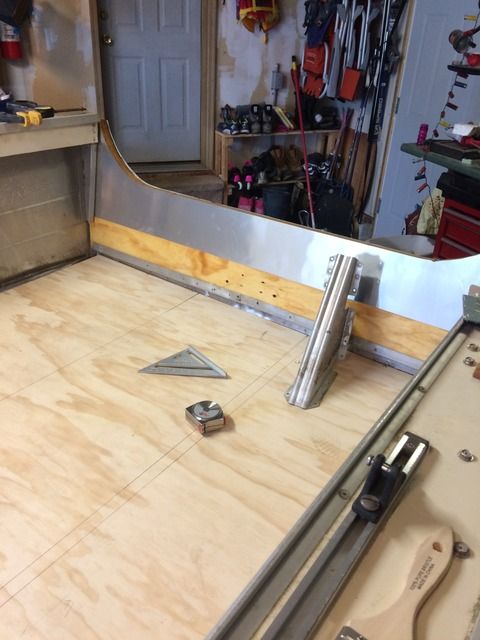
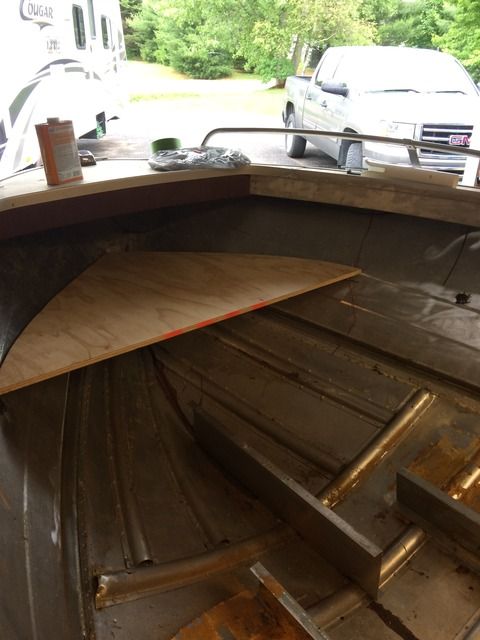
Restoration/Repurpose 1982 160SS

classiccat

"Captain" + Starmada Splash Of The Year 2020
Joined
Dec 20, 2010
Messages
3,405
^ agree. Also makes getting in/out of the boat easier. :thumb:
 

pckeen

Commander
Joined
Jun 20, 2012
Messages
2,067
Is pulling the splash well required for a transom rebuild? I see so many that have, but thought I read that it isn't required. Was thinking of getting into the garage tomorrow, to start in on a leak test, then on to transom removal.

Not required. You have to remove the transom cap and all the screws that hold the splashwell to the transom.
 

VT Dukhntr

Cadet
Joined
Sep 13, 2007
Messages
27
Not required. You have to remove the transom cap and all the screws that hold the splashwell to the transom.

I figured that much. Just wasn't big on drilling out even more rivets. Hopefully the 728 screws all come out smoothly.
 

MNhunter1

Ensign
Joined
May 12, 2014
Messages
979
Not many rivets involved in removing the splashwell. My personal opinion is that the splashwell removal is less labor intensive than attempting to effectively replace the transom with it still in place. Proper sealing of the thru bolts, splashwell drain tubes, and investigating/addressing any potential underlying issues like transom skin corrosion or knee brace repair is done much more effectively and efficiently with the splashwell removed.
 

VT Dukhntr

Cadet
Joined
Sep 13, 2007
Messages
27
Not many rivets involved in removing the splashwell. My personal opinion is that the splashwell removal is less labor intensive than attempting to effectively replace the transom with it still in place. Proper sealing of the thru bolts, splashwell drain tubes, and investigating/addressing any potential underlying issues like transom skin corrosion or knee brace repair is done much more effectively and efficiently with the splashwell removed.

A solid arguement to pull it out, thanks for the reply.
 

pckeen

Commander
Joined
Jun 20, 2012
Messages
2,067
Oh yes, and don't forget to remove the drain tubes (grind down the lip and tap it out with a hammer and screwdriver).
 

VT Dukhntr

Cadet
Joined
Sep 13, 2007
Messages
27
I found that the Z channel and a portion of the transom brace had busted rivets. No cracks in the aluminum, just busted rivets. Wondering if I should rivet this back together or instead fix with Stainless machine screws with nuts? Haven't done a lot of solid rivets in my life, so I don't want to mess them up
 
Last edited:

Toby VT

Cadet
Joined
Sep 8, 2016
Messages
20
VT Dukhntr can you please look at your messages? I want to acquire the windshield! Thanks!
 

Watermann

Starmada Splash of the Year 2014
Joined
Jan 12, 2013
Messages
13,753
The entire transom is full of SS nuts and bolts (machine screws too) so several more is no big deal, just be sure to use nyloc nuts and a washer on the inside not on the outside. When you tighten thru the hull bolts use plenty of 5200, working it around coating the hole before inserting the screw, then a small bead on the outside enough to squeeze out. The inside will have plenty of 5200 come out when doing the mentioned slathering. Then have someone hold the machine screw head solid while on the inside you tighten down the nyloc nut, this will keep the screw head from spinning out the 5200 and make a much more positive seal. Wipe excess 5200 off the outside screw head and done.

I know everything has to be so danged anal around here doesn't it? :lol:
 

VT Dukhntr

Cadet
Joined
Sep 13, 2007
Messages
27
There is what appears to be gasket material on the screw flange of the splash well. My thought is scrape all that off, and apply a bead of 5200, when I reinstall the splash. Anyone else do it like that, or is there a source for the gasket material?
 

MNhunter1

Ensign
Joined
May 12, 2014
Messages
979
There is what appears to be gasket material on the screw flange of the splash well. My thought is scrape all that off, and apply a bead of 5200, when I reinstall the splash. Anyone else do it like that, or is there a source for the gasket material?


I have seen glazing tape (1/8"?) that is often used on glass windows recommended, but have never used it myself. I believe most just stick with the 5200.

I coated each screw before driving it home and then ran a bead along the seam, let cure, and topped it with a coat of paint.


Candutch

Chief Petty Officer
Joined
May 8, 2015
Messages
637
A bead 5200 between the SW screw strip and transom and dipped each screw in 5200 then ran a bead of 5200 in the splashwell along the transom. No water getting in there for a long time I hope.
 

VT Dukhntr

Cadet
Joined
Sep 13, 2007
Messages
27
Been a while, so I guess I should pay the mob. From another post here, I skinned the exposed part of the transom with aluminum. Nothing structural, just wanted to avoid sun exposure


Also modified the bow, by removing the old bench, and will replace with short bench I. The front. Liking all the open space I will have


Been working on all the small stuff like new rivets, filling in screw holes, fixing corrosion spots, etc
Need some help with replacing a few more rivets, and will be ready to flip for paint prep. Moving along nicely so far.
 

Watermann

Starmada Splash of the Year 2014
Joined
Jan 12, 2013
Messages
13,753
Hey those smalls sure add up quick and make the end that much closer. :encouragement:
 

VT Dukhntr

Cadet
Joined
Sep 13, 2007
Messages
27
Been a while since I made an update. Progress was a bit slow, but picked up speed. Got the hull painted, and floor is all attached. Was hoping to lay Nautolex today.
While making holes, I thought I was being careful. However, got in a little too much of a hurry and punched one through the hull. It's a small hole, but right through new paint. Little MT will fix it, not to worried. Just a moment of being disgruntled!! A lot of work done, then bang...blemish!!!
Wondering where everyone is hosting pictures to share, now that Photobucket has taken all our pictures hostage?
 

coostv

Petty Officer 1st Class
Joined
Mar 21, 2010
Messages
230
I have been using Tinypic for as long as I can remember, but that one has become flaky lately. PB owns it and whether it is intentional or not, it seems they are trying to kill it... Everytime I try to upload new photos I get an error saying "404 the photo does not exist". So, I am now trying Imgur.
 

Watermann

Starmada Splash of the Year 2014
Joined
Jan 12, 2013
Messages
13,753
I've been using MS OneDrive, every MS PC and device on the planet has their little cloud logo on it. I replaced every photo in all my threads linked to OD. No issues at all, take a look.
 
Top