Missouri 1983 SuperSport 16

jbcurt00

Moderator
Staff member
Joined
Oct 25, 2011
Messages
24,863
No, IMO either epoxy or Poly resin is more expensive and harder to work w. Epoxy takes a while to cure, polyester is a hazmat. TB3 is water cleanup until it cures and water/boil proof when it does, and cures fairly quick. Polyurethane glue is abut midway between easy/forgiving and being more difficult to use.

My last 2 ply transom glue ups were done w polyurethane (gorilla both times) but thats because I wanted to use it the 1st time and had it left over for the 2nd.

TB3 is about $30/gal here, and will probably do a whole 18ft boat's wood gluing needs, maybe a 21ftr..... Easy to use, relatively cheap (definitely inexpensive) water cleanup before cure, water/boil proof when cured and it cures fairly quick. Whats not to like?

Several have used epoxy to laminate the transom ply. A few even used glass in between the ply sheets. As far as I know, none have come back to complain that they used it w or w out glass.

IMO, no upside to using polyester and glass, and I wouldnt recommend it anywhere else on a build, so why bother?


At least I'd recommend using epoxy elsewhere on a build, so if you have it on hand, you could use it.

But it takes quite a bit, you'll need to mix more then you need, you dont want to leave epoxy voids or run out w out coating the entire surface. That epoxy could have been used elsewhere, and there are other good choices, so why use the epoxy?

As long as you meant epoxy and glass, go ahead and use that if you want to, are comfortable w its use and the slower cure. No problems will occur if its done well....
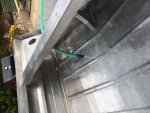
 

Laker99

Petty Officer 3rd Class
Joined
Feb 27, 2013
Messages
93
I'll just keep it simple and go with Tite Bond 3. I've used it before on other projects. That and the spar varnish is much simpler and I'm sure this approach will outlive me!

I just had some left over polyester resin and cloth from putting in new stringers and floor in a 1969 Glastron that I have since I bought a 5 gallon bucket. Most of the fiberglass rebuilds put the chop mat between the two layers of plywood. I've seen people use Liquid Nails too but have seen a few of those delaminate. So TB3 it is. Water cleanup sure is nice.

I have to say I like working with the aluminum boat so far - much cleaner and simpler.
 

Laker99

Petty Officer 3rd Class
Joined
Feb 27, 2013
Messages
93
No Title

​Finally got to the transom last night. I got derailed this week with a family room remodel and had to put together an entertainment center with lousy directions that took about 6 hours. I want to meet the people that write these pictogram instructions, don't label parts, and then send you more parts than you need just to keep it interesting.

​Used 3/4" marine plywood and 2/3rds of a bottle of glue. Spread the glue with a plastic spackling knife so the wood was completely covered. It oozed out the sides so I should have good coverage. Used every clamp in the house. I also drilled holes where I know the splashwell drains will go and ran a bolt through so I could get some good pressure on the center of the transom. I'll let it dry for three days this weekend before I pull the clamps off. The hull is in the shed at our lake house. I'll be there this weekend and work some more on the rust and carpet glue removal. I've come this far so I may as well try to get it to bare metal especially since I have decided to paint a lot of the interior rather than upholster it.
 

Attachments

  • photo260738.JPG
    photo260738.JPG
    90.7 KB · Views: 2
  • photo260739.JPG
    photo260739.JPG
    104.1 KB · Views: 11

Watermann

Starmada Splash of the Year 2014
Joined
Jan 12, 2013
Messages
13,753
Okay that is one serious clamp job! It should only take that TB3 24 hours set up like a rock.

fetch
 

Laker99

Petty Officer 3rd Class
Joined
Feb 27, 2013
Messages
93
I like clamps! :) I need to get on the rivet train next. I've been eyeing up what tools I need for solid rivets.
 

redneck joe

Supreme Mariner
Joined
Mar 18, 2009
Messages
10,263
Ive heard there is an air riveter out there and i have comfirmed here in iboats from the experts that tool do NOT apply to the rehab budget.
this has been a PSA
 

Watermann

Starmada Splash of the Year 2014
Joined
Jan 12, 2013
Messages
13,753
Budget..... :pound: :der:

Let me know Laker if you want some info and I can post up the rivet set, bar I have and type of rivets.
 

Tnstratofam

Commander
Joined
Aug 18, 2013
Messages
2,679
I like clamps! :) I need to get on the rivet train next. I've been eyeing up what tools I need for solid rivets.


This conjures up images of men in bell bottom pants and leisure suits bucking rivets to the tune of Love Train! :lol:
 

Laker99

Petty Officer 3rd Class
Joined
Feb 27, 2013
Messages
93
No Title

Found a nice trailer today. It fits perfectly and is a 2017 model. A guy bought the trailer without measuring correctly and his boat did not fit. He could not return it to the dealer because it was titled and the warranty would be void. It's only a month old and I paid half price. Had adjustable bunks, wind guides, and winch stand. It's built really well. 13" wheels. I need to get some kind of a vee bracket for the front for the bow to rest in. There are all of these aluminum boat manufacturers in SW MO and NW AR so you can find odds and end trailers at a good price. Tracker, Lowe, etc. are here. They deliver a rig and the boat gets damaged or something so they part out the trailers. There are a few dealers that buy them at auction and then sell at auction. This seemed less expensive than a project trailer. The only thing its missing is a swingaway tongue which I can add.

​Tomorrow is paint and glue remover day. I bought a bunch of goop. Curious to see how it works. I also noticed crawling around under the boat I have a few rivets knocked off. I think this boat ran in some rocky rivers in SW MN. I've got lots of holes to fix too with the aluminum flashing and JB trick.
 

Attachments

  • photo260839.JPG
    photo260839.JPG
    156 KB · Views: 2
  • photo260840.JPG
    photo260840.JPG
    160.3 KB · Views: 2
  • photo260841.JPG
    photo260841.JPG
    153.1 KB · Views: 2
  • photo260842.JPG
    photo260842.JPG
    115.6 KB · Views: 2
  • photo260843.JPG
    photo260843.JPG
    102.7 KB · Views: 2
  • photo260844.JPG
    photo260844.JPG
    112.1 KB · Views: 2

Watermann

Starmada Splash of the Year 2014
Joined
Jan 12, 2013
Messages
13,753
Oh too late I was going to say save that super beautiful new trailer and yourself the heartache and do all your dirty work and painting on the old trailer and then swap it over. Perfect fit BTW. :thumb:

I've never really had any luck with the Goop stuff on decades old adhesives.
 

Laker99

Petty Officer 3rd Class
Joined
Feb 27, 2013
Messages
93
I don't have an old trailer for this boat but I do have a cradle made of 2 x 6's on casters that I can use so I don't mess it up. I just put it on there to see if it fit and to adjust the bunks. I have Goof Off, Jasco, and Klean Strip sprayable, and rust remover so something ought to work. I'm probably going to have to flip the hull and take it to bare metal. I'm just working on the inside tomorrow. It's got a lot of knicks on the outside. I was hoping I could just rough it up and paint it but that doesn't seem like a good call. Do you all use JB as a filler when you have some gouges and creases?
 

mbroughton02

Petty Officer 2nd Class
Joined
Jan 17, 2015
Messages
198
I don't have an old trailer for this boat but I do have a cradle made of 2 x 6's on casters that I can use so I don't mess it up. I just put it on there to see if it fit and to adjust the bunks. I have Goof Off, Jasco, and Klean Strip sprayable, and rust remover so something ought to work. I'm probably going to have to flip the hull and take it to bare metal. I'm just working on the inside tomorrow. It's got a lot of knicks on the outside. I was hoping I could just rough it up and paint it but that doesn't seem like a good call. Do you all use JB as a filler when you have some gouges and creases?
I tried using the marine grade JB weld and for me it did okay with smaller holes. For bigger holes, gouges, etc., Marine Tex worked much better for me. It is thicker and seems to spread / sand better. Just my 2 cents...
 

Laker99

Petty Officer 3rd Class
Joined
Feb 27, 2013
Messages
93
No Title

Well, after a several month break I got back to work on this today. I was in Italy for a month with work and then had a month of getting kids situated after college in two different cities. I pretty much have the inside all cleaned up. It was 90 degrees here today and the stripper worked great in the direct sunlight. In fact, I moved the boat into the shade as it seemed like the stripper would dry out too fast. I used the sprayable stripper and it was like cracking an egg in a hot frying pan. I had previously used a rust remover and then spend three hours cleaning up the little spots that I missed and the splashwell. It had a lot of paint and primer on it which took sever tries to get to bare metal. I used a putty knife, a straight edge razor, and steel wool to get this cleaned up. I'm going to try to get the interior pieces such as the consoles, bow seating storage piece and the stern flotation covers done tomorrow. My goal is to be able to flip the boat and start on the bottom by the weekend. I'm having a hard time bringing myself to put paint or glue on this clean metal after all of the work to get it cleaned up.

​I later read on the rust remover not to use it on aluminum. I got it off of there pretty quick but I can see where it discolored the aluminum a bit but the stripper seems to have made the metal uniform appearing once again. It's interesting how the steel corrodes the aluminum. My biggest corrosion is where they used steel bolts for the interior panels. You would think they would know better.

​I'm going to get it off this nice trailer so no worries there. I was super careful working on the inside of the boat. I keep the boat at a metal building and then bring it to the house when I work on it. It's going to get turtled on the driveway for a while which will be a bit of an eyesore but so be it. I guess I'm getting close to needing to order a few rivet tools and some rivets.
 

Attachments

  • photo269735.jpg
    photo269735.jpg
    87.3 KB · Views: 2

Laker99

Petty Officer 3rd Class
Joined
Feb 27, 2013
Messages
93
Thanks so much. I'll have to get an order together. This is very helpful. Don
 

Laker99

Petty Officer 3rd Class
Joined
Feb 27, 2013
Messages
93
No Title

Made some progress on this the past few days. I fixed all of the rivets a couple of weeks ago including a couple of patches on the transom where various transducers, speedo pickups, and ladders left 19 holes. Did my leak test and nothing leaked. I was sort of surprised since this was my first attempt at solid rivets. I'm going to put some 5200 along the seams and over some of that StarCraft brown goop that remains.

​I also got bold and practiced painting with my HVLP gun that I bought. I bought some Rusto, thinned it, and practiced on a barrel. I watched several YouTube videos and if I have to say so myself it turned out pretty good - no runs. I have never painted before with a sprayer so I was pleasantly surprised. Now I need to get my paint ordered.
 

Attachments

  • photo272738.jpg
    photo272738.jpg
    116.4 KB · Views: 1
  • photo274296.JPG
    photo274296.JPG
    117.9 KB · Views: 1
  • photo274297.JPG
    photo274297.JPG
    119.2 KB · Views: 1
  • photo274298.JPG
    photo274298.JPG
    155.6 KB · Views: 1

Watermann

Starmada Splash of the Year 2014
Joined
Jan 12, 2013
Messages
13,753
Nice forward progress and no leaks really is a bonus :thumb:
 

dozerII

Admiral
Joined
Oct 25, 2009
Messages
6,527
Really nice clean hull, I would recommend Gluvit over 5200 for the seams. 5220 will sit on the surface and gluvit will penetrate and wick into all the voids.
 

Laker99

Petty Officer 3rd Class
Joined
Feb 27, 2013
Messages
93
Good point on the Gluvit. I think I read that once upon a time and forgot. Thanks for the reminder
 
Top