Yellow Submarine

GA_Boater

Honorary Moderator Emeritus
Joined
May 24, 2011
Messages
49,038
I'm a bottom feeder and I would keep both tanks on the side mounts. Clean out the goopy one, it may just be ancient gas. The good thing is side tanks are easier to replace than under deck tanks and you have both tanks now. Add a water separator/filter and you'll be good.
 

jbcurt00

Moderator
Staff member
Joined
Oct 25, 2011
Messages
24,871
Yep ^^^

A $100 spent on a fuel tank sealer and as is where is mounting is cheaper then a new tank. Might pressure test them both before and after tank sealing. Even $200 to seal both tanks would be cheaper then most new belly tanks to feed a motor on a 25ftr.

Not likely to want to use a 19 or 26gal tank, or at least I wouldnt w a 26ft cabin equipped week+ cruiser.....
 

pckeen

Commander
Joined
Jun 20, 2012
Messages
2,067
As it turned out, the tanks were not properly mounted, so they just slid out.

More work happening this morning, but I have a line on a well priced donor boat in Ham Lake Minnesota. Is there anyone in the area who could take a look at it and do a compression check?
 

Watermann

Starmada Splash of the Year 2014
Joined
Jan 12, 2013
Messages
13,753
Too much bad has happened to me and others for me to even think about using an old steel gas tanks from the 70's. I would get rid of everything fuel related and put in all new, can't go wrong then.

As for the tank brackets. I keep forgetting about some guys aversion to removing any of the through the hull rivets, I've replaced and made so many new holes for solid rivets that I don't even give it a second thought now. ;)
 

pckeen

Commander
Joined
Jun 20, 2012
Messages
2,067
I think I'll get these tanks replaced.

The interior is now completely out, except for the aluminum superstructure in the rear, which I intend to leave in place for the time being.


Watermann

Starmada Splash of the Year 2014
Joined
Jan 12, 2013
Messages
13,753
Nice work Peter, yeah the t bolts hold the top windshield on. I had to twist all mine off on my Chief, they were rusted tight. You should be able to see the nuts on the underside.
 

Candutch

Chief Petty Officer
Joined
May 8, 2015
Messages
637
Hey Peter, check out the brochures in the sticky at the top of the main page. There is a brochure with all the cruisers for 1976. I would think the 74 and 76 would be fairly similar.
Good job on gutting it, you flew through that. The aluminum looks pretty clean to, that's a bonus.
 

pckeen

Commander
Joined
Jun 20, 2012
Messages
2,067
Nice work Peter, yeah the t bolts hold the top windshield on. I had to twist all mine off on my Chief, they were rusted tight. You should be able to see the nuts on the underside.

Thanks. I'll have to take the interior ceiling off to get at them.
 

pckeen

Commander
Joined
Jun 20, 2012
Messages
2,067
Hey Peter, check out the brochures in the sticky at the top of the main page. There is a brochure with all the cruisers for 1976. I would think the 74 and 76 would be fairly similar.
Good job on gutting it, you flew through that. The aluminum looks pretty clean to, that's a bonus.

Good advice. I looked at them, and mine looks like the 25 foot 1976 Chief, but I'm still trying to work out if the 74 came with a factory hard top.
 

Watermann

Starmada Splash of the Year 2014
Joined
Jan 12, 2013
Messages
13,753

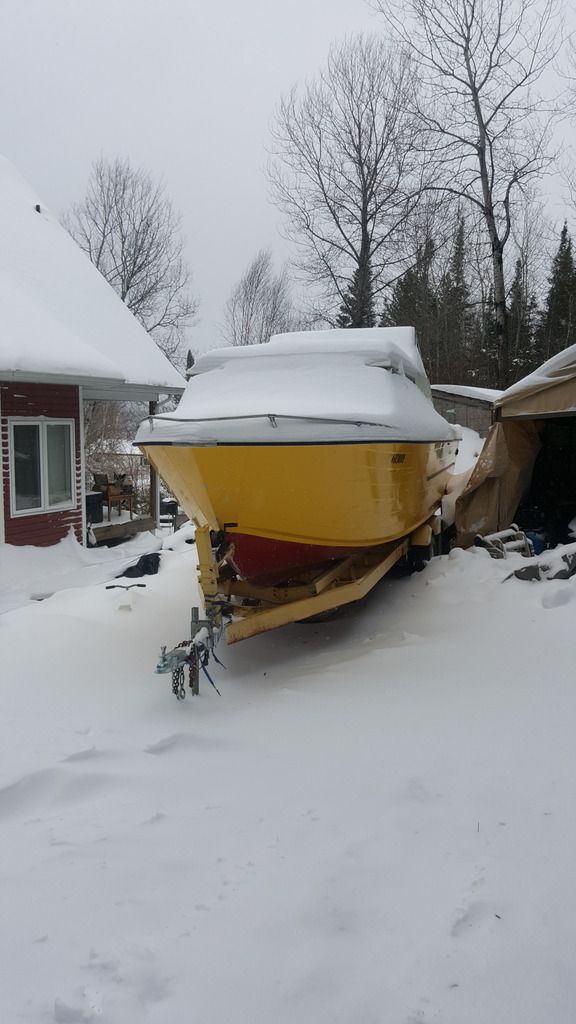
Gasp it's almost May for crying out loud! :faint2:

20170427_124212_zps0i4hr8mp.jpg
 

coostv

Petty Officer 1st Class
Joined
Mar 21, 2010
Messages
230
Yuck, this is one reason I stick to the lower west part of Michigan (Grand Rapids area)! I would love to live in the Upper Peninsula (and have lived north of Marquette), but this time of year I am ready to be done with snow!

Project is looking great though!
 

Candutch

Chief Petty Officer
Joined
May 8, 2015
Messages
637
I feel your pain! We had that earlier this week. The joys of living north of the 49th.
 

pckeen

Commander
Joined
Jun 20, 2012
Messages
2,067
Nothing exciting, just necessary work tonight: dismantling the roof and preparing for a dump run.

Quick poll: the beaded polystrene blocks were mostly in good condition, without any significant damage. It'll save buying a lot of foam of I reuse them, and I'll be using closed cell foam board for anything I buy. What says the mob? Dump it or re-use it?
 
Last edited:

Candutch

Chief Petty Officer
Joined
May 8, 2015
Messages
637
I re-used the original that was in good shape but I'm in the minority. Most will tell you to garbage it. I figure it last 34 years, it was dry and in good shape it should last another 34. Anything that could come in direct contact with water was closed cell foam though.
 

jbcurt00

Moderator
Staff member
Joined
Oct 25, 2011
Messages
24,871
Old poly bead insulation tends to start losing white styro beads which decreases its flotation value and blocks/plugs the limber holes under the ribs.

It often stinks after being water soaked or being a critter habitat.

On a giant 26ft Starcraft, all new foam might be expensive I suppose but on most 14-18ftrs, its not a big expense.
 

Candutch

Chief Petty Officer
Joined
May 8, 2015
Messages
637
I'm envious of those of you that live south of the border. Unfortunately the prices here in Canada aren't as favorable. A 4 x 8 x 1.5" sheet here is $60 or if you want to by smaller a 2 x 8 x 1" will cost you $ 30. Even with reusing some of the square blocks under the casting decks, foam behind the side panels and some of the shaped foam along the stringers I still dropped over 200 bucks on the close cell foam.
I totally agree that all closed cell would be ideal but if trying to save some money to spend elswhere i dont see the problem with reusing what is good. The foam I saved was all dry and in great shape, anything suspect and the rodent nest was cut out and discarded. Everything on the bottom of the hull was discarded and replace with closed cell as well. The stuff last 34 years and the only thing that really destroyed my foam was the fuel and oil spillage and mice in the stern of the boat.
 

pckeen

Commander
Joined
Jun 20, 2012
Messages
2,067
OK - next step - get the 165 mercruiser engine out. I got the exhaust clamps loosened, unattached the water hose from the motor from the transom assembly, removed the trim pump, and removed the throttle cable.

ā€‹I've removed two large bolts that bolt the transom assembly to the engine, and I can see the two bolts holding the front motor bracket (which attaches to the engine with a single bolt), to the motor mounting board. Is there anything other than these three/four bolts that I should have to remove to get the engine out?
 
Last edited:

Watermann

Starmada Splash of the Year 2014
Joined
Jan 12, 2013
Messages
13,753
Wiring harness connections, fuel line to pump oh and of course the outdrive too. ;)
 
Top