'69 offshore rebuild- BMerr

BMerr509

Petty Officer 2nd Class
Joined
Jun 28, 2016
Messages
167
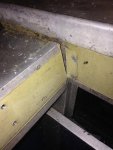
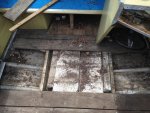
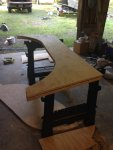
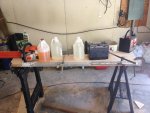
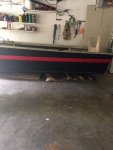
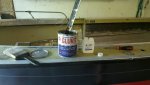
Guys i'm trying to plan out my floor, and with the help of CTWS's pictures (not sure if there's some kind of copyright issues, if so i apologize), i am able to get a good idea of what the boat underfloor looks like while being 1000 miles from it. My goal is to raise the floor about 3.5", so i was considering using 2x4's vertically before dropping in the 3/4" marine ply floor (probably every 12'' or so, or if you think that is overkill i can do 16"), sort of like a horizontal joist system. Of course, they will need to be epoxied, and instead of riveting them, i could use 5200 and a few deck screws to the stringers to support them from one side of the boat to the other, although once the ply gets dropped on them, they aren't going to go anywhere. Here is a pic to show (i'm sorry, i used paint without a mouse so getting a straight line was impossible, but you get the idea!). I think it would work. I'm going to gluvit the boat before this, too. my epoxy will be 635 US composites. My reasons for raising the floor are twofold: One, additional storage space underneath to include a cubby for my gas tank and battery, and also because i actually think the boat is a hair too deep. i love the stability tho!

Please let me know what you think. Thanks, as always. I'm very grateful for any advice. 2x4 Idea.jpg
 

Watermann

Starmada Splash of the Year 2014
Joined
Jan 12, 2013
Messages
13,753
Man with this new font it's tough to read, at first I though it was you want to raise the deck thirty five inches but I think you mean three and a half inches. :lol:

Here's the problem I can see with that, you don't want to put anything on the bottom of the hull other than flotation. Normally when having elevated decks you have a sub deck of 1/2" ply in place where the deck originally went and then build up from there to have elevation so when you have a compartment there's the sub deck with the flotation foam underneath that. 3.5" would not be worth the effort obviously as not much other than a life jacket would fit in that space and added weight of double decking. There would also be the issue of if the entire deck is raised how will the helm and console will fit.

I like the widely used configuration where the helm is at the base deck level and then the bow and stern are elevated to create compartment space. So when underway your down lower in the boat to maintain stability. This is the config I'm going to be using in my SS build. Elevated deck in the bow and stern with the helm being where it was originally. My SN 160 is a prime example of that design.
 

BMerr509

Petty Officer 2nd Class
Joined
Jun 28, 2016
Messages
167
So you're saying i can save $60 in 2x4's??? Lol I hear ya, and i did wonder if i would ever realize the potential of the extra work. Besides, this is getting expensive fast, just like you all have experienced, and i knew it was coming.

Thanks for the input, I'm about to begin drafting some drawings to see if i've left anything out.
 

Watermann

Starmada Splash of the Year 2014
Joined
Jan 12, 2013
Messages
13,753
Well 2x4's at least here are almost free compared to aluminum angle and tubing that I plan on using to elevate my decking.
 

BMerr509

Petty Officer 2nd Class
Joined
Jun 28, 2016
Messages
167
No Title

Good morning guys- got back yesterday and up bright and early working on the Offshore since i only have a week to do so. got the transom cover off and the transom is shot. It doesn't look like anyone epoxied it- its just two sheets of plywood crammed in there. i had planned on replacing it so this wasn't bad news really. The aluminum part of both sides of the transom is solid, which is all i care about. Check out the pics! back-plate is garbage, it looks to be original. its plywood with fiberglass coating. the next pic shows how the transom is bolted to the hull. good news is i can re-use the screws/bolts- i don't have a riveting tool or rivets so i'm trying to get through this project without either... next pic is of the floor my super awesome PO used. Pressure treated 3/4'' x 6" pieces. soft spots galore. again, i planned on replacing the floor anyways so no biggie. Should i be worried about the hull being exposed to the PT wood, even after i remove it? i'm worried the chemicals will have a lasting effect on the AL even once i put the new flooring in. I'm thinking i'll be fine, but not sure. Last pic is where the splash-well meets the gunwhales. ripped on both sides. Again, i planned on shortening it like just about everyone here has so it's fine. There is foam under the floor and it is completely dry from where i felt it- any reason why i can't re-use it? i know foam isn't all that expensive but just wondering if there's any repercussions here.

Good news is i don't work this week :rockon: but I think tomorrow i might go pick up a new trailer. There's one for sale: http://syracuse.craigslist.org/bod/5750516567.html

What do you think about the price? I'll have to drive 1.5 hours to get it, think it's worth it? I've already decided to get a new trailer since mine is not adaquate. This is the best price- i called the guy and it's aluminum, brand new, has 3 in stock. also this one too on his lot: http://syracuse.craigslist.org/bod/5750534921.html
My gluvit came in the mail, as well as 2 gallons of epoxy, even though i doubt i'll get far enough to use the epoxy before i leave for the month this weekend.

Thanks for stoppin' by, and thanks for your knowledge in advance! I should have some more pics tonight.
 

Attachments

  • photo251325.jpg
    photo251325.jpg
    44.3 KB · Views: 2
  • photo251326.jpg
    photo251326.jpg
    54 KB · Views: 2
  • photo251327.jpg
    photo251327.jpg
    94.2 KB · Views: 2
  • photo251328.jpg
    photo251328.jpg
    89.3 KB · Views: 2
  • photo251329.jpg
    photo251329.jpg
    126.2 KB · Views: 2

BMerr509

Petty Officer 2nd Class
Joined
Jun 28, 2016
Messages
167
No Title

Got the transom out which was a pain to be honest. salvaged the u bolts for tubing! also got the splashwell loose. i just need to find a way to manipulate it to come out. I still haven't found any real structural defects. that transom was build like brick outhouse. it has fiberglass on the inside and outside. and it was heavy. i think if i were going to put an older motor on for another year or two, i would have left the transom, even tho it is semi rotted, it was still pretty strong. But the last thing i want to do is put a beautiful new motor on and, well, use your imagination. The inside aluminum portion of the hull where the transom goes is solid- it looks shabby in the pics but its just dirty. It will clean up nice! Any reason not to prime/paint it? Thanks for looking, let me know if the pics don't upload well or if they're too small.
 

Attachments

  • photo251336.jpg
    photo251336.jpg
    53.6 KB · Views: 2
  • photo251337.jpg
    photo251337.jpg
    56.3 KB · Views: 2
  • photo251338.jpg
    photo251338.jpg
    115 KB · Views: 2
  • photo251339.jpg
    photo251339.jpg
    50.2 KB · Views: 2
  • photo251340.jpg
    photo251340.jpg
    64.6 KB · Views: 2
  • photo251341.jpg
    photo251341.jpg
    75.3 KB · Views: 2

g0nef1sshn

Lieutenant
Joined
Feb 24, 2015
Messages
1,291
I would prime and paint in once cleaned and any corrosion issues are dealt with. Just added protection and piece of mind from future corrosion issues. My 2 cents.
 

Watermann

Starmada Splash of the Year 2014
Joined
Jan 12, 2013
Messages
13,753
Nice progress on the tear down :thumb:

Next up clean up and repairs, they take the most time and is where we loose a lot of guys, they just seem to disappear :lol:

You shouldn't use the old white styrofoam, it'll be deteriorating and the savings is not worth smelling it's stink. I clean and paint the inner transom skins on my boats too, I also paint the heck out of the transom wood.
 

BMerr509

Petty Officer 2nd Class
Joined
Jun 28, 2016
Messages
167
No Title

Hey guys, got some more work done, although not too much. got the console out along with all the wiring. Good call WM on the foam- the top layer was dry, the bottom not so much. I'm going to toss it all and start fresh. Here's a couple pics. I hope to get Gluvit on tomorrow but we'll see. I bought a sheet of MG plywood (which i could have financed it was so expensive lol) and plan on cutting out the transom pieces tomorrow and gluing them. So i guess i'll lay down 3 coats of epoxy, then two of primer, then two of paint? Guess that is good insurance on the good wood. I am considering using the MG for the floor as well. I'm struggling on what to do with the bow set up that you see in the pics, the side seat setup as they are riveted into the hull. I would like to re-use them but they need to come out for the new floor. I'll have to think more about it.

Have a nice night!
 

Attachments

  • photo251458.jpg
    photo251458.jpg
    63.5 KB · Views: 4
  • photo251459.jpg
    photo251459.jpg
    78.7 KB · Views: 4
  • photo251460.jpg
    photo251460.jpg
    86.3 KB · Views: 6

BMerr509

Petty Officer 2nd Class
Joined
Jun 28, 2016
Messages
167
And i'm not going anywhere- i need you guys way more than anyone else for guidance! Otherwise i would have thought pressure treated was great for AL stringers! LOL Once i get back in Oct and deer season is over, i'll be working on this puppy everyday until shes ready for salmon season.
 

g0nef1sshn

Lieutenant
Joined
Feb 24, 2015
Messages
1,291
I didnt have the side front seats in mine when i got. But the braces were there. Unless im wrong, they pop riveted to the sides of the hull? Easy to take out and replace when ready. Go for it, get that wood out and clean her out good. If they are solid, i think pop rivets would be fine to replace since its above the water line. Others can chime in for more details...
 

Watermann

Starmada Splash of the Year 2014
Joined
Jan 12, 2013
Messages
13,753
Looks like they had a different design back then with the bow seat being a structural part of the boat, I bet they used solid rivets for that through the hull attachment. Can you remove the blind rivets holding the deck piece down and slide the piece out from the under the bow seat frame?
 

g0nef1sshn

Lieutenant
Joined
Feb 24, 2015
Messages
1,291
Looks like they had a different design back then with the bow seat being a structural part of the boat, I bet they used solid rivets for that through the hull attachment. Can you remove the blind rivets holding the deck piece down and slide the piece out from the under the bow seat frame?

Now that you mention it, i think i may have added pop rivets to the side hull brace. But the seats should cone off the braces easy? Havnt g0ne there before..... worth doing right since you are this far though.
 

BMerr509

Petty Officer 2nd Class
Joined
Jun 28, 2016
Messages
167
No Title

Some pics/updates. i was able to get the floor out from under the front deck frame without disturbing it. I think I'm going to end up leaving most of it in for floor support for the new floor. Got the transom cut, glued, test fitted, and two layers of epoxy on. Man that stuff is awesome. Gluvit'ed the inside seams and rivets. I didn't get the front good enough so i think i'm going to get another can and apply it before i put the floor on. I'm not going to be able to get much more done before i leave Saturday for the month but I'll get right to her when i'm back... We took her off the trailer and put her on my garage floor with foam for support/protection. Getting the finished project back on the new trailer may prove difficult. Check out the pics!

Have a great Labor Day!
 

Attachments

  • photo251653.jpg
    photo251653.jpg
    80.7 KB · Views: 2
  • photo251654.jpg
    photo251654.jpg
    126 KB · Views: 2
  • photo251655.jpg
    photo251655.jpg
    108.6 KB · Views: 2
  • photo251656.jpg
    photo251656.jpg
    99.6 KB · Views: 2
  • photo251657.JPG
    photo251657.JPG
    249.1 KB · Views: 2
  • photo251658.JPG
    photo251658.JPG
    260.9 KB · Views: 2

oldhaven

Chief Petty Officer
Joined
Aug 30, 2015
Messages
568
Looks like you are right on plan. You will spend the whole month away going through the next steps in your head, so it will be easy to get back into it.
 

Watermann

Starmada Splash of the Year 2014
Joined
Jan 12, 2013
Messages
13,753
I sure hope you cleaned the inside of the boat up before gluvit application. I usually pressure wash a couple times scrubbing with cleaner, usually cleaning vinegar and once dry I wipe the seams down with a solvent I have either acetone or xylene Then after cleaning inspect it closely for any repairs that are needed before gluvit goes on. Looks like the transom needs some attention too.

fetch
 

BMerr509

Petty Officer 2nd Class
Joined
Jun 28, 2016
Messages
167
Yes sir, definitely cleaned the inside. it looked like new when i was done and in fantastic shape. I assume when you say transom, you mean the outside aluminum back piece? Yes, it will need some JB for sure, but its not terrible. I'm going to JB the old motor mount holes too since the new motor will probably not have the same holes. What do you guys think? Also, i have a CMC power t/t that works perfect and in great shape w/the old merc if anyone is interested. I can't get it to anyone before Oct but it's there.

OldH - you're so right, it's been the only thing on my mind while i'm away!
 

Watermann

Starmada Splash of the Year 2014
Joined
Jan 12, 2013
Messages
13,753
I figured you did a clean up first. ;)

These old boats really get into a guys blood. After I'm done with this one it's going to be tough not to look for anther one to work on.

Sent ya a pm about the CMC.
 

oldhaven

Chief Petty Officer
Joined
Aug 30, 2015
Messages
568
I'm going to JB the old motor mount holes too since the new motor will probably not have the same holes. What do you guys think?

The mounting hole locations and dimensions have been standardized for motors for quite a while, so you might not need to fill them.


Watermann

Starmada Splash of the Year 2014
Joined
Jan 12, 2013
Messages
13,753
What I did to cover the old dorm fridge mounting holes in my transom was to not drill any mount holes in my new wood and made a motor pad out of .125 AL to cover them. The pad was back buttered with 5200 and is now part of the boat. :lol:

Problem with that BIA bolt pattern is that it's after our boats and motors of the 60s & 70's so it's a crap shoot there. Shoot my 140 Merc has clamps on top.

Anyway this is what the pad looks like.

IMAG2383.jpg
 
Top