1977 18' Starcraft SS restoration

oldhaven

Chief Petty Officer
Joined
Aug 30, 2015
Messages
568
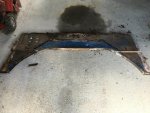
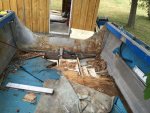
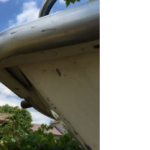
All those extra transom holes can be filled in with JB weld or Marine Tex, but you may want to add a new plate over most of them. I did that with a 60 x 18 inch piece of 5052 Ajluminum. This works well if you are removing the z brace and knee anyway, since the rivets and through bolts help hold it on while the adhesive sets up. Lots of others have done this successfully. See my link below, about halfway into the journey.
 

payphone

Cadet
Joined
Apr 16, 2009
Messages
22
No Title

41
that's how many holes I need to fill in just the transom. There are four more holes in the side hull near the stern and at least 20 more on the gunwales.:crazy:
But I did manage to get the transom and splashwell out, No turning back now!:eagerness:

Ron, I like your idea of adding some aluminum to the outboard side of the transom for strength. I was thinking of picking up a 1/8" sheet to cover the inboard exposed wood. What are your thoughts? It would tuck up under the transom cap. Maybe I could also sneak the other sheet in between the wood transom and the existing aluminum too. - basically sandwich the wood with aluminum.

Also, should this thread be renamed as a 'restore' or something - or should I just start a new one?


paul
 

Attachments

  • photo247259.jpg
    photo247259.jpg
    35.5 KB · Views: 2
  • photo247260.jpg
    photo247260.jpg
    41.8 KB · Views: 2

Watermann

Starmada Splash of the Year 2014
Joined
Jan 12, 2013
Messages
13,753
Oh man you got off easy on the holes, the PO's of my Chief all had a goal of drilling one hole a week into that poor old gal. Each gunnel sported over 70. :eek:

On the bright side you have a transom template rather than mulch pile!

Hey that decking really looks nasty, I hope the boat wasn't used much like that. Hows the knee brace looking?

You can PM a Mod and ask them to change the title of your thread to exactly what you want it to read. We have a couple SC regulars GA_Boater and jbcurt00
 

jbcurt00

Moderator
Staff member
Joined
Oct 25, 2011
Messages
24,863
Yep,
Just post what you'd like the new title to be and we can change it.
 

GA_Boater

Honorary Moderator Emeritus
Joined
May 24, 2011
Messages
49,038
Re-titled, payphone.

BTW - I haven't seen a payphone in years! LOL
 

oldhaven

Chief Petty Officer
Joined
Aug 30, 2015
Messages
568
I added the 1/8 sheet on the outside, which looks like a patch, but putting it on the inside would require that you reduce the thickness of the wood where it fits in the side brackets and z-brace, and two 3/4 pieces would not work. You would have to use 3/4 and 5/8. You could recess the sheet into the 1-1/2 plywood, but that is getting pretty involved. I thought about putting an aluminum sheet on the inside where the transom is exposed, and some boat manufacturers do that, but I figured that water will inevitably get behind it and it would be better to have it open so things dry out in open air. Whatever you do will probably last 40-50 years or longer than most of us will care.
 
Last edited:

Candutch

Chief Petty Officer
Joined
May 8, 2015
Messages
637
I didn't like the exposed wood on the inside either. I covered mine with 1/16th aluminum and I skinned tge outside with 1/8th. Obviously the transom cap won't fit anymore after that. Mine was all busted up anyways and I changed my transom shape so I just fabricated a new cap out of 1/16th aluminum.
 

payphone

Cadet
Joined
Apr 16, 2009
Messages
22
No Title

Thanks Rob, Once my transom is in place I'll see how much room I have.

I can't seem to get this cap off my bow. Is there something I'm missing? I see the screws underneath that look like the just hold the wood bow deck supports.
My goal is to strip off the rub rail and the aluminum rail along the inside of the gunwale.
 

Attachments

  • photo247755.png
    photo247755.png
    53.3 KB · Views: 0

payphone

Cadet
Joined
Apr 16, 2009
Messages
22
I've finally gotten busy working on the boat lately after being away on vacation for August and busy with other stuff in September. The boat is now completely stripped down to the hull. I decided to move over and work on the trailer. I had it sandblasted by someone with a tow behind rig. He drove right out back to my boat and trailer. I didn't need to drive it anywhere and only took an hour and a half. He used some additive in the water to control flash rust. Worked great. I ended up rolling on rustoleum primer and spraying thinned rustoleum topcoat with my HVLP.
Now trying to decide what to replace my bunkboards with. Either a non pressure treated 2x4 with carpet or maybe 2x4 plastic decking.
I'll add some pics later

I can't upload pictures. Filetype: JPG and size: less than 700MB
 
Last edited:

payphone

Cadet
Joined
Apr 16, 2009
Messages
22
I'm unable to upload any photos. All are less than 700 MB and I've made more than 3 posts. Very frustrating.
I really don't want to start a photobucket account. I already have iphoto and Amazon.
 

payphone

Cadet
Joined
Apr 16, 2009
Messages
22
The previous post has been updated to show what I get when I choose option #2 from tutorial. Tiny pictures that don't change size when given the option after uploading.
I assume others are uploading just fine so I must be doing something wrong.
 
Top