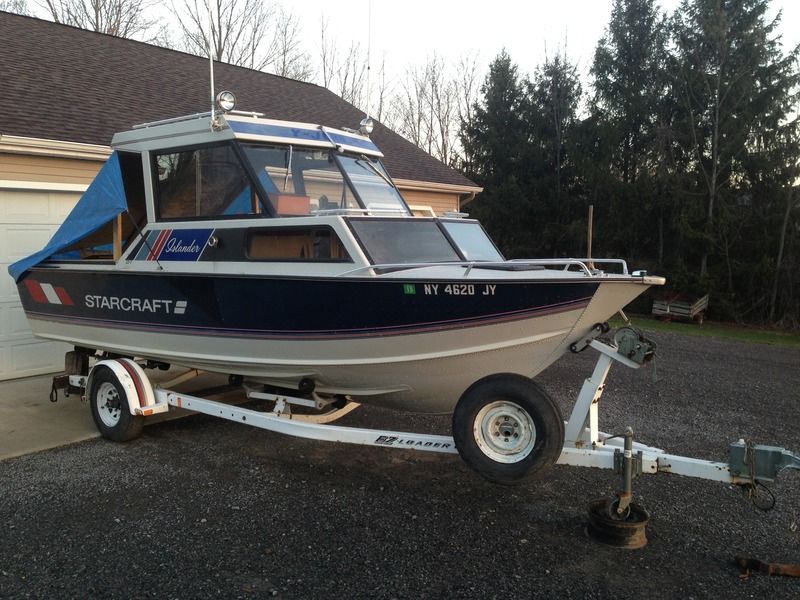
1989 Starcraft 221V restoration

GA_Boater

Honorary Moderator Emeritus
Joined
May 24, 2011
Messages
49,038
Your other thread can be moved here and can continue in the relocated thread.

And the other topics you started can merged as well. They are all related to the Chieftain build.
 

GA_Boater

Honorary Moderator Emeritus
Joined
May 24, 2011
Messages
49,038
It's moved, Kevin.

I moved the rivet/ truss head screw topic into this one also - Post #15, because it had no replies and the Starmada does have some rivet experience,

This is Post #15;


One last question, I've been asking a ton lol. I have about 12 rivets that I had a marina attempt to fix from the outside with closed end blind rivets about 3 years ago. They held up till now. Now, I have my hull completely exposed with floors out. Can I replace these with truss head screws as mentioned in other restoration posts? Is it better to use solid rivets with a riveter and bucking bar? My reason for asking is my lack of access under the trailer. If the screws are a good option, I think I have the room to get under there.

I left the tank topic - The link. http://forums.iboats.com/forum/boat...air/10167224-starcraft-221v-gas-tank-question
 

Watermann

Starmada Splash of the Year 2014
Joined
Jan 12, 2013
Messages
13,753
Welcome to the dark side Kevin :lol:

Looking forward to seeing your Chief come back to life and hit the waves. :encouragement:
 

Grandad

Lieutenant Commander
Joined
Jun 7, 2011
Messages
1,504
Hi Kev. I used solid rivets just as a matter of course for using what was originally installed. The only original rivets I removed were those holding the ends of ribs that I needed to raise for repairs to the hull skin. All others still seem intact, even though somewhat thinned by minor corrosion. My thoughts are that although nuts and bolts will perhaps suffice, you are dependent upon sealant around the threads to keep water out, whereas solid rivets expand to fit properly sized clearance holes and you're depending less on sealant. That said, sealant such as 3M 5200 is pretty reliable. A little sleuthing tells me that's an Ontario trailer license plate. If you're looking for solid rivets, I got mine through Aircraft Spruce that has an outlet at the Brantford airport. You can order online and they'll ship. - Grandad
 

KevinHall

Cadet
Joined
Feb 1, 2016
Messages
24
Thank you very much for that info. I will get in touch with them tomorrow. I'm in the Niagara area, so a drive to Brantford isn't bad if I can get started on my riveting. I'm thinking of bumping up to a 1/4" diameter rivet, as I just noticed the closed end blind rivets that were used 3 years ago to repair a few rivets, are just a hair larger than the original 3/16". Were those rivets you got at Aircraft Spruce the 2117 alloy?
 

Grandad

Lieutenant Commander
Joined
Jun 7, 2011
Messages
1,504
Thank you very much for that info. I will get in touch with them tomorrow. I'm in the Niagara area, so a drive to Brantford isn't bad if I can get started on my riveting. I'm thinking of bumping up to a 1/4" diameter rivet, as I just noticed the closed end blind rivets that were used 3 years ago to repair a few rivets, are just a hair larger than the original 3/16". Were those rivets you got at Aircraft Spruce the 2117 alloy?
Here's what I ordered. I believe they were 2 different hardness types. I think I used the harder/tougher ones, but I ordered both to experiment with. I found this in an old email order confirmation. I believe they were 3/16", so you'll need a different item number. The rivet tip on this order worked well in a standard air chisel that I have with an on-tool regulator set down to 40 PSI. - Grandad

AN470AD-6-7 SOLID ALUM RIVETS AN470AD-6-7
AN470A-6-7 ALUMINUM RIVET MS20470A-6-7
12-01207 RIVET SET STRAIGHT 3/16X 3-1/2
 

FrankenCub

Petty Officer 1st Class
Joined
Dec 29, 2015
Messages
296
I sure like those newer Chiefs, they are quite the lookers ;) I like the glove box thing yours has going on too. Not sure I may borrow that idea. Looks like it has a lot of storage area. Could be a good spot for an 'oh sh#t' handle for a passenger too lol.
 

KevinHall

Cadet
Joined
Feb 1, 2016
Messages
24
I thought it looked pretty identical to the 89 islander as well, until I took some hull measurements of my friends Islander. I came in at about 9" extra beam. The only other difference I can see is that my rear transom cover area at the stern is narrower. His was almost 12" wide. ​As far as the glovebox goes, I plan to replace it with the "Oh Sh#@" grab bar. I'm on Erie all the time, and it would come in handy some days.

I should try to find some pics of what she looked like 6 years ago when I bought it. It has a little sink unit behind the passenger seat, with a fold out table. I took that out day one, as it ate up too much room.

What's everyone's thoughts on adding a raw water wash down pump? Not a fan of extra stuff mounted thru-transom, but I like the idea of washing the boat down while fishing.
 

FrankenCub

Petty Officer 1st Class
Joined
Dec 29, 2015
Messages
296
Speaking of Islanders, on the way to my friends fab shop there was an Islander next door and I thought it looked a lot like your Chief, other than the hard top. Before pics would be nice to show the progress in your rehab ;) That and I'd like to see how it was originally set up to get idea for my rehab lol. I will be using my Chief for a floating camper as much as a fishing platform.
 

KevinHall

Cadet
Joined
Feb 1, 2016
Messages
24
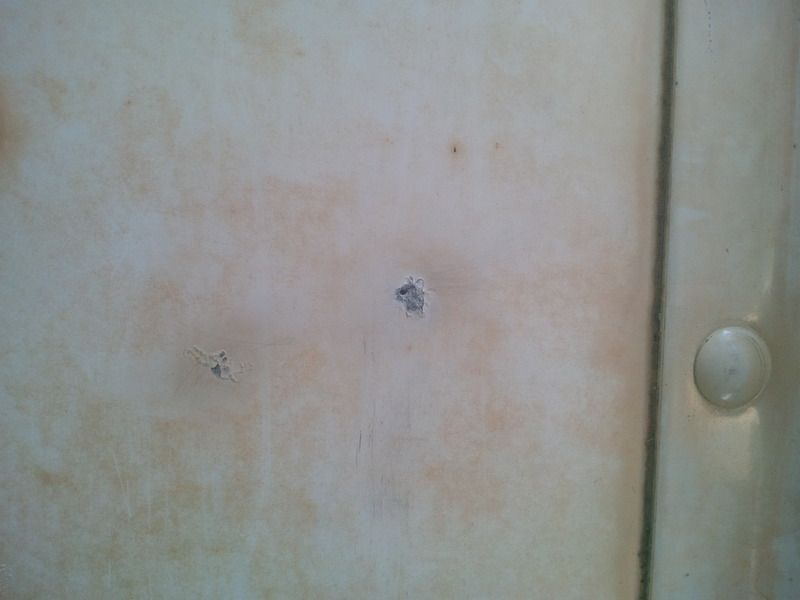
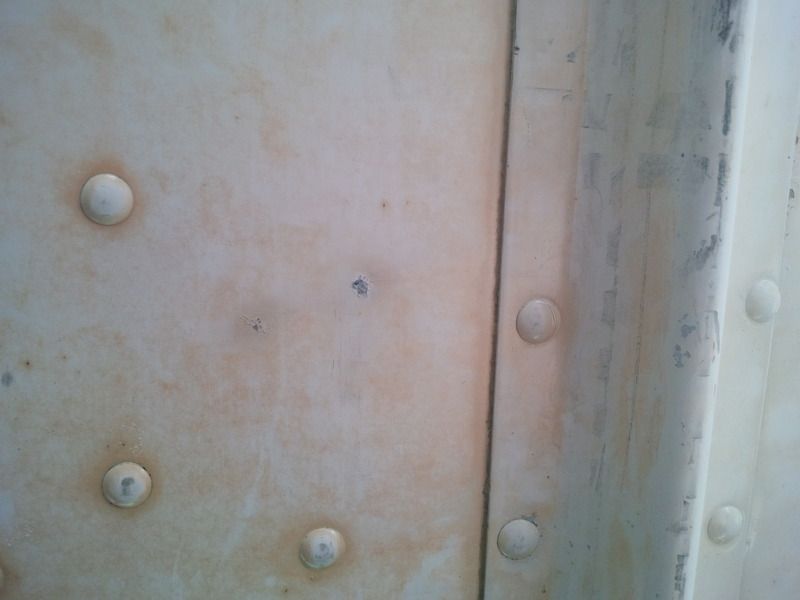
OK, so before starting my rivet repairs, I went over my entire hull. I found this tiny little hole, which looks an awful lot like electrolysis on the inside. Previous owner had a marina slip. My question is, do I just fill it with something, or should I drill it out and place a solid rivet through? It's just a section of hull, and is not in a structural spot. The rivet would just fill the hole. Here's some pics, tell me what you guys think...


And Frankencub, I'll see if I have some before's kicking around. They might be on my old computer.
 

FrankenCub

Petty Officer 1st Class
Joined
Dec 29, 2015
Messages
296
Thanks Kevin ;)

With your hole situation, seems it's below the waterline and passes all the way through I wouldn't feel comfortable filling it with JB or the likes. I would drill it and seal the hole with a solid rivet and 5200. I have a spot in mine that is corroded on the inside but it doesn't go through, that I would fill. It's odd because there's no other corrosion around it.
 

Watermann

Starmada Splash of the Year 2014
Joined
Jan 12, 2013
Messages
13,753
It's not structural but it is below the waterline it looks like, I would drill it out to 3/16" wheel it clean inside and out then butter a solid with 5200 using a washer or backer on the inside with 5200 to sandwich the repair.
 

KevinHall

Cadet
Joined
Feb 1, 2016
Messages
24
Thanks, the repair to the small hole worked great. The other 19 rivets that I had repaired 3 years ago with closed end blind rivets....not so well. While attempting to replace them with 1/4" solids, I figured I'd be upsizing, and that would work. Turns out, they OVER drilled the holes when installing those rivets, which is why they loosened in the first place. So I'm thinking I'm forced to do the Truss head screw and lock nut fix.
 

dt5150

Seaman
Joined
Aug 22, 2010
Messages
56
i've got a line on a 95 islander that doesn't have one. i haven't bought the boat yet, but likely will.

Mod EDIT: Solicitation is not permitted
 
Last edited by a moderator:

KevinHall

Cadet
Joined
Feb 1, 2016
Messages
24
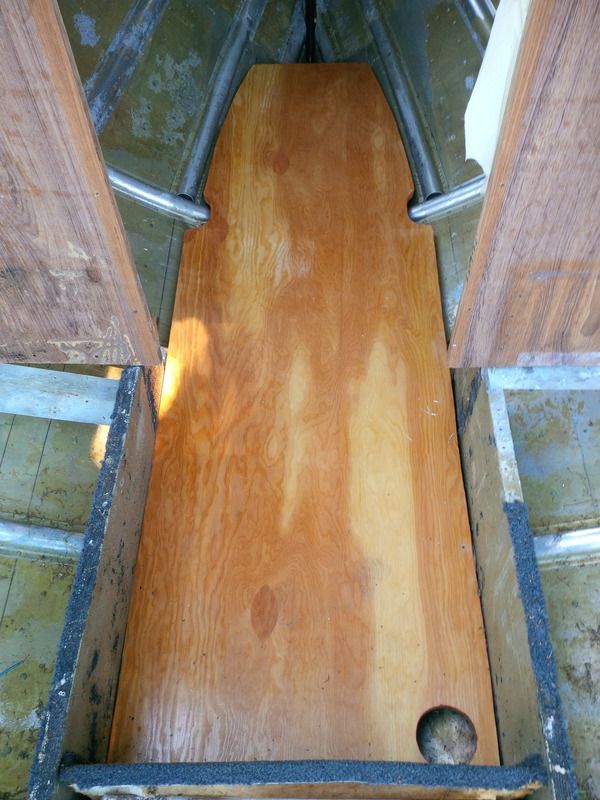
Guys, is there any padding or foam that needs to go under the floor section for the cuddy? I don't want to go with expansion foam, and the original piece that came out only had a bit of the foam under it when I pulled it apart. Does it rest right on the ribs or do I tuck something under? It was originally riveted to the ribs.
​G
 

Watermann

Starmada Splash of the Year 2014
Joined
Jan 12, 2013
Messages
13,753
The Islander and Chief both have limited space for foam under deck so I would add rigid foam board anywhere you can including under the cabin deck if there's room that is.
 

KevinHall

Cadet
Joined
Feb 1, 2016
Messages
24
And how about around and under my fuel tank Watermann? Any ideas in that area? When I removed the tank, there was a strip of wood under the tank with rubber strips, and of course a bunch of expansion foam. I've replaced the wood and rubber, but wondering what to do to take up that extra space underneath and around the sides of the tank. I was hoping to do this job with zero expansion foam.
 

Watermann

Starmada Splash of the Year 2014
Joined
Jan 12, 2013
Messages
13,753
I did away with the board under the fuel tank in my SS and used aluminum cross pieces and put foam in underneath for the support. That 2" rigid foam board can handle the weight, and not rot as long as your tank doesn't leak a bunch of gas on it. Since you have the board you could also just put what you can under there with it, just be sure water can pass under it.
 
Top