1970 Starchief conversion to center console

BajaRon

Petty Officer 3rd Class
Joined
Aug 23, 2015
Messages
85
Minwax Helmsman Spar Urethane. It has UV blockers and plenty of us swear by it. Lowes/Home Depot and other places carry it.

Nice work going on in this thread!

This sounds perfect for my transom, three coats.

E-bond epoxy has 3 gallon kits of their 1285/1289 epoxy for ~$125 with shipping. It's a good deal and product. Just another alternative to USC. They're an industrial supplier so you have to call them and they don't sell pumps.

http://ebondepoxies.com/products-services/marine-epoxies/

One thing I wish I had known when I was doing my epoxy work is that warm wood will much more readily absorb epoxy than cool or cold wood. A halogen bulb or heat gun will do the trick.

Would this be a better idea to seal my 5/8 marine grade decking? My deck will be high salt water exposed, blood and guts, and high temps in Baja...100 degrees. On past decks I have thrown sand in with the paint...it worked excellent...good grip when barefoot, easy to clean with raw water wash down. Any ideas or suggestions? Thanks, Ron
 

laurentide

Lieutenant Commander
Joined
Jul 24, 2011
Messages
1,869
Would this be a better idea to seal my 5/8 marine grade decking? My deck will be high salt water exposed, blood and guts, and high temps in Baja...100 degrees. On past decks I have thrown sand in with the paint...it worked excellent...good grip when barefoot, easy to clean with raw water wash down. Any ideas or suggestions? Thanks, Ron

Whatever works! 10 oz glass and epoxy would be bulletproof, but sanded paint sounds quick and easy! The only issue would be plywood checking with paint only, which will eventually let water into the wood. It just depends on your own life expectancy for the deck.

PS: I really like Nautolex on my deck for fishing. It's at least worth a price check. It's durable stuff and meets all the criteria you mentioned.
 
Last edited:

GA_Boater

Honorary Moderator Emeritus
Joined
May 24, 2011
Messages
49,038
When I use Spar, I coat one side and the edges, flip it over when dry and coat the flat and the edges again.

That way with 3 coats on the flat, the edges get 6 and the open grain on the edge is well protected from moisture being pulled in.

My deck is sparred also, but has carpet. It isn't exposed to wash down water because I'm a terrible fish catcher. :doh:
 

laurentide

Lieutenant Commander
Joined
Jul 24, 2011
Messages
1,869
When I use Spar, I coat one side and the edges, flip it over when dry and coat the flat and the edges again.

That way with 3 coats on the flat, the edges get 6 and the open grain on the edge is well protected from moisture being pulled in.

My deck is sparred also, but has carpet. It isn't exposed to wash down water because I'm a terrible fish catcher. :doh:


GA, you can paint over spar varnish, right? That could be the way to go for Ron's deck.

Edit: there's some debate on this, with some saying that oil based paint will give the same result. So maybe just a few coats of the good ol' high VOC rustoleum oil base?
 
Last edited:

GA_Boater

Honorary Moderator Emeritus
Joined
May 24, 2011
Messages
49,038
Chem - I don't know about paint on top of the Spar, Never tried.

I prefer to use Rusto on metal and paint for wood on wood. I have used Rusto on wood because I already had it in the color I wanted and in some cases it worked OK, other times, so so.

The stuff Jason used on the deck of the Islander/SS looked promising. I forget what it was called.
 

Watermann

Starmada Splash of the Year 2014
Joined
Jan 12, 2013
Messages
13,753
Behr deck over is what Jas used on top of epoxy, I used the similar product on my SN rusto deck restore that they used to call deck armor. It's very viscous stuff that grips on the surface not through penetration so much. No matter what you use, the surface can't be super smooth to have anything stick. I used a stiff wire brush to scratch the surface up before applying the rusto deck stuff. 3 seasons and it looks the same as when I put it on with no peeling. Cleans easily too if you don't mind swabbing the deck a couple times during the season.
 

BajaRon

Petty Officer 3rd Class
Joined
Aug 23, 2015
Messages
85
Ok folks, another question...I want to have all my holes drilled out on my transom before I varnish....Question is..."are the four motor mount holes universal?" I took off 1992 Yamaha...and I hope to reinstall a 2014 Yamaha. Thanks, Ron
 

BWR1953

Vice Admiral
Joined
Jan 23, 2009
Messages
5,845
Ok folks, another question...I want to have all my holes drilled out on my transom before I varnish....Question is..."are the four motor mount holes universal?" I took off 1992 Yamaha...and I hope to reinstall a 2014 Yamaha. Thanks, Ron
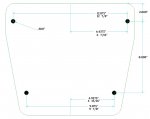
See if the holes fit this pattern.

Boat Transom Mount.jpg
 

laurentide

Lieutenant Commander
Joined
Jul 24, 2011
Messages
1,869
Here's a copy/paste that may help:

"They are the same pattern, but not quite the same size. American made outboards use a 1/2" bolt, the Japanese use a metric size. Close but just a bit smaller. It's simple enough to drill the hole larger.

For the record, mounting patterns were all over the place right on up until Yamaha entered the market in 1984. Yamaha had the good marketing sense to go with the most popular hole pattern used by OMC. Mercury followed suit along the same time frame, but Force engines used a funky mounting pattern and size for a while longer before finally getting on board."

Not sure why I didn't mention this earlier, but I used rustoleum oil based over faired epoxy on my bulkheads and it's held up great. When I compare it to the side panels that were just primed and painted, the non-epoxied panels are starting to check slightly. I bet varnish would work if you scuffed it up.
 
Last edited:

jbcurt00

Moderator
Staff member
Joined
Oct 25, 2011
Messages
24,862
Jas' deck over should be well cured by the time it sees lake water :rolleyes:

Rob, you did meticulous prep and allowed the Rusto stuff cure for quite a while on your SN, it was warm and you waited weeks if IIRC. Thats all required IMO.
 

Watermann

Starmada Splash of the Year 2014
Joined
Jan 12, 2013
Messages
13,753
Jas' deck over should be well cured by the time it sees lake water :rolleyes:

Rob, you did meticulous prep and allowed the Rusto stuff cure for quite a while on your SN, it was warm and you waited weeks if IIRC. Thats all required IMO.

That was my biggest problem with the rusto stuff is the time it took to become fully cured and impervious to abrasion, I think it took a few weeks from the time I put it on, we had some cold spring.weather that year. I imagine it would be considerably less if done when it was hot. I do like the finish though and would consider using it again.
 

BajaRon

Petty Officer 3rd Class
Joined
Aug 23, 2015
Messages
85
See if the holes fit this pattern.


Right on the money!!! Now I can pre-drill and sleep at night. Thanks! Once again iboat members to the rescue.

Had a good work day today. Sanded and fine tuned my transom so it fit easy but snug into place. Also first time using Marine Tex. Worked great. Lots of pitting on the transom. Will fill in the larger holes tomorrow with JB Weld. Lots to learn for the first time.
The wood work is my weak link. Maybe with the varnish the transom will look like I knew what I was doing. Weather is warmer, time to get moving. Thanks to all, Ron
 

BWR1953

Vice Admiral
Joined
Jan 23, 2009
Messages
5,845
Right on the money!!! Now I can pre-drill and sleep at night. Thanks! Once again iboat members to the rescue.

Had a good work day today. Sanded and fine tuned my transom so it fit easy but snug into place. Also first time using Marine Tex. Worked great. Lots of pitting on the transom. Will fill in the larger holes tomorrow with JB Weld. Lots to learn for the first time.
The wood work is my weak link. Maybe with the varnish the transom will look like I knew what I was doing. Weather is warmer, time to get moving. Thanks to all, Ron
Glad it worked. :thumb:
 

BajaRon

Petty Officer 3rd Class
Joined
Aug 23, 2015
Messages
85
Hola Everyone,
been busy with work, training for a bicycle race in April, along with being on a committee for a ballot measure in June. Back to work on the boat and will be posting pictures soon. Thanks to all for the past help, Ron
 

BajaRon

Petty Officer 3rd Class
Joined
Aug 23, 2015
Messages
85
No Title

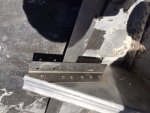
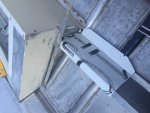
Ok...long time since posting pictures, here goes. I have a ton of pictures, please be patient. First pic is of my knee brace repair...it came out great. Also down low and to the right is the drain repair. Previous owner had a bronze drain! It burnt a large hole...repair came out great.

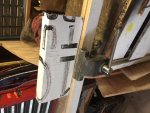
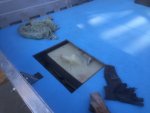
Second pic is of my home made brake/vice, bending an extension....where I cut away the bow hatch to lengthen the deck space. I shortened the hatch by one rib. Came out good.

Third pic is the extension in place....came out good and strong

Let me send these and see how it turns out, Ron
 

Attachments

  • photo251196.JPG
    photo251196.JPG
    111.9 KB · Views: 4
  • photo251197.JPG
    photo251197.JPG
    123.3 KB · Views: 4
  • photo251198.JPG
    photo251198.JPG
    104.9 KB · Views: 4

BajaRon

Petty Officer 3rd Class
Joined
Aug 23, 2015
Messages
85
No Title

Ok...not perfect! Been busy. Quit my job in July and have been working all day 7 days, sun up to sun down when I can. Need to finish so I can go back to work.

First I should point out my many mistakes.

Did not take pictures of boat before I started
Did not find this site until after I started
Used improper hardware when reassembling
Lack the skill of some of our Master Builder on this site.
Was sloppy with the GluVit....some dribbled down and "clogged" the bilge weep holes. Had to chisel out to clear it's path.
Did not use enough weight to join the two 3/4 inch marine plywood for the transom. Had to sand extra to fit into place.
Should have used the Moller 28 or 32 gallon belly tanks....I think, not sure.
Should have used a wash down pump instead of a bait pump. Very crowded in the bilge.
May have to put the battery up inside the center console for weight distribution
Not good with body work repair

There are more mistakes, I will note them as I go. Let me try more pictures.
 

Attachments

  • photo251199.JPG
    photo251199.JPG
    166.1 KB · Views: 6
  • photo251200.JPG
    photo251200.JPG
    114.9 KB · Views: 7
  • photo251202.JPG
    photo251202.JPG
    113.5 KB · Views: 8
  • photo251203.JPG
    photo251203.JPG
    111.2 KB · Views: 8
  • photo251204.JPG
    photo251204.JPG
    96.6 KB · Views: 8
  • photo251205.JPG
    photo251205.JPG
    122.1 KB · Views: 7

BajaRon

Petty Officer 3rd Class
Joined
Aug 23, 2015
Messages
85
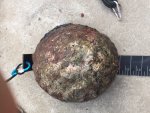
Ok, better! First pic is an almost 10 inch abalone taken at Pt. Arena in May.

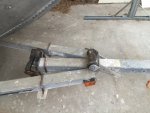
Second is the rotten rollers...all have been replaced. Trailer is galvanized and in good shape, perfect for the salt!

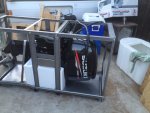
Pic of my new 60hp Suzuki with 40 gallon bait well to the side

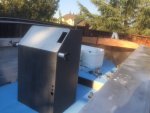
Next is the center console. Fits perfect. Found in Portland after looking for about one year. $100.00...came with good steering cable, wheel, and old Suzuki shifter, which I hope to sell.

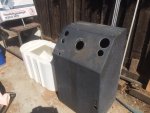
Next is the cover I fabricated to hide the old holes on the center console, it came out great. In the back is the 72 quart ice box, marine grade, extra insulation

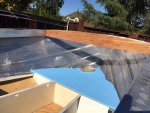
Next is the mahogany replacement. The original was cracking in the middle...came out great!
 

Watermann

Starmada Splash of the Year 2014
Joined
Jan 12, 2013
Messages
13,753
Looks like you're about to start putting it all back together now. Don't forget to leak test first.
 

laurentide

Lieutenant Commander
Joined
Jul 24, 2011
Messages
1,869
People love those Suzukis, you should be really happy with that engine. Everything's looking great!
 

BajaRon

Petty Officer 3rd Class
Joined
Aug 23, 2015
Messages
85
No Title

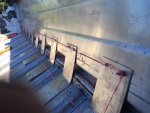
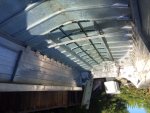
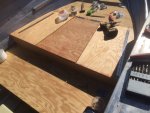
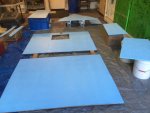
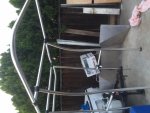
Ok, let me try more pictures. Sorry about the upside down picture
 

Attachments

  • photo251255.JPG
    photo251255.JPG
    106.9 KB · Views: 13
  • photo251256.JPG
    photo251256.JPG
    123.6 KB · Views: 4
  • photo251257.JPG
    photo251257.JPG
    106.2 KB · Views: 4
  • photo251258.JPG
    photo251258.JPG
    98.6 KB · Views: 4
  • photo251259.JPG
    photo251259.JPG
    75.8 KB · Views: 4
  • photo251260.JPG
    photo251260.JPG
    112 KB · Views: 4
Top