pro-crastinator
Chief Petty Officer
- Joined
- Dec 12, 2013
- Messages
- 453
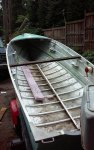
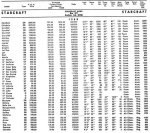
Starcraft rebuild 1965 Marlin
Its a 1965 Starcraft Marlin
$390 new FOB
14' 1" length
64" beam
320 lbs
16" transom hight 54" transon width
40hp max
850lbs capacity
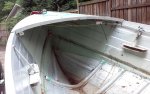
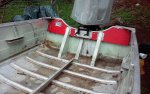
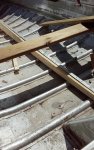
Floor replacement
This is where I am directing my next effort.
Have many questions.
Will develop this with another post - as this one is not letting me download pics.
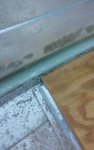
aluminum patching/hole repair.
Many / most of my holes are exposed and visible. The jbweld/aluminum backer method sounds like it will be just right – but you stated that this would be better for unseen repairs. I could use more comments regarding this.
Resin coating on wood
I'll get epoxy resin and resist the temptation to use the polyester. I'll need it for the new transom anyway...
I didn't realize the UV vulnerability of the epoxy. Huh.
Also thinking about encapsulating pink foam panels under seats with epoxy resin. Maybe some fiberglass mat would improve things here.
Renamed thread
The adventure began with the link below.
You guys are great!
Thanks for the conversation – It helps O so much to bounce off ideas to those who have done it already.
-Bennett
Its a 1965 Starcraft Marlin
$390 new FOB
14' 1" length
64" beam
320 lbs
16" transom hight 54" transon width
40hp max
850lbs capacity
Floor replacement
This is where I am directing my next effort.
Have many questions.
Will develop this with another post - as this one is not letting me download pics.
aluminum patching/hole repair.
Many / most of my holes are exposed and visible. The jbweld/aluminum backer method sounds like it will be just right – but you stated that this would be better for unseen repairs. I could use more comments regarding this.
Resin coating on wood
I'll get epoxy resin and resist the temptation to use the polyester. I'll need it for the new transom anyway...
I didn't realize the UV vulnerability of the epoxy. Huh.
Also thinking about encapsulating pink foam panels under seats with epoxy resin. Maybe some fiberglass mat would improve things here.
Renamed thread
The adventure began with the link below.
You guys are great!
Thanks for the conversation – It helps O so much to bounce off ideas to those who have done it already.
-Bennett