1977 15' StarCraft Holiday Restomod

Watermann

Starmada Splash of the Year 2014
Joined
Jan 12, 2013
Messages
13,753
Nice looking work you do, kitchen included! :thumb:
 

mbroughton02

Petty Officer 2nd Class
Joined
Jan 17, 2015
Messages
198
Yeah crown molding makes me want to punch something. And I'm good at geometry. I don't blame you for putting it off!
 

jbcurt00

Moderator
Staff member
Joined
Oct 25, 2011
Messages
24,871
Upside down and backwards. Crown's easy :rolleyes:

Great work in the kitchen and on the boat
 

coostv

Petty Officer 1st Class
Joined
Mar 21, 2010
Messages
230
Thanks guys!

This pic was my last test fit before blowing it apart for coating everything.

1z3chp0.jpg


Here all of the sub structure is coated and glued and screwed in.

2dljk9l.jpg


Next up will be cutting a hatch opening in the bow piece and coating it. I was originally thinking I was going to carpet the sides of the bow opening, but I think I might just paint it now... Will decide that later. Many decisions left to make, but at least the end is within grasp now for the bow. I plan to trim the edge of the opening with an aluminum trim I found, many more posts to follow in the coming weeks. Hope I can keep the momentum up and get it done in time for Memorial Day Weekend.
 

77kingfisher

Seaman
Joined
Apr 24, 2017
Messages
71
Very nice looking restoration. Im just starting my restoration on a 77 Kingfisher 16'. Im wondering what you painted with for primer and final coats. Was it marine grade or...?
 

jbcurt00

Moderator
Staff member
Joined
Oct 25, 2011
Messages
24,871
Kingfisher start a topic about your project. You'll get lots of help, just like Coostv has....

And if you read back thru his topic, primer and paint are probaby discussed at length.....
 

coostv

Petty Officer 1st Class
Joined
Mar 21, 2010
Messages
230
Some progress today. I decided to just paint the inside of the hull with Rust Oleum smoke grey. I will probably end up covering the console sides later with vinyl, but for now they are coated with varnish and paint. If I end up hating the painted hull, I will probably cover it with carpet, but I think I will like it just as it is.

smat75.jpg


I am finally at the point where things can start being installed for good. I am hoping to get the upper bow wood and aluminum installed for good tomorrow and start the sanding process for primer and paint! Things should really start progressing in the coming weeks.
 

Watermann

Starmada Splash of the Year 2014
Joined
Jan 12, 2013
Messages
13,753
I like the color of gray but that rusto pro likes to run and sag for some reason at least it has for me in the past. It seems as soon as you get enough on to where it lays down the stuff starts wanting to sag and then it takes forever to dry. Hope you have better results with it than me.
 

coostv

Petty Officer 1st Class
Joined
Mar 21, 2010
Messages
230
Good it wasn't just me! It sagged in a few spots where I brushed it on, but the foam roller seemed to do OK. I rolled a coat on and it just covered, so I let that tack up and hit it with a second coat. It seemed OK when I left it to go in for dinner, but I never went back out after that so I will have to check it out tomorrow.
 

Watermann

Starmada Splash of the Year 2014
Joined
Jan 12, 2013
Messages
13,753
Good it wasn't just me! It sagged in a few spots where I brushed it on, but the foam roller seemed to do OK. I rolled a coat on and it just covered, so I let that tack up and hit it with a second coat. It seemed OK when I left it to go in for dinner, but I never went back out after that so I will have to check it out tomorrow.

Oh you rolled it on, you are a brave man I've only sprayed the stuff after trying to roll on rusto topside once.

The VanSickle tractor paint I have been using is the most forgiving and easy to apply paint I've ever used. I think they made so even a dirt clod can make it look good using a old stiff brush. :lol:
 

coostv

Petty Officer 1st Class
Joined
Mar 21, 2010
Messages
230
Finally Dabbler! Been too long in dry dock!

WM, I didn't even think of spraying it! Most of it will never be seen, I just wanted the original green covered up since it will not go with the new blue paint or the gray, blue, and white interior. I have about 3 quarts left from the gallon since it was only $16ish more than a quart...

I plan to get the new side panels cut today, the originals are good enough for a template on the top side, but they were a few inches above the deck and I'd like them to be a little closer. How close should I go (was thinking 1/2")? Judging from the holes along the bottom, they looked like they were attached via angle to the deck originally, but that angle was long gone by the time I got the boat. Will some 6063 (sharp corner) 1/8" thick angle be sufficient? I will peruse the Alro Steel book laying on my desk at work on Monday and pick a size, but I was not sure what the original thickness was. I will be ordering some architectural channel to cap off the edges of the consoles anyway, might as well get it all at once.
 

Watermann

Starmada Splash of the Year 2014
Joined
Jan 12, 2013
Messages
13,753
It may have originally had some angle like my SS had which is totally different than the awesome toe kick the regular SS has. Mine has a 1" angle that attaches to the deck by screws with 4" that goes up and the ply stopped short of the deck a couple three inches. I ran the side panels down all the way to the deck so they would add support to the gunnels since there was also no side tray attached to the hull either. The top of my side panels are riveted to angle that I attached with rivets as well so the panels go up underneath the gunnel lip and support it then are attached with large flange rivets.

I don't think you'll need to use 1/8" AL most of the angle that attaches the side panels is pretty thin and you could use 1/16" easily. The thing is you'd maybe want to put the angle that attaches to the decking inward so it doesn't stick out and I don't know how much room there would be but it's doable.
 

coostv

Petty Officer 1st Class
Joined
Mar 21, 2010
Messages
230
Thanks for the insight WM. Alro did not have 1/16" so, I ended up ordering a stick of 1" x 3" x 1/8" angle. 16' was more than I needed, but it was only $26 and I can use the remainder for brackets or whatever. I plan to attach it to the deck and mount the side panel to it through the face, so only a little bit of it will stick out from the bottom.

I managed to get the side panels cut yesterday, didn't exactly go as planned... I used the original panel as a template and simply added an inch and a half to the bottom. What that left me with was a new side panel that was now an 1-1/8" away from the deck at the stern end and almost touching at the forward end. I didn't remember the gap being that far off when the original panel was in it. Oh well, I just ended up marking the forward end cutting a long slice of pie. The are now even with the deck, just a little further away than intended, but a lot closer than they were, lol.

My plan for mounting them is to drill all of the new mounting holes and use rivet nuts to attach the panels just like the factory did through the face, but not have to deal with the nuts on the backside.

ndqwz4.jpg


Since I dragged my feet on deciding what to do for color on the side panels, I do not have my vinyl yet. I ended up just going with white, should have just ordered it a while ago when I had the original urge to do so. Oh well, plenty of things to do while I wait for that to show up.
 

coostv

Petty Officer 1st Class
Joined
Mar 21, 2010
Messages
230
Was looking back at some of my posts, I went from not wanting to drill holes in it, to hacking the crap out of it in the name of progress...

Got my rivet nuts all set for the side panels. I will be carpeting inside the area behind them.

2v1uc1t.jpg


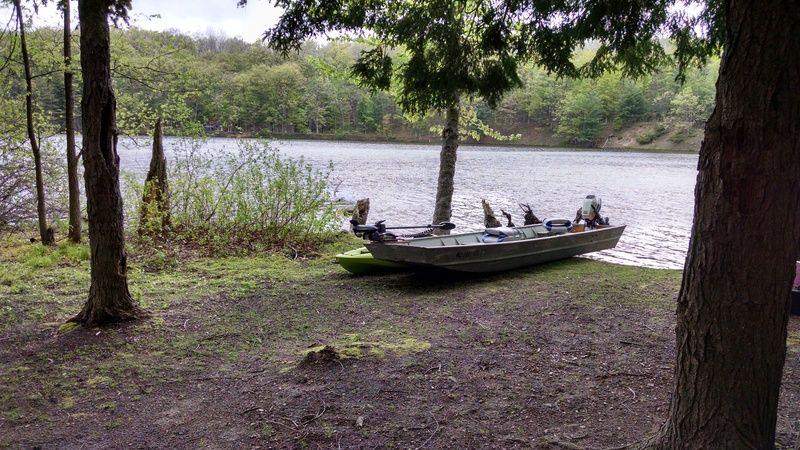
Decided I am going to leave the splash well alone, so I wanted to fit it back in before I commence to priming it. I then cut some angle for to replace the ripping original attachment points.

2dqt186.jpg


33nxfmp.jpg


I don't care for the size of the steel tank that came with the boat, it would probably be fine, but I want to build a permanent platform in front of the splash well and this tank would be a pain to fill, not to mention hard to get the plug in and out.

10e0u2x.jpg


I like the fit of the 6 gallon tank much better. I have both a 6 and a 3 gallon, I could bring the 3 gallon along for longer weekends, but I doubt I will ever run it that long in a weekend, batteries for the trolling motor are a greater concern for me!

b4uwy9.jpg


I am up to the point when I have to have some interruption free time with the boat. I am at a point now where I can spray primer on the entire top side, but I keep having to leave and go do other things. My goal of Memorial Day weekend is shot, but she is getting very close to going together for good.
 

Watermann

Starmada Splash of the Year 2014
Joined
Jan 12, 2013
Messages
13,753
Looking good, you'll be on the water in no time. :encouragement:
 

coostv

Petty Officer 1st Class
Joined
Mar 21, 2010
Messages
230
Thanks guys! I will be slowing for a little bit, but will be back on it hot and heavy in a week or two.
 

coostv

Petty Officer 1st Class
Joined
Mar 21, 2010
Messages
230
Another fishing trip in the books without the Holi... She felt neglected so I rushed home as soon as I could and got back to work on her, lol.

This Jon has seen more use than it should in the last couple seasons, leaks, flexes, rattles, you name it, its got it all... But, it got us to our island campsite and provided a good place to sip beers and get skunked on the fishing side of things... It was terrible fishing, managed to hook one Pike and lost it, and hooked one smallish Bass and lost it too.

IMG_20170525_151058747_HDR_zpscippgu5q.jpg


I ordered a piece of trim from the orange big box store and picked it up last Monday. Been playing with it this week and think I will order another piece tomorrow for the other side. It is fairly thin and I think it is made for edge counter tops, but I think once it is screwed in it will serve the purpose just fine. It will have a seam in the middle of the bow opening, I may or may not make a piece to cover where the two sides will meet.

205rxgi.jpg


jtx6cl.jpg


Now that I have an idea of how the trim will go I am going to move back to final prep for paint. Hopefully I will have a productive weekend!
 
Last edited:

Watermann

Starmada Splash of the Year 2014
Joined
Jan 12, 2013
Messages
13,753
That trim look perfect, you should post up what it is so others can find it if they wantto follow suit. I know there's a bunch of guys that have done the bow cover 'bowectomy' on their boats who would appreciate it.

Personally if you can I would use 5/32nds blind rivets to secure the trim rather than screws which will certainly over time come loose only hanging onto a couple teeth worth of AL. For as much trim as you have WAY cheaper too than SS screws.
 
Top