Cyclone Vacuum Design anyone?

gm280

Supreme Mariner
Joined
Jun 26, 2011
Messages
14,592
I was sitting here thinking about building a Cyclone style vacuum accessory tank to help rid the main tank and the motor from the very fine dust and stuff that we all seen clogging up the standard shop vac filters from vacuuming the grinding material out of our boats. And I see tons of ideas all over the net. But I was wondering if anybody on these forums has actually built any, and if so, how well did it work and do you care to share your design? I even see clever programs to assist in designing the inverted funnel type cone. I contemplated using standard thin gauge sheet metal or even fiber glassing such a part for building one. Any good ideas floating around?
 

MTboatguy

Fleet Admiral
Joined
Jul 8, 2010
Messages
8,988
Might want to give that guy a call, hmmm, whats his name? Oh that is right...

Dyson!

:D
 

Scott Danforth

Grumpy Vintage Moderator still playing with boats
Staff member
Joined
Jul 23, 2011
Messages
47,536

gm280

Supreme Mariner
Joined
Jun 26, 2011
Messages
14,592
Might want to give that guy a call, hmmm, whats his name? Oh that is right...

Dyson!

:D

Well MT guy I actually did ask Dyson and his answer was to post it on iboats for the best designs and suggestions. :pound:
 

ondarvr

Supreme Mariner
Joined
Apr 6, 2005
Messages
11,527
I just use a pool vacuum hose that's 20' long (you can get them longer) and place the vacuum outside, I use an extension cord as the on/off switch. This way it never plugs up. Only some shop-vacs direct the dirty air through the motor, others use a separate fan to cool the motor. I also use the filter bags, they work very well.
 

gm280

Supreme Mariner
Joined
Jun 26, 2011
Messages
14,592
Okay, I see this went cold a lot quicker then I was hoping for. I was hoping some iboaters had such adapters and could tell me if they really worker well. I have read a ton of threads about the advantages of a cyclone type vacuum setup. Seem the taper of the cone helps remove most all the chunks and even the very fine dust and fiberglass grinding particles from the actual vacuum cleaner because as the particles spin around, the speed increases the lower down the taper they go. And that centrifugal speed overcomes the vacuum suction to empty into the pre-vac container. They even sell premade cyclone cones called the Dirt Deputy;
41gMcKmIzqL.jpg


And there are a lot of folks building these.
original


original


original


I am going to make one myself and if it really does the trick. I will post the article here for others to see and mimic if they like. JMHO!

:thumb:
 

bigdee

Commander
Joined
Jul 27, 2006
Messages
2,665
Yes it will work the way you said. I worked with many cyclones in industry. I have to mention that there is slight risk of fire due to the static. The ones I worked with all had water deluge systems with flame detection. I don't think that is a big concern in your case but something you need to be aware of.
 

gm280

Supreme Mariner
Joined
Jun 26, 2011
Messages
14,592
Yes it will work the way you said. I worked with many cyclones in industry. I have to mention that there is slight risk of fire due to the static. The ones I worked with all had water deluge systems with flame detection. I don't think that is a big concern in your case but something you need to be aware of.

I know static electricity does gets created if you use only plastics and such. That is also an issue in larger whole shop vacuum systems. And they counter act that by using an un-insulted wire run through the piping to help control static build up. I can feel the static now with just using my shop vac as it is usually used daily. But I am going to make my setup from an old metal trash can that has long ago stopped working via the foot opening contraption. So the taper cone will dissipate the static as it gets produced...or so I hope so.

I found a very good program that you input the top diameter and the bottom diameter and the total height. Then it calculates the cut out pattern for you and gives the angle in degrees, and the arcs you need to cut. I will be using that program for the tapered cone section. Interestingly enough, if this really works out well, the actual vacuum canister will not receive anything to fill it up. And it that is so, you could easily remove the canister and just use the motor assembly in a very small container for the suction capability and the pre-vac container would be the main container to empty. :noidea:
 

Tnstratofam

Commander
Joined
Aug 18, 2013
Messages
2,679
Gm I've seen reviews done by wood workers who like the Dust Deputy by onieda like the one you showed a picture of. If you do a search on you tube of cyclone shop vac reviews you should have some good info. I don't see why it won't work the same when grinding fiberglass versus sawing wood. I'm interested in what you find as I feel it could be a good investment.
 

jbcurt00

Moderator
Staff member
Joined
Oct 25, 2011
Messages
24,871
I think WOG posted a garbage can centrifuge separater cyclone at some point.

I dont know if its ideal for fiberglass grinding dust collection, thats pretty fine dust. The fine stuff makes it to the filter, the big chunks are dumped out of the cyclone and keeps a typically small volume shop vac from filling quickly.

I have used a water filter when grinding concrete. It works ok too, but man, what a mess to empty.


Good luck.
 

gm280

Supreme Mariner
Joined
Jun 26, 2011
Messages
14,592
Gm I've seen reviews done by wood workers who like the Dust Deputy by onieda like the one you showed a picture of. If you do a search on you tube of cyclone shop vac reviews you should have some good info. I don't see why it won't work the same when grinding fiberglass versus sawing wood. I'm interested in what you find as I feel it could be a good investment.

tnstratofam, I actually did go to you tube and watched a few of the reviews and cyclone uses. And much to my amazement, that Dust Deputy is not only the cheaper on the market, but also came out one of the best if not the best. I was impressed how one guy tested it. He tested three marketed cyclone type vac traps, and he used a random orbital disk sander for the very fine partials.

I was expecting a lot of the dust to bypass the cyclone contraption being so little and small and go to the vacuum straight into the dust filter like usual. But I was impressed to see nearly 100% was trapped before the shop vacuum cleaner with so very little in the filter . So now I think instead of reinventing the cyclone myself, I may just buy one of those Dust Deputies and fix up my setup. Can't get any easier and then I don't have to clean the filters out so often and that will certainly allow the motor to breath and run cooler too.

In every non-biased test by so many, the Dust Deputy came out tops. I see them sold everywhere and about $45 dollars too. So I will look at that option instead of making a cyclone myself. I even had the program all figured out to design my own. But why do that when they are available so cheaply and work so well. :noidea:
 

gm280

Supreme Mariner
Joined
Jun 26, 2011
Messages
14,592
Okay folks, a little update on this subject. After watching a lot of cyclone type dust vacuum setups, I decided to just buy the Dust Deputy. And that is what I did. It should be here maybe today. Reason I decided to buy rather then build was the many videos I watched showed how well that little thing works. Why reinvent something that is available for such a little cost. So once I get it, I will post how it works for others to see.

Watching the videos, it looks like the actual vacuum container received very little in dust and debris from this setup. So hopefully no more filters packed with such dust anymore. :bounce:
 

gm280

Supreme Mariner
Joined
Jun 26, 2011
Messages
14,592
Looking forward to see how well it works for you.

Well that little Dust Deputy did show up yesterday. And I will post pictures and how well it works. If it alleviates the filter from plugging up with the fiberglass dust, it will be a huge hit with me for certain. We'll see. :noidea:
 

gm280

Supreme Mariner
Joined
Jun 26, 2011
Messages
14,592
Okay, I did manage to work in a setup for this Dust Deputy cyclone vacuum accessory. And before I go any further, I want to state, I am not being paid by Dust Deputy to promote any of their products. But I did say I would provide an honest assessment after using it. So here goes.

I opened up the box and it was well packaged with some warning issues about vacuuming up embers and items that could be extremely combustible. DUH! If anybody serious does that now, just forget buying one of these and stay away from me.

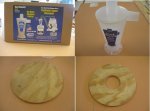
So I proceed to make my setup. Here are some pictures;
Dust Deputy - 1.jpg
The outside of the box with a picture of a typical setup. And the Dust Deputy itself right out of the box.
I then took a piece of plywood and started cutting it to the proper shape. The diameter is 9" because on my bucket lid, the max diameter I could make and have it fit flat against the top was 9". So your plywood could be larger or smaller depending on what your lid will allow. This plywood goes underneath the lid to keep the top from sucking in when using it. I did read a few folks that forgo this reinforcement and have problems. So I decided to head that possible problem off from the get go.


The center hole is 3" and that is specified in the instructions as well. The is the exact opening of the Dust Deputy on the bottom. I used my Porter Cable Plunge Router to make these cuts. Bu honestly, a simple jig saw will certainly work.
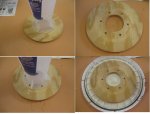
Dust Deputy - 2.jpg
Next I drilled the six holes in the plate. They state to drill the holes 1/4". But the actual holes in the Dust Deputy are 5/16". And I almost made them 5/16" and decided to just go with the 1/4" size. And there is a good reason for that. If any of the spacing is even a little off, it is easier to move the Dust Deputy around to line up six 1/4" holes then six 5/16" holes without waddling and filing the holes for everything to fit. So go with the 1/4" size. It works.

Next, it is time to cut the plastic lid for this to mount on. As you can now see the 9" plywood just fits perfectly in the plastic lid because of all those ribs around the edge. So centering this was not hard at all. I marked it with a sharpie. But keep in mind that a sharpie really doesn't stay on this type plastic too well. So watch for that. I thought about what to use to cut this 3" hole out of the top. And even though a perfect cutting idea would be a 3" Forstner bit, I just didn't have one that large. I think my biggest is 2 1/2". So out comes a really good and sharp #11 bladed Exacto knife and an extremely sharp carpet knife. Between the two I managed to get it cut out. But here again, if you go the knife route, be careful with it and go slow. It is really easy to make a bad cut with a shape knife and applied pressure to cut the plastic. I took many little cuts in the plastic before cutting all the way through. But whatever work for you.
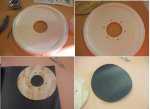
Dust Deputy - 3.jpg
The 3" center came out really nice. Then you have to drill the six 1/4" holes as well. Again marking these was not as easy as it would seem. And that is because while you can get to all the six holes, if your marker is of a normal length, you can't mark the front side of any of the holes. The taper of the Dust Deputy won't allow it. So make do and it really isn't to critical as long as the holes are useable. Remember the holes are 5/16" and you are drilling 1/4". So there is a little lead way.

Now comes the interesting part. There are a lot of ways to install the Dust Deputy on the plastic lid. You want an air tight fit so the system will work perfectly. If there are air holes then the vacuum doesn't work as good. So I thought about silicones and different type sealers to assemble this. I even thought about 5200 sealer. I thought if I only had some rubber sheet, that would be prefect. Well I didn't have any rubber sheet and started wondering what else I could use. I even tough about tire tubing. Well I went to Lowe's (I think I own half of them now around where I live). And between my wife and I we searched the store over pretty well. And then we get to the housing section and they had this drawer liner sheeting. It was about 3/32" thick, black, and rubbery. WALA, there was my rubber sheet. It came in 12" by 7'. And cost $7. So that is what I used for the gaskets instead of glues, sealers or silicones. So use whatever you have and as long as it seals, it will work.

I cut the circle out with the sharp carpet knife pretty easy.
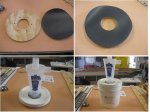
Dust Deputy - 4.jpg
Cutting the outside of the gasket was easy, but not so much for the inside. It was a little more iffy. But I eventually got it cut. I needed to put the six holes for the bolts. That was another interesting question. I have a gasket cutter assortment that you use a hammer to cut them out. So I tried them. They worked okay, but honestly, a simple scratch awl works just as good to make an opening. You have to force the bolts through, but it does seal perfectly.

I used 1 1/4" bolts with flat washers on both sides with nylon lock nuts so vibration won't loosen them up down the road. Not bad getting everything made after all.

And for those of you that use Cabisol, take a real good look at the bucket I used for this. Yes a Cabisol bucket, and it has a great rubber gasket all around the lip to seal really tightly. How can you go wrong reusing such things?
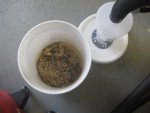
Dust Deputy Done (17).JPG
Here is the results of this setup. I have to say I am more the impressed with how well this thing works. If you are tired of plugged vacuum filters and having to clean out the vacuum and filter every time you use it, you have to make one of these. The time saved is worth it. But not having to clean the vacuum filter off is the best art. I give this 5 starts and I am really hard to impress.

So there it is folks. Hope it wasn't too boring. long and useless. But I thought it was worth the effort to report how well this things works knowing other iboaters grind fiberglass and hate cleaning dust filter in their vacuums. And it is neat to see the cyclone action as it runs too. :thumb:
 

Tnstratofam

Commander
Joined
Aug 18, 2013
Messages
2,679
Awesome. Looks like it did an exceptional job of seperating out the wood and dust particles. I appreciate the detail on assembly and design of the bucket and top. I will be purchasing one soon, and hope to copy your design. Thanks for posting the results.
 

gm280

Supreme Mariner
Joined
Jun 26, 2011
Messages
14,592
One last update to this Dust Deputy contraption. Today I took my regular shop vacuum, I actually have two. One dedicated to the table saw and one for most everything else. Well I took the main one for everything and removed the filter and thoroughly cleaned it of all dust and anything else stuck in the folds. I also cleaned the vacuum body so there was zero dirt, dust or any thing else in it.

Then I reassembled it and started cleaning my shop. I do that occasionally and there is everything from saw dust, metal particles, regular dust, sanding dust and yes even fiberglass dust because I used my angle grinder to trim off the 1708 on the top edge of my boat. I vacuumed the boat, floor, chop saw, table saw, grinder/wire brush stand, every place I could think of. I actually vacuumed for about an hour straight. I really wanted to test this Dust Deputy to see if it really worked in a real test.

Well I was totally amazed to see not one speck of anything in the shop vacuum or the shop vacuum filter...not anything. Everything was in the Dust Deputy bucket. What else can I say. It works as advertised. :thumb:
 

gm280

Supreme Mariner
Joined
Jun 26, 2011
Messages
14,592
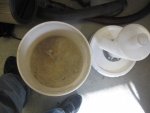
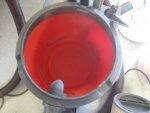
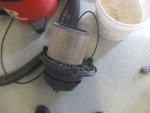
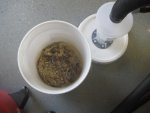
I know I stated last post that it was the last one. But I have to show these pictures from todays boat work. I when over the recently installed 1708 fiberglass material with a grinder to remove all the sharp edges and prickly threads. And I did a jam up job grinding those things. There was fiberglass white snow everywhere, as usual. So I took the new cyclone Dust Deputy setup I build and went to vacuuming all that itchy dust. After finishing vacuum up the boat and everything, I decided to open up the bucket to see what was captured in it. To my amazement, all that fiberglass dust was in the bucket and virtually zero in the shop vacuum. Take a look. I am a extremely happy camper...I mean boater. :bounce:

Dust Deputy Done (17).JPG
You can see all the other items I vacuumed up but look at the fine fiberglass dust as well.
IMG_0083.JPG
I bounced the bucket around to show the dust better. The bucket is about half way filled.
IMG_0085.JPG
And this is what was not in the shop vacuum. Basically clean.
IMG_0086.JPG
And this is the filter. I know you can't really see it good, but this is exactly what it looked like after last cleanup. Now I will get a new filter and probably never have to mess with it again. You can see the bucket on the side. That caught everything. I couldn't be happier. :thumb:
 

Tnstratofam

Commander
Joined
Aug 18, 2013
Messages
2,679
Looks like it's working really well. I think this should be a recommended addition to anyone who will be doing any fiberglass grinding or woodworking.:encouragement:
 

gm280

Supreme Mariner
Joined
Jun 26, 2011
Messages
14,592
Looks like it's working really well. I think this should be a recommended addition to anyone who will be doing any fiberglass grinding or woodworking.:encouragement:

Yes tnstratofam, If I haven't seen it, I would believe it. When you use this thing, you can see the dust and debris spinning around in the cyclone unit. And it spins so fast that the vacuum suction can't pull the material out the top outlet to the shop vacuum cleaner. So it drops into the bucket. Really a clever idea. Physical forces working against each other. It just can't pull even the littlest particle out of the spinning action. The centrifugal force is too strong for the suction pull. My biggest issue was having to clean out the shop vacuum filter. I hated doing that. Now I wouldn't have to. :thumb:
 
Top