


Saline Marina
Petty Officer 2nd Class
- Joined
- Sep 9, 2014
- Messages
- 162
Just wanted to post a thread for documentation and to try to give back to the forum since its helped me a lot.
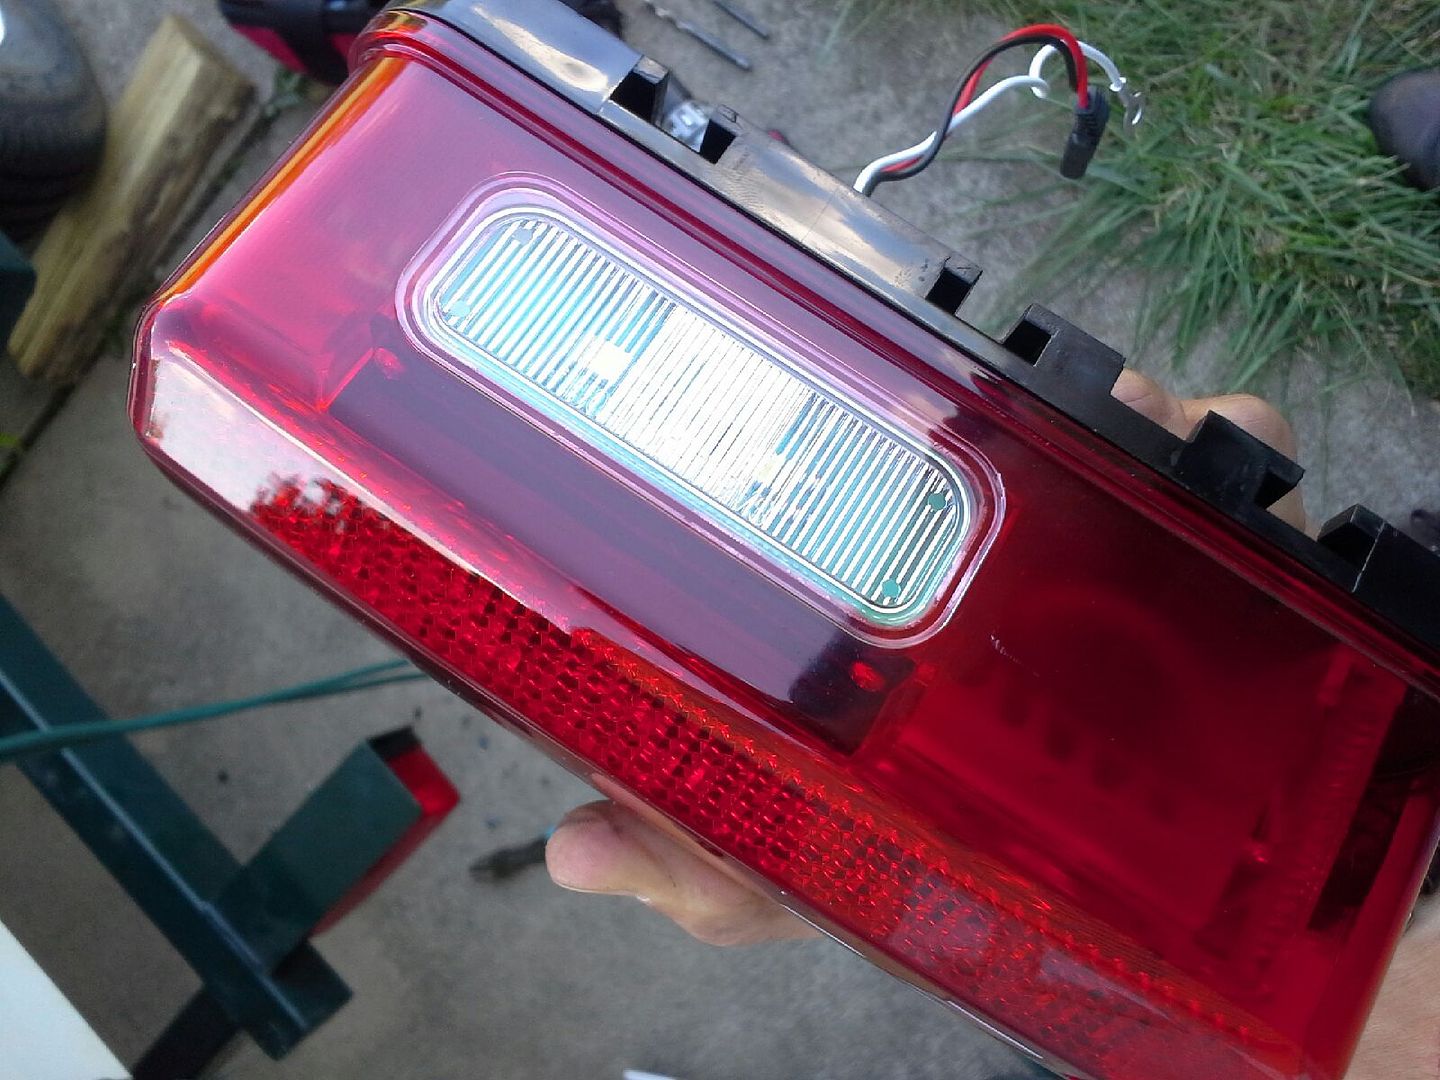
Not the most fun topic, but when I got my Four Winns 170 Horizon, the trailer had a broken light on one side which also shattered the sealed bulb. I looked at getting just a new bulb asm but thought maybe it would be a good time to upgrade to LEDs since they are so much brighter and the old setup is around 15 years old at this point.
I sourced some new Wesbar lamps from Amazon, the part numbers are pictured below in case that is useful. There is definitely a Left asm and a Right asm. The Left side is described as "8 way" on some sites which also includes a clear LED in the bottom for illuminating the license plate.
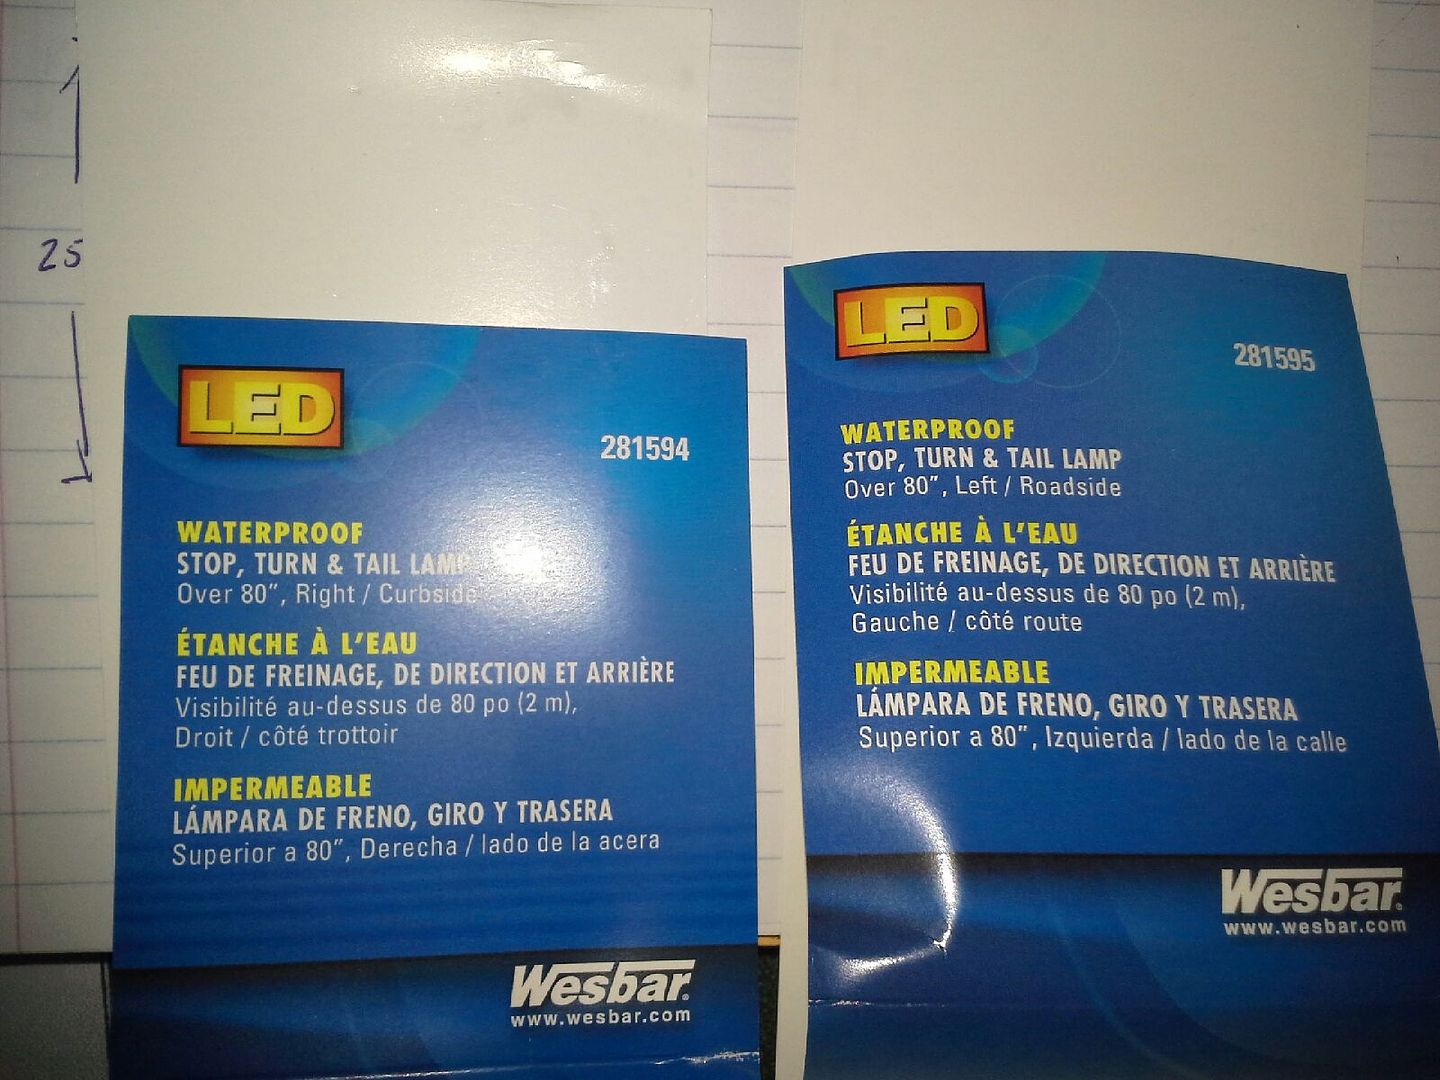
"8 way"
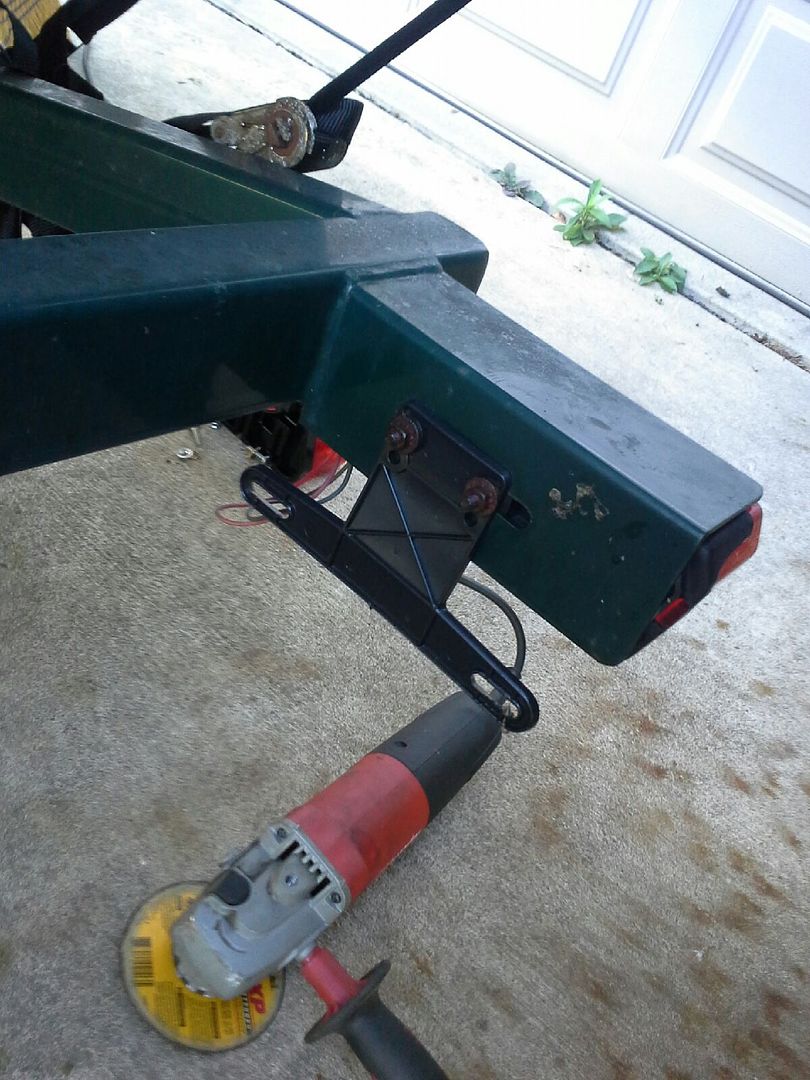
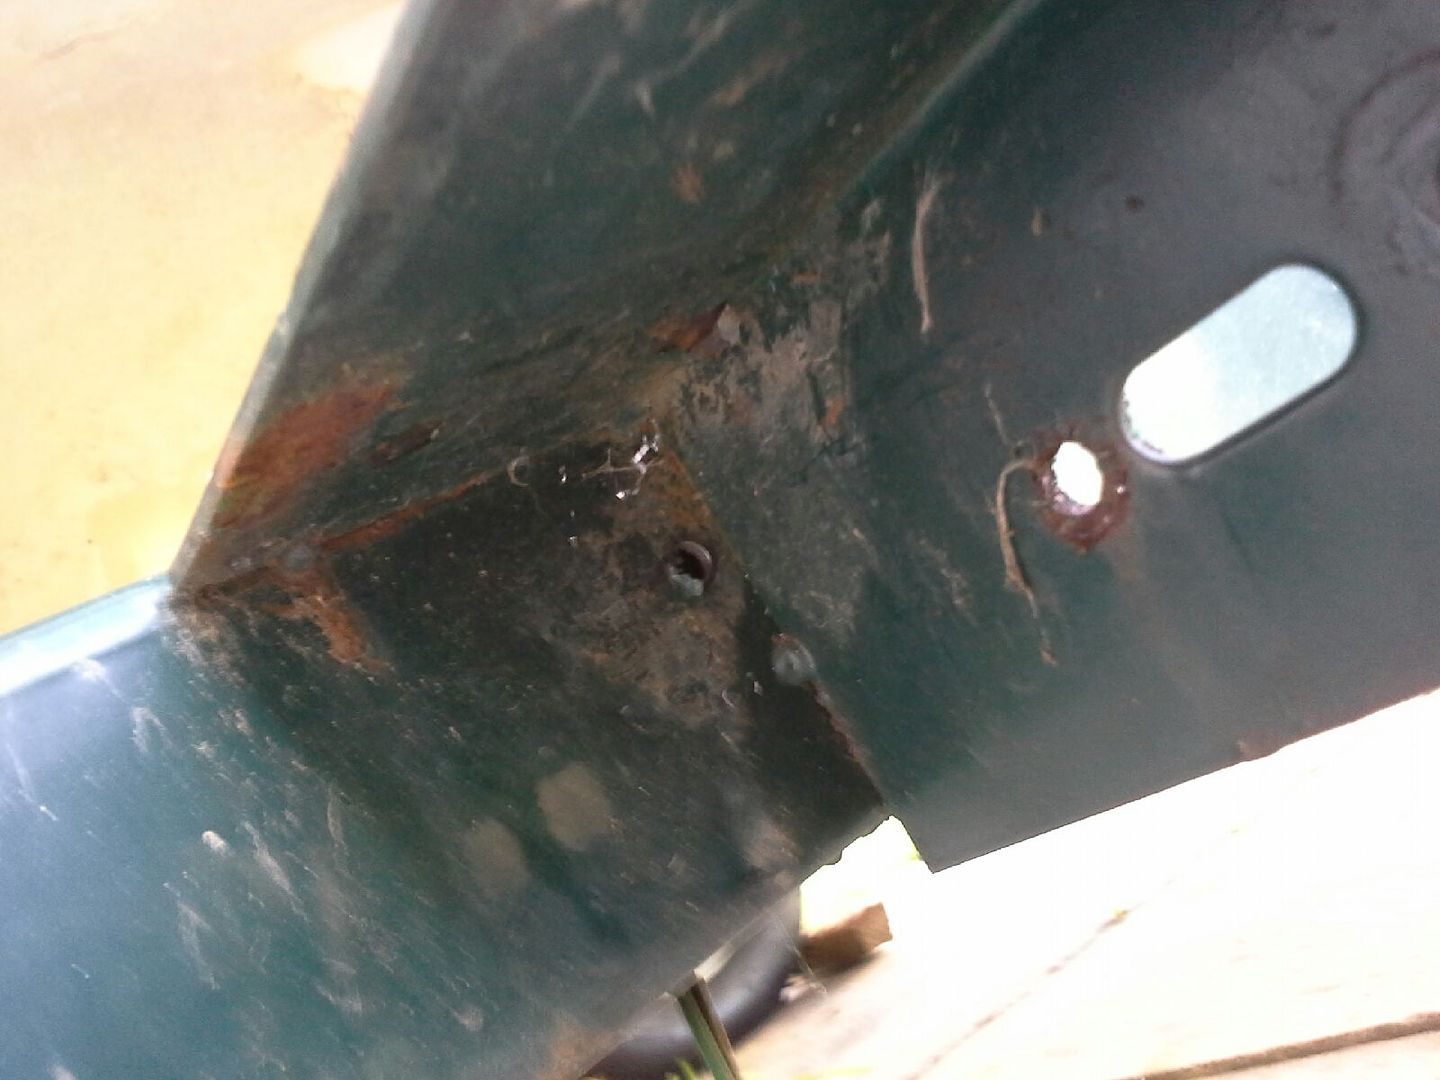
First order of business is to remove the old lamps. Bolts corroded solid, carriage heads retained by plastic channels...no chance at removal. So I got out the cutoff disk on the grinder, it works but also tends to melt the plastic. Not that big of a deal as I'm not reusing these lamps. A hacksaw or super sawzall blade could be used (slower) if the plastic was to be saved.
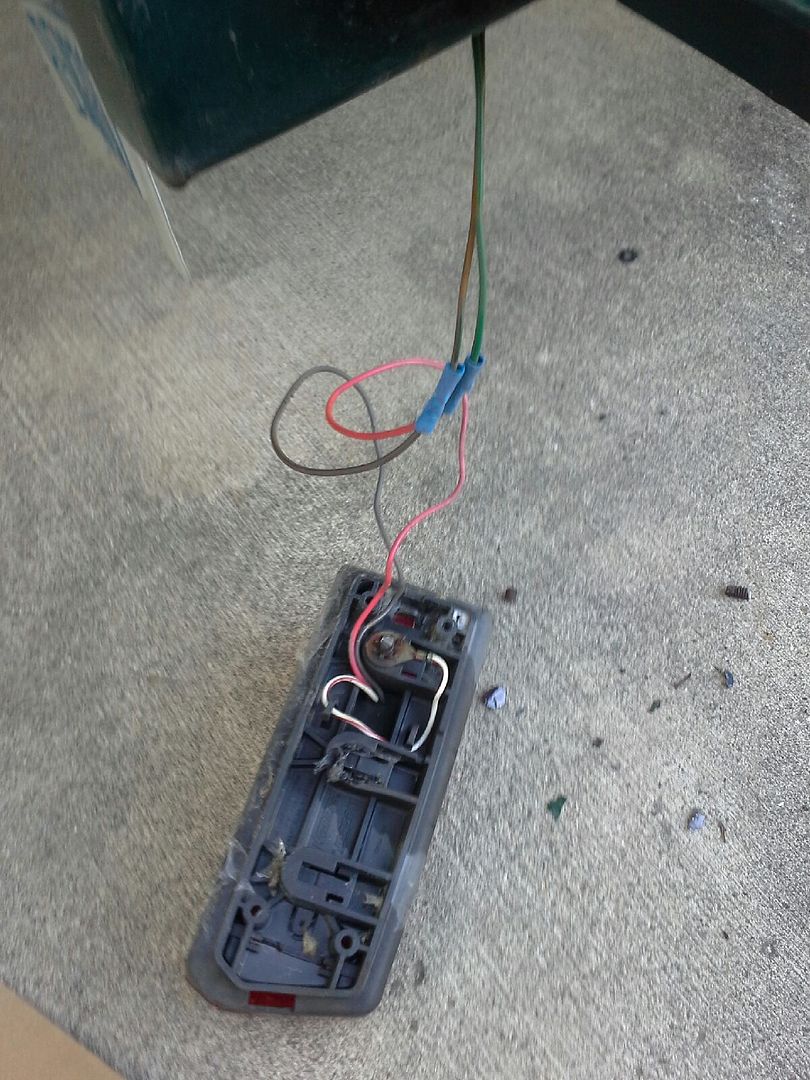
I was interested that in OEM manufacture, normal insulated butt splices were used to connect the wiring. Also the ground is just captured behind the housing asm with a large star washer to bite into the frame.
I wanted an internal routing on the wiring, so I drilled this hole under the metal backer housing. It pictured as 1/4" and I opened it to 5/16" for better wire clearance.
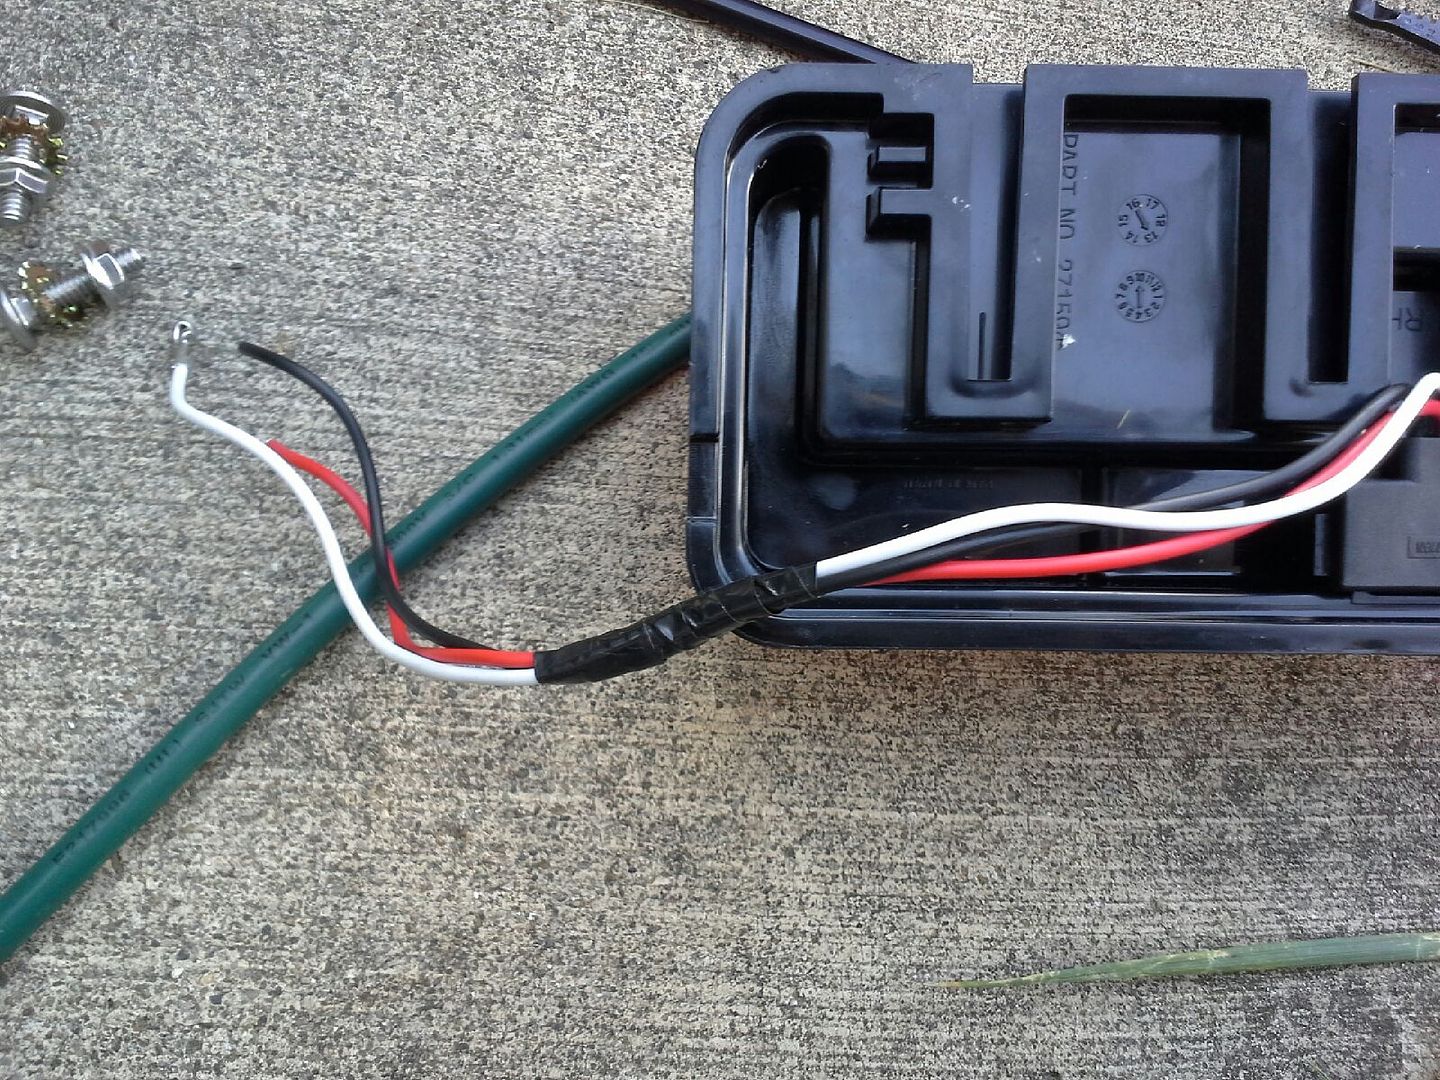
Snipped off the 2-pole bullet connector as I don't have the mating half. Double electrical taped the bundle going thru for chafe resistance going thru the hole I just drilled in the frame.
Used blue Loctite on the fasteners. The fasteners are described as stainless steel, but that material has a terrible tendency to gall when it contacts in a threaded application. So I left the nuts snug (more than the picture at right) but not uber tight, and used Loctite to keep them in place. Anti-seize could also be used but I didn't want the lamps to have any chance of falling off while towing.
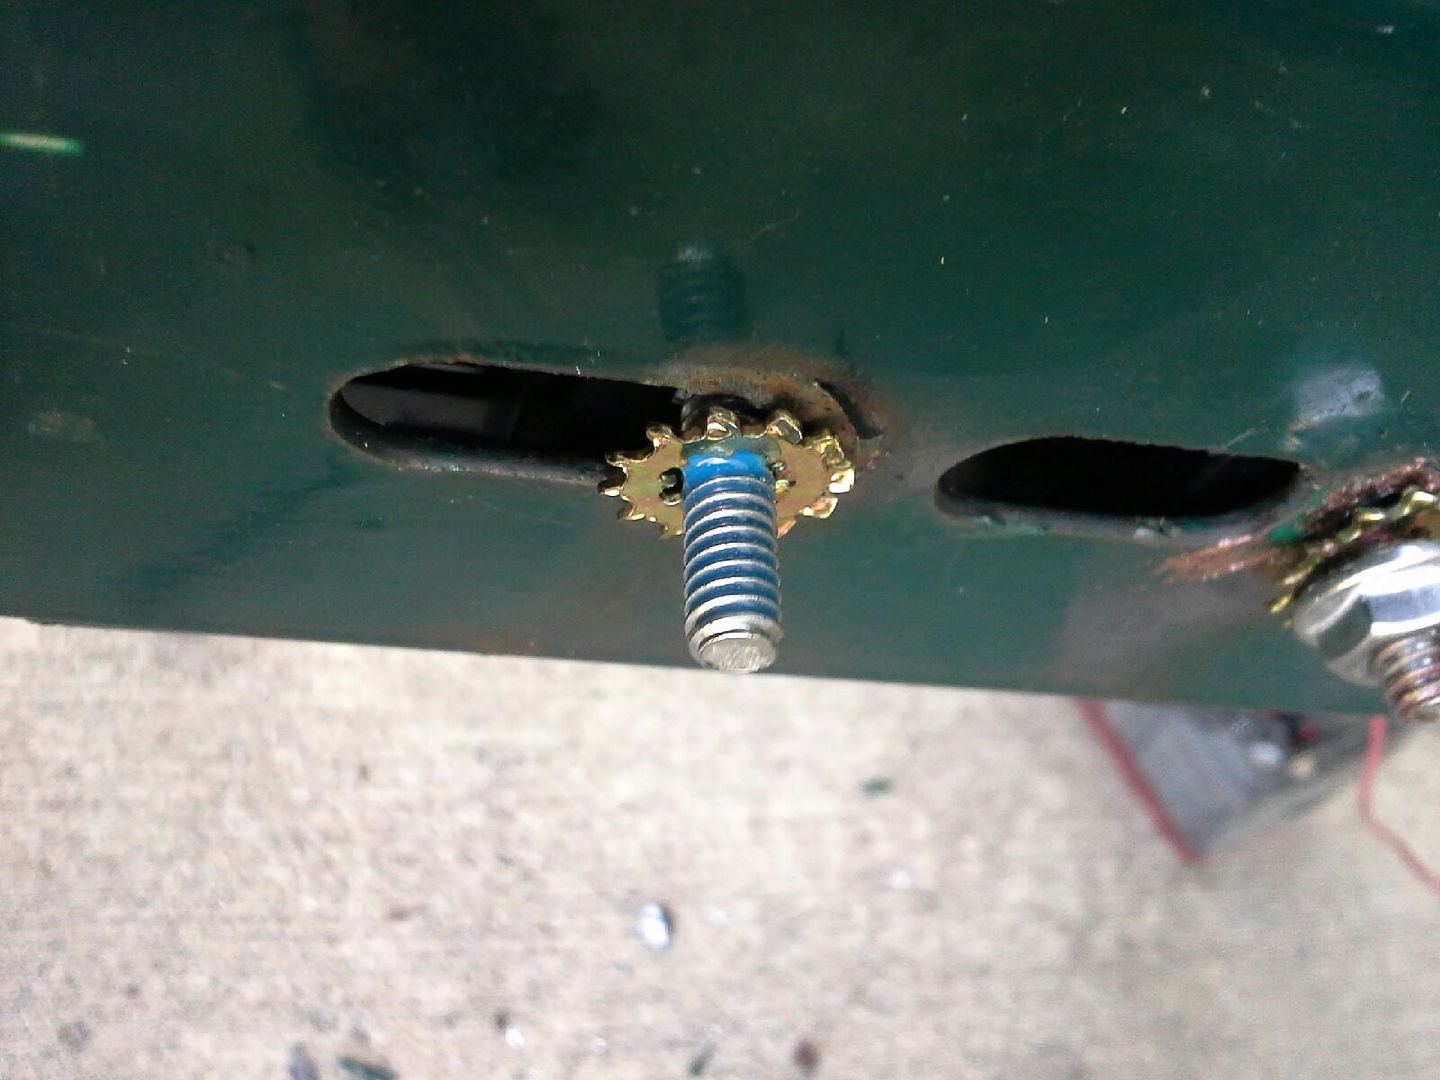
Drilled and tapped a new 10-24 hole for a brass screw. Scraped paint and bedded with pure copper anti-seize, which is also a conductivity aid in addition to being a corrosion preventer.
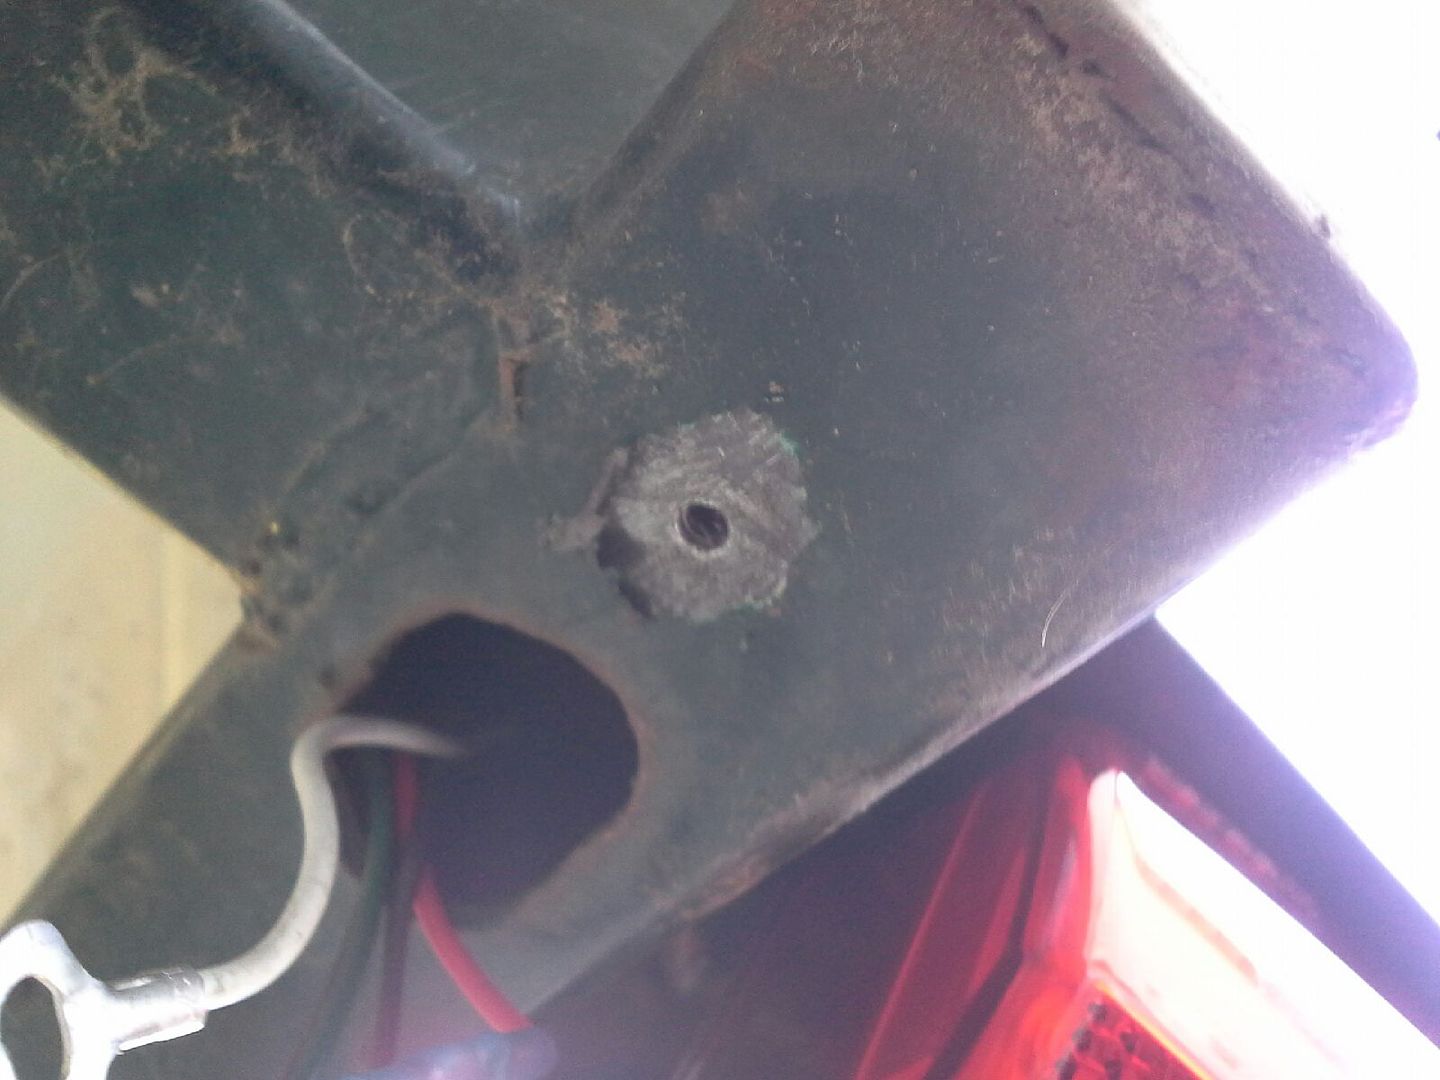
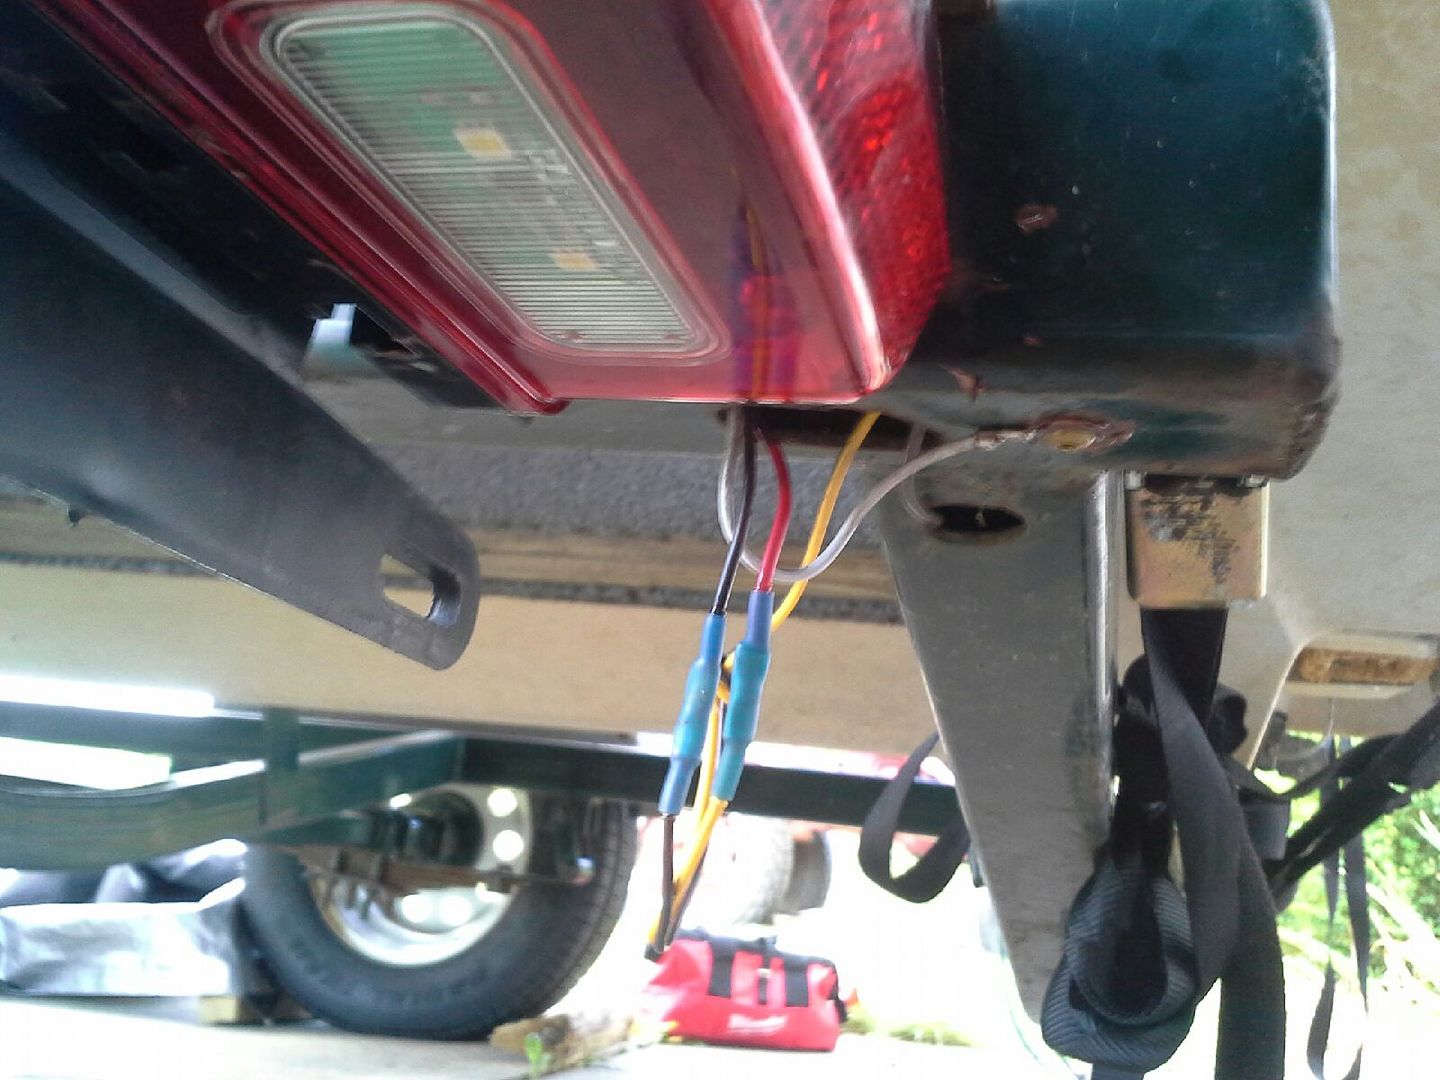
Final step, ground connected, I used Panduit heat shrink butt splices. Really love these for vehicle and trailer apps as there's a sealing glue inside the heat-shrink which seals out moisture for a really long-lived and reliable connection.
Pushed wires inside and tested, works great, unfortunately no pics as I'm a one man repair crew at present. Thanks for reading and I hope it helped.
Not the most fun topic, but when I got my Four Winns 170 Horizon, the trailer had a broken light on one side which also shattered the sealed bulb. I looked at getting just a new bulb asm but thought maybe it would be a good time to upgrade to LEDs since they are so much brighter and the old setup is around 15 years old at this point.
I sourced some new Wesbar lamps from Amazon, the part numbers are pictured below in case that is useful. There is definitely a Left asm and a Right asm. The Left side is described as "8 way" on some sites which also includes a clear LED in the bottom for illuminating the license plate.

"8 way"

First order of business is to remove the old lamps. Bolts corroded solid, carriage heads retained by plastic channels...no chance at removal. So I got out the cutoff disk on the grinder, it works but also tends to melt the plastic. Not that big of a deal as I'm not reusing these lamps. A hacksaw or super sawzall blade could be used (slower) if the plastic was to be saved.

I was interested that in OEM manufacture, normal insulated butt splices were used to connect the wiring. Also the ground is just captured behind the housing asm with a large star washer to bite into the frame.

I wanted an internal routing on the wiring, so I drilled this hole under the metal backer housing. It pictured as 1/4" and I opened it to 5/16" for better wire clearance.

Snipped off the 2-pole bullet connector as I don't have the mating half. Double electrical taped the bundle going thru for chafe resistance going thru the hole I just drilled in the frame.

Used blue Loctite on the fasteners. The fasteners are described as stainless steel, but that material has a terrible tendency to gall when it contacts in a threaded application. So I left the nuts snug (more than the picture at right) but not uber tight, and used Loctite to keep them in place. Anti-seize could also be used but I didn't want the lamps to have any chance of falling off while towing.

Drilled and tapped a new 10-24 hole for a brass screw. Scraped paint and bedded with pure copper anti-seize, which is also a conductivity aid in addition to being a corrosion preventer.

Final step, ground connected, I used Panduit heat shrink butt splices. Really love these for vehicle and trailer apps as there's a sealing glue inside the heat-shrink which seals out moisture for a really long-lived and reliable connection.

Pushed wires inside and tested, works great, unfortunately no pics as I'm a one man repair crew at present. Thanks for reading
and I hope it helped.
Last edited: