New Pontoon Cover

bruceb58

Supreme Mariner
Joined
Mar 5, 2006
Messages
30,524
I promised that I would post some of the steps I did to make my pontoon cover so here goes.

This is what the old cover looked like. I believe it is the Dowco cover that SunTracker charges over $800 for. Not impressed with the material or how it was constructed for that price.

IMG_20131222_084544.jpg

IMG_20131222_084558.jpg


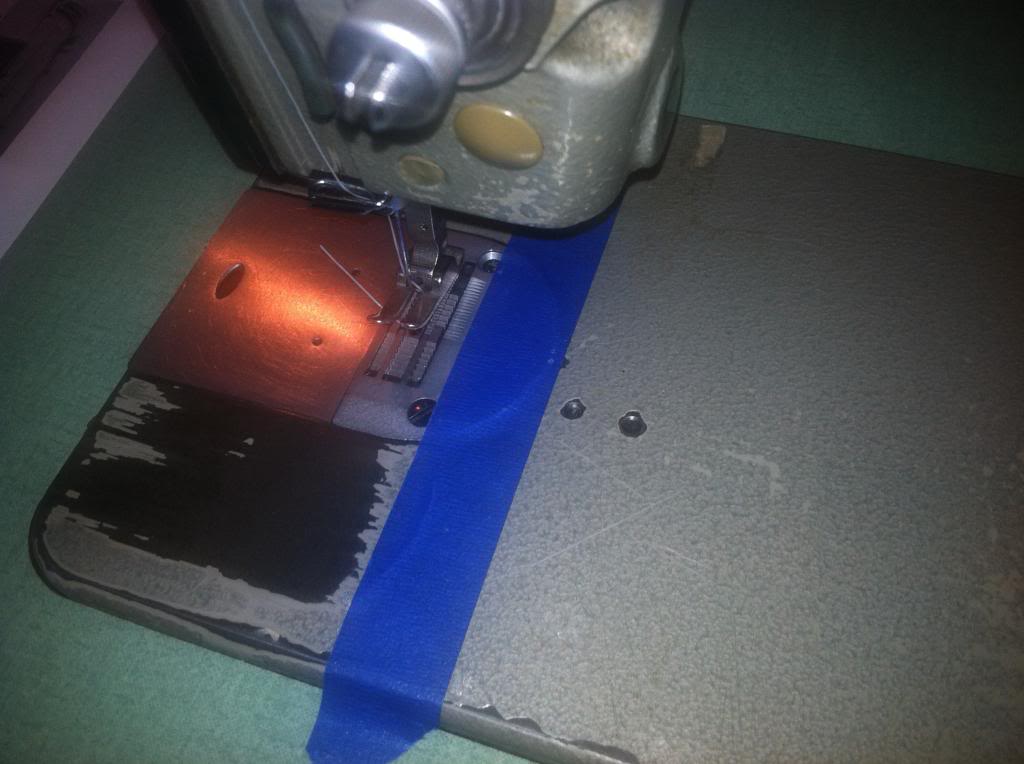
First thing to do is get out my Consew 226R walking foot sewing machine sewing machine.
IMG_20131222_090124.jpg


Lay out the material that I want to cut. I am going to do a seam down the middle. I will have 2 60" pieces sewn together. I prefer on a pontoon to do the seam this way. You use more material but you don't get the circus tent effect as much as the fabric stretches.

I am using Marine Sunbrella which is the 9oz per yard weight. It is the standard Sunbrella that is used on boats.
IMG_20131222_091737.jpg


This picture shows the tool that cuts the Sunbrella. It does so by melting the fabric. It is very important to use a tool like this when cutting Sunbrella as the raw edges will fray.
IMG_20131222_091905.jpg
 

bruceb58

Supreme Mariner
Joined
Mar 5, 2006
Messages
30,524
Re: New Pontoon Cover

Next step is to sew the seams. Since Sunbrella is not side sensitive like some fabrics you can sew any side. With other fabrics that have a front and back side, you put the 2 front sides together before you sew this seam.
IMG_20131222_094026.jpg


After you sew the length of the fabric you top stitch what you just sewed.
IMG_20131222_104709.jpg


I now lay the entire fabric pieces I just sewed together over the boat and prop the cover up where I think my poles will need to be. I use Pony clamps to hold the fabric in place along the top rail.
IMG_20131222_120746.jpg


I mark the cover along the top rail and then cut along my marks with my hot knife tool. This picture shows the cover marked. To mark, I either use a soap stone or a piece of soap.
IMG_20131222_123606.jpg

I have also made my cutouts where the bimini top poles connect to the top rail.
 

bruceb58

Supreme Mariner
Joined
Mar 5, 2006
Messages
30,524
Re: New Pontoon Cover

After I have the top piece trimmed(adding 1/2" seam allowance), I sew on the skirt that goes around the circumference of the boat. Because I have openings for the bimini top, I do the skirts in segments from bimini pole to bimini pole. I have 5 poles on each side so there are many sections. I personally hate having darts in my cover and that is why I prefer this method of having the seam along the edge of the rail. Som canvas makers make the cover wide enough to reach all the way to where the snaps go and put darts at the corners. There will obviously be places where you will need them going around some odd shaped places but I believe less darts the better and you get a cover with less wrinkles.

I got lazy here with my picture taking. This shows the skirt sewed on in the front. Seam is perfectly along the rail of the boat
IMG_20140104_144225.jpg


I am using quick-fit fasteners to hold the cover in place. These are very useful tools. Basically, you have all the male snap heads installed on the boat and you press these guys on the snaps. You push the fabric over the point and place the black plastic holder over it. This does 2 things. it allows you to pull the fabric tight to the desired position and also marks where your snaps are going to be.
IMG_20140104_144139.jpg

IMG_20140104_144207.jpg

IMG_20140104_144216.jpg
 
Last edited:

MH Hawker

Vice Admiral
Joined
Jul 13, 2011
Messages
5,516
Re: New Pontoon Cover

I all ways wondered how the fabric was kept in place. I am still waiting to see how the 250 cover the one guy is having done comes out when it takes 70 plus yards at 15 a yard
 
Last edited:

bruceb58

Supreme Mariner
Joined
Mar 5, 2006
Messages
30,524
Re: New Pontoon Cover

Now is time to trim the skirt with the hot knife. the Quick fit fasteners are holding the cover perfectly in place. If this was a snap in cockpit cover. I would be marking the cut line with soapstone and cutting it off the boat.
IMG_20140104_154732.jpg


Here I am going to make some reinforcements for the poles. Once you make these you can add a snap, grommet or pole vent to hold the poles. I put one layer of Sunbrella on top of the cover and a layer of Sunbrella and 2 layers of vinyl on the underside. You can see the black Vents that I will be putting on the cover here.

I just cut a square 1" bigger than I want and fold each edge over 1/2" and hold it with basting tape.
IMG_20140105_160535.jpg

IMG_20140105_161045.jpg

IMG_20140105_095231.jpg

I put 3 of these on my cover. I used something similar to this:Amazon.com: Taylor Made Products Boat-Vent II*Boat Cover Vent: Sports & Outdoors
 

bruceb58

Supreme Mariner
Joined
Mar 5, 2006
Messages
30,524
Re: New Pontoon Cover

This is where I got even lazier with the pictures. I will take more and add them later.

The perimeter of the cover has 1" poly webbing sewn on followed by 1" Double fold Sunbrella bias cut binding. You want to use bias cut binding so that if you have any curves, it is easier to go around corners.

This shows the binder attachment for my machine. It folds the binding for you so all you have to do is push the edge of your work toward the tool.
IMG_20140201_160807.jpg


I use a swing away binder. You can also use a fixed binder that screws into the machine or bobbin plate. I have my swing away binder mounted on its own bobbin plate so it is easy to remove.

What is nice about the swing away is that when you start your stitching at the beginning of a run and you do your reversing to lock your stitching down, the binder swings back with the material. With a fixed binder, this is close to impossible without the material bunching up.
IMG_20140201_160716.jpg


This shows the finished edge from the back side. I messed up on my cut of the webbing here. Little bit crooked!
IMG_20140201_160724.jpg

IMG_20140201_160731.jpg
 
Last edited:

bruceb58

Supreme Mariner
Joined
Mar 5, 2006
Messages
30,524
Re: New Pontoon Cover

Next step is installing snaps. At this point in time, my cover is on and I have it help mainly in place with the quick-fit pins. I use my Press-n-snap tool to install all the snaps. I do this while the cover is on the boat so I can do some adjustments so I don't get wrinkles. If you don't have this tool and have the hammer type tool, you will have to make sure you do a very good job of marking where the snaps go as you don't really want to take the cover on and off for each snap.
IMG_20140203_211155.jpg


Here is what the snap looks like on the reverse side. I only use stainless Steel snaps.
IMG_20140206_230118.jpg


For where I go around bimini poles, I sewed in these flaps. At the top, I cut a circle. I sew in a piece of material that will wrap around the pole and then lay flat against each other. I sew in velcro to hold it so it doesn't flap in the breeze and an extra snap at the bottom/
IMG_20140220_073607.jpg

This shows it folded flat. I don't have the bimini on right now so it doesn't show how it fits. I wanted to do something like this for 2 reasons. One is to keep water out and the other is to shield my seat from the sun. If you just do cutouts, like I have seen on some covers, the vinyl of the seat rots out where the cutout is made.

IMG_20140220_073626.jpg
 
Last edited:

bruceb58

Supreme Mariner
Joined
Mar 5, 2006
Messages
30,524
Re: New Pontoon Cover

Here is the finished cover before i put the pole vents in.
IMG_20140203_131908.jpg
The poles aren't super tight at this point so there are a couple wrinkles but not bad!

Next cover would probably have a little more slope to it. I wanted it fairly low so that the wind doesn't catch it as much when it will be at my slip at the lake in the summer. It still sheds water well.
 
Last edited:

BatDaddy1887

Chief Petty Officer
Joined
Jan 18, 2009
Messages
463
Re: New Pontoon Cover

Bruce, you are an inspiration to all of us! Great job. I made my own individual seat covers back in '09, but not as clean and neat as you have done. When next I tackle this type of project, I will employ your techniques for the snaps. Thanks.
 

bajaunderground

Lieutenant
Joined
Apr 18, 2008
Messages
1,401
Re: New Pontoon Cover

Bruce, the only thing that surpasses your good advice is your skillz!!! You have 4 things I want/need...binding attachment, hot knife, snap kit and walking foot machine.

I had a friend hold the covers in place while I marked my snaps, then pulled off, put in snaps, replaced cover, marked snaps...you know the drill...eventually the friend was not needed as there was enough pressure with the existing snaps!

If I start making covers for buddy's boats, I'll get 3 of the 4...unless I can get a walking foot machine for free?

~Brett
 

bruceb58

Supreme Mariner
Joined
Mar 5, 2006
Messages
30,524
Re: New Pontoon Cover

I should send you my binder for you to try. I guarantee you will love it.

My next sewing job is an outboard motor cover. Using binding on the edge of it too but no webbing so the trick I showed you with the webbing wouldn't work.

Next project, I am going to be trying the SolarFix thread that I bought. Bought an extra bobbin carrier specifically for that thread so I set the tension on it and only use it with that thread.

You don't like your walking needle machine?
 
Last edited:

bajaunderground

Lieutenant
Joined
Apr 18, 2008
Messages
1,401
Re: New Pontoon Cover

I should send you my binder for you to try. I guarantee you will love it.

My next sewing job is an outboard motor cover. Using binding on the edge of it too but no webbing so the trick I showed you with the webbing wouldn't work.

Next project, I am going to be trying the SolarFix thread that I bought. Bought an extra bobbin carrier specifically for that thread so I set the tension on it and only use it with that thread.

You don't like your walking needle machine?

Mines not a walking foot...it's a "needle feed" which moves the material through with the dogs...works okay, but not as well as a walking foot! You should sent me that binding attachment to "try out" I'm sure I'd love it!!!
 

bruceb58

Supreme Mariner
Joined
Mar 5, 2006
Messages
30,524
Re: New Pontoon Cover

I have an extra 7/8" fixed one. It's not a swing away one though. You have a picture of your machine bed to the right of your foot. There should be some mounting screws in that area or you can use an extra bobbin cover.
IMG_20140103_081315.jpg
 

Attachments

  • IMG_20140103_081315[1].jpg
    IMG_20140103_081315[1].jpg
    141.4 KB · Views: 2
Last edited:

bajaunderground

Lieutenant
Joined
Apr 18, 2008
Messages
1,401
Re: New Pontoon Cover

I have the mounting spot...


But, to be honest, I really liked the look of the folded edge/webbing than with the binding? Less material and faster assembly? I know what the professional's prefer and use?! IDK, I still have a winter cover too make!!
 

bruceb58

Supreme Mariner
Joined
Mar 5, 2006
Messages
30,524
Re: New Pontoon Cover

Did you see the swing away edge guide I have in post # 2? Very useful and better than tape to mark where you sew the first seam.
 
Top