1989 Yamaha 175 Prop shaft seals - how many?

mjf55

Chief Petty Officer
Joined
Jun 17, 2014
Messages
462
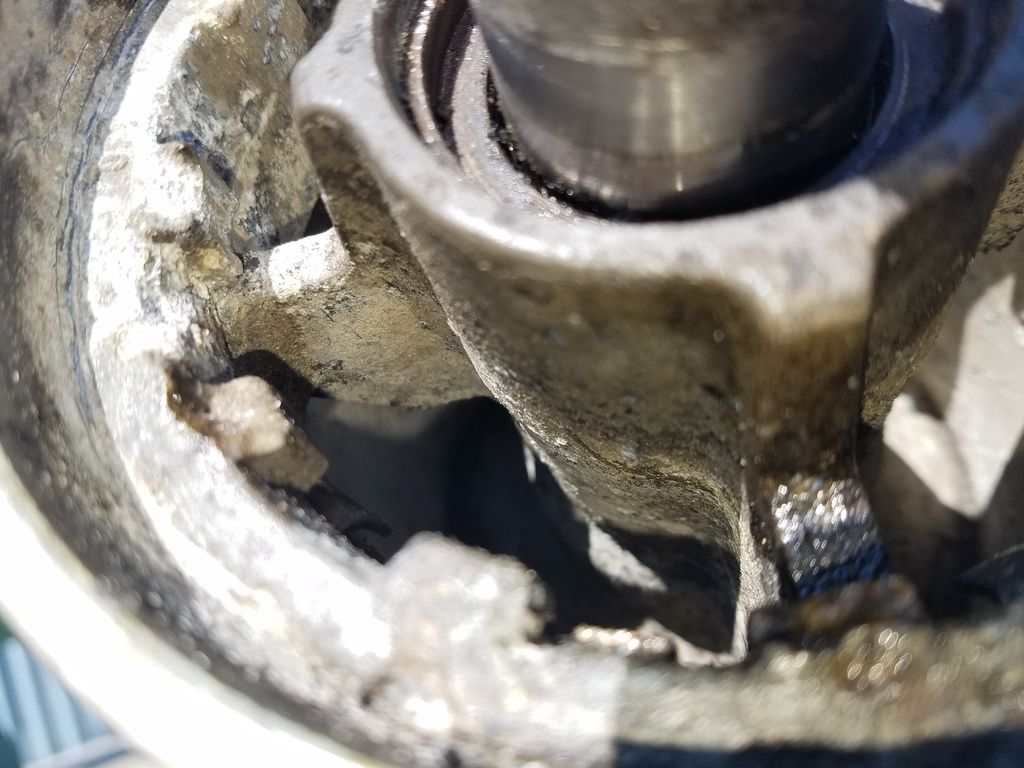
As the title reads, I have a 1989 Yamaha 175 ETXF that I am replacing the prop shaft seals. ( I already replaced the driveshaft and shift seals). Everything I read shows there are 2 seals to replace on the prop shaft. However, when I removed the first one, there seems to be a metal ring spacer and only the 1 seal.
Because this is a salt water boat, I am trying to remove / replace the seals with the shaft on.

Here are 2 photos of the carrier, with the seal ( 1) removed. Can anyone advise me? ( I really dont want to remove the carrier from the LU, as I know something big will break.

20161017_152223_zpsuvsrokmb.jpg


20161017_152139_zpsztnkld7n.jpg
 

GA_Boater

Honorary Moderator Emeritus
Joined
May 24, 2011
Messages
49,038
I think what you are seeing is the metal ring and rubber lip of the 2nd seal. No real detail in the diagram, but every diagram shows 2 seals. The manual says both seals are installed with the lip facing the prop. I wouldn't want to remove your carrier either.

yamseals.PNG
 

99yam40

Fleet Admiral
Joined
Sep 7, 2008
Messages
8,874
is that metal spacer you talk about a seal put in opposite the way the other seal was installed
 

mjf55

Chief Petty Officer
Joined
Jun 17, 2014
Messages
462
I think what you are seeing is the metal ring and rubber lip of the 2nd seal.....
Thanks GA. I did not think there was metal in the seal, except for the little spring that goes around the opening.

is that metal spacer you talk about a seal put in opposite the way the other seal was installed
Thanks 99Yam40. Both the ring and the flat behind the ring appear to be metal. I am thinking ( overthinking I am sure ) that the flat metal is some kind of a washer / spacer , but none is shown in any parts diagram. My new seals do not have and metal like that.

Still confused as to the next steps. Do I remove the ring ( hoping it is NOT part of the carrier, but how can it be if there is a washer behind it ), Or just put the 1 seal in.


Some measurements.
The thickness of the new seal is 7mm ( 6.5 if i squish it a little )
The distance from the outer metal ring to the edge of the carrier is 5 mm
The distance from the metal / washer? face to the edge of the carrier is 10 mm.
Therefore the ring is also 5 mm.

2 seals would be 13-14 mm. Hanging outside of the carrier by 3 - 4 mm. Does not sound right.

All measurements taken with my precision HF plastic calipers. ( Since all measurements are from the same instrument, and relative to each other, it should suffice.
 

mjf55

Chief Petty Officer
Joined
Jun 17, 2014
Messages
462
Well as it turns out, what I was seeing was remaining part of the original seal first seal. Another member suggested that I compare what I took out vs a new seal, and there was not enough material removed. So I had part of the seal still in. Put on my big boy pants and removed that ring/flat part, which turns out to be the metal casing the is inside of the rubber of a seal. Never knew they were made that way.

GA_Boater , 99yam40, thanks for your help.
 

GA_Boater

Honorary Moderator Emeritus
Joined
May 24, 2011
Messages
49,038
We try! :smile:


Use some lube on the outside of the new seals so the rubber coating isn't torn when installing, Grease the heck out of it.
 

99yam40

Fleet Admiral
Joined
Sep 7, 2008
Messages
8,874
I usually use a small touch of sealer on the outside of seal, but put some grease on the lip of the seal to make sure it has lub against the shaft
 

mjf55

Chief Petty Officer
Joined
Jun 17, 2014
Messages
462
Will do on the grease. I like the sealer idea. Like I said, I had already replaced the drive shaft and shifter seals. I WAS hoping that I could skip the prop shaft. It tested pressure to 6 psi ( then saw the leak, and vacuumed to 15 inches of hg.

My service manual ( official Yamaha one ) does not have the specs for pressure or vacuum. What should this vintage be?
 

mjf55

Chief Petty Officer
Joined
Jun 17, 2014
Messages
462
A video on the method I used for the first seal. Not sure if I will try it this way on the inner sear, or tap 2 screws into it and pull or try the Lisle 58430 Shaft Type Seal Puller. Its's only 15 dollars.


mjf55

Chief Petty Officer
Joined
Jun 17, 2014
Messages
462
Just for completeness, I used the above video technique to remove the outer seal. It was not working for the inner seal. I the got a long (12") 1/8 " drill bit. Using the box end of a 12 point wrench as a guide, I drilled 2 holes, one on each side and put in a pan head sheet metal screw. Using a pry bar I gently pried up each end. Came right up. Everything is clean ready for the new seals.
 

GA_Boater

Honorary Moderator Emeritus
Joined
May 24, 2011
Messages
49,038
That's a tough one to pry the seal out with the prop shaft in the way.

How are you going to seat the new seal. Do you have a piece of the right sized pipe or gonna do the tap, tap around the seal until it seats?
 

99yam40

Fleet Admiral
Joined
Sep 7, 2008
Messages
8,874
setting to proper depth is important also
the Yamaha tool does it, but measuring how deep the old ones before removing works also
 

mjf55

Chief Petty Officer
Joined
Jun 17, 2014
Messages
462
I am shopping for a pipe the right diameter. There appears to be a seal stop on the casing, but not sure.
From the measurement I took earlier (post 4), I should be able to determine the correct depth. I do not have the Yamaha tool.

While on this, let me ask about the pressure / vacuum test. It is not mentioned in the Yamaha service manual for this motor.
Does anyone know the correct pressure and vacuum and for how long new seals should hold for the 1989 175. I have seen from 2.2 psi to 14.2 psi for a few seconds, to 15 minutes. The vacuum advice seems to all over the map also.
Otherwise my plan would be to step to 15 psi and inch of hg in increments of 5 for 15 minutes. Then reverse the process, while spinning the prop and drive shaft. Sounds OK? or am I over thinking this.
 

mjf55

Chief Petty Officer
Joined
Jun 17, 2014
Messages
462
Just to close the saga. I used a 1 1/4" schedule 40 pvc pipe, about 1 foot long. Tapped the seals into place. New vacuum test showed it can hold 10 inHg for 15 minutes ( got tired of waiting) and for pressure, it can hold 6 psi for the same 15. ( well really a different 15 minutes, :D), all while rotating the prop and drive shaft periodically. I have read that the old V4 and V6 units are only tested to 2.2 psi and have never seen a vacuum spec for this year / vintage.

Thanks for all who helped along the way.
 

GA_Boater

Honorary Moderator Emeritus
Joined
May 24, 2011
Messages
49,038
Good deal, mjf. Ya didn't have to try to get the carrier out. Whew!
 
Top