Greetings Everyone, New Member: Wanted to join the forum and share information regarding my leaking trim pump on a Volvo Penta DPS-A drive, 5.0GXI (and other info). The pump would have died completely had I not pulled it. There was saltwater sediments, some rust, and the pump oil had turned to a white, thick non-pumpable gunk inside the oil reservoir. Forgive me in advance, for this my first post I started looking through posts to place my comments in a specific thread, but there are so many posts. Moderator/Administrator if needed please post appropriately as needed, and in the future I will do a better look for specific post area. I made these repairs some time in the past, but until now just joining a forum so I can share as well as receive help when needed. Below are three sections, DPS-A Trim Pump; Fuel Pressure Regulator Screen Bulletin service recall; Bellows Replacement, my personal thoughts. Thanks.
Section I: DPS-A Trim Pump Removal.
Pic1 below: This is the wire connection for the trim pump, located in the bilge towards the rear of the engine (transom/stern). The wire plug, is 2 wire, colors blue/white and green/white.
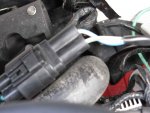
Pic2 below: Locate the intake water hose from the engine to the drive and the wires are zip tied along the hose. Cut all zip ties or whatever holding, so that you will be able to pull the trim pump from the boat; if you intend to remove it. Otherwise disregard pics 1 &2 wiring/harness altogether.
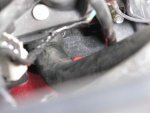
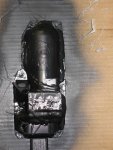
Pic 3 below: This is a pic of the trim pump, still on the boat after removing the cover. I did this work with the boat on boatlift over the water, while in an inflatable boat to access the pump. The numbers 1-4 on the cable hoses were written to ensure correct reinstallation (install starting near bellows L-R). As you can see my pump was in dire need of help. Oil had broken down to seawater and white gunk sludge.
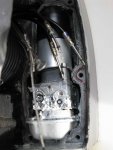
Pic4 below: Pump completely removed. At the top of the pump, the wires simply pull off the tabs if you plan to move the trim pump (you have to lift up the black removable rubber cover atop of the pump; do not remove it. Do not try to remove the pump, unless you free the wires in pics 1 and 2, otherwise you can clean the pump in place. I scraped off rust and treated with rust inhibitor, cleaned the pump with spray gunk cleaner, soapy dish liquid, and denatured alcohol as follows: You could remove the plastic white reservoir held on by crimped clamp to make it easier, but then you would need a new crimp clamp and tool or similar - I just left it in place. 1. Cover or do not get water into the opening of the motor, if so let dry. Pour all the oil out of the pump that you can. 2. Spray gunk cleaner into the fill opening, place your finger and shake in all directions. Pour out and repeat. 3. Pour in the dish cleaner and hot water, shake again, repeat then pour out. 4. Wipe pump completely dry, then pour in denatured alcohol/alcohol then shake and pour out, and continue to shake any excess out - the alcohol will dry any water out of the reservoir. 5. Once dry, pour in the trim pump fluid to the top then use plastic and a zip tie to keep it from leaking out the fill hole. This ensures your pump is filled and you want have to worry about doing so when reinstalling on the boat. Once the pump is in place during reinstall; before putting cover on, cut zip tie and remove plastic, then replace cover and complete install.
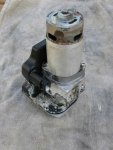
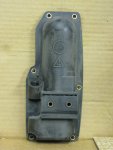
Pic 5 below: Pump cover thoroughly cleaned, then rough sanded with sandpaper 150 grit for epoxy application.
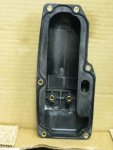
Pic 6 below: Inside of cover cleaned thoroughly.
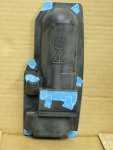
Pic 7 below: Prepped cover, bolt holes taped off before epoxy.
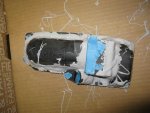
Pic 8 below: Trim pump cover after epoxying. Note: My objective was to apply epoxy around all the assumed weak spots of the polymer/plastic cover - just in case. If you ever used epoxy it's a little messy. Also, don't put too much epoxy in the area of the bolt holes, or you will not be able to get your socket in to tighten, and will have to trim some of the epoxy out after partially or fully hardening. Epoxy is a good choice when enough is applied and allowed to completely cure, hard and solid with no leaks.
Pic 9 below: Make sure the epoxy dries before painting, at least 24 -36 hours. Then paint and let stand for another 24 hours for full drying. I could have sanded the epoxy after drying before painting but its not visible and no effect on performance.
.
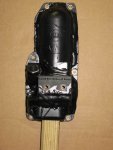
Pic 10 below: Finished product. Test your socket around the bolt holes to make sure you have clearance, if not use a drill with bit or dremel and lightly trim unti okay.
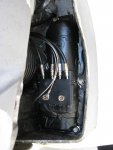
Pic 11 below: Installed back on the boat. Have not had any problems. After a few uses in the water you can check by visually looking for leaks or you can remove the cap from the trim pump and draw out some oil to look at the color. If its milky or other you may have a leak. Note: I cleaned the area on the boat where the trim pump is housed thoroughly. I used marine silicone on the pump cover in addition to the rubber gasket that seats in the trim pump cover. That's a wrap.
Section II: Fuel Pressure Screen DIY Recall to Use E-clip. Service bulletin #P-23-7 3 01
**Disclaimer FYI Only** I recommend you follow manufacturer and service bulletin #P-23-7 3 01 information** My boat is pre-production 2010 so this affected my boat. At first I was going to purchase the e-clip, but after pulling the fuel screen and determining the purpose of the e-clip. I realized that the intent for replacing the fuel screen, was to remove the screen out of the equation and the e-clip is basically a void filler without a screen. So what I did was to simply, and carefully remove the screen and put it back in place, because the part itself is basically an OEM perfect fit, now only without the screen. My boat has been working flawlessly since then 15 months ago and still now, with no problems whatsoever, if not better.
**Info/Remarks from Bulletin #P-23-7 3 01**: Testing has determined that the fuel screen on the Fuel Pressure Regulator can cause a restriction of the fuel return line. Restricting the return line raises fuel pressure, which can degrade engine performance.
The screen has been removed in production, and replaced with an e-c1ip, beginning in 2010. The e-clip, #21491831 must be purchased separately.
Section III: Bellows Replacement
**Disclaimer FYI Only** First off do whatever is required of your warranty, maintenance agreement, mechanic's suggestion, and for your peace of mind. I decided to include this write up on bellows because people are curious as to whether they should change their bellows religiously every 2 or 3 years. My boat is used in saltwater regularly and is kept on a boatlift. I have not changed my bellows in 7 years (will probably change this year), but, I do inspect my bellows every year or as needed, and I spray silicone lubricant on them as a maintenance enhancement. I base my own personal decision on the hypothetical, not doctrinal, and none fact; as to whether a boat is kept in water, storage, or boatlift. In comparison to a boat kept in the water; boats kept on a boatlift or dry storage will come nowhere close to 8,760 hours of bellows in the water, as follows:
a) In water - Your boats bellows are under water 8760 hrs annually (365 x 24), whether the boat is used or not, with the exception when hauled out for maintenance or other. In this example it might be a good idea to change every 2 to 3 years or recommended interval.
b) Boatlift and Dry storage:
1-None usage during the year - In some instances the boat gets 0 hours exposure to water.
2-Monthly usage. Using an average of 6-8 hours per outing day:
+Most people might use their boat only 1 or 2 times per month or none, for total of 0 hours and 6 to 8 and 12 to 16 hours per month. Using 16 hours, 12x16 or 192 hours a year water exposure.
+Some people may use their boat mostly weekends or 4x2 for 8 times a month for total of 48 to 64 hours per month. Using 64 hours, 12x64 or 768 hours a year water exposure.
General. Hours will vary depending upon how much the boat is used outside the average used above; so add additional day(s) and hours.
Section I: DPS-A Trim Pump Removal.
Pic1 below: This is the wire connection for the trim pump, located in the bilge towards the rear of the engine (transom/stern). The wire plug, is 2 wire, colors blue/white and green/white.

Pic2 below: Locate the intake water hose from the engine to the drive and the wires are zip tied along the hose. Cut all zip ties or whatever holding, so that you will be able to pull the trim pump from the boat; if you intend to remove it. Otherwise disregard pics 1 &2 wiring/harness altogether.

Pic 3 below: This is a pic of the trim pump, still on the boat after removing the cover. I did this work with the boat on boatlift over the water, while in an inflatable boat to access the pump. The numbers 1-4 on the cable hoses were written to ensure correct reinstallation (install starting near bellows L-R). As you can see my pump was in dire need of help. Oil had broken down to seawater and white gunk sludge.

Pic4 below: Pump completely removed. At the top of the pump, the wires simply pull off the tabs if you plan to move the trim pump (you have to lift up the black removable rubber cover atop of the pump; do not remove it. Do not try to remove the pump, unless you free the wires in pics 1 and 2, otherwise you can clean the pump in place. I scraped off rust and treated with rust inhibitor, cleaned the pump with spray gunk cleaner, soapy dish liquid, and denatured alcohol as follows: You could remove the plastic white reservoir held on by crimped clamp to make it easier, but then you would need a new crimp clamp and tool or similar - I just left it in place. 1. Cover or do not get water into the opening of the motor, if so let dry. Pour all the oil out of the pump that you can. 2. Spray gunk cleaner into the fill opening, place your finger and shake in all directions. Pour out and repeat. 3. Pour in the dish cleaner and hot water, shake again, repeat then pour out. 4. Wipe pump completely dry, then pour in denatured alcohol/alcohol then shake and pour out, and continue to shake any excess out - the alcohol will dry any water out of the reservoir. 5. Once dry, pour in the trim pump fluid to the top then use plastic and a zip tie to keep it from leaking out the fill hole. This ensures your pump is filled and you want have to worry about doing so when reinstalling on the boat. Once the pump is in place during reinstall; before putting cover on, cut zip tie and remove plastic, then replace cover and complete install.

Pic 5 below: Pump cover thoroughly cleaned, then rough sanded with sandpaper 150 grit for epoxy application.

Pic 6 below: Inside of cover cleaned thoroughly.

Pic 7 below: Prepped cover, bolt holes taped off before epoxy.

Pic 8 below: Trim pump cover after epoxying. Note: My objective was to apply epoxy around all the assumed weak spots of the polymer/plastic cover - just in case. If you ever used epoxy it's a little messy. Also, don't put too much epoxy in the area of the bolt holes, or you will not be able to get your socket in to tighten, and will have to trim some of the epoxy out after partially or fully hardening. Epoxy is a good choice when enough is applied and allowed to completely cure, hard and solid with no leaks.

Pic 9 below: Make sure the epoxy dries before painting, at least 24 -36 hours. Then paint and let stand for another 24 hours for full drying. I could have sanded the epoxy after drying before painting but its not visible and no effect on performance.
.

Pic 10 below: Finished product. Test your socket around the bolt holes to make sure you have clearance, if not use a drill with bit or dremel and lightly trim unti okay.

Pic 11 below: Installed back on the boat. Have not had any problems. After a few uses in the water you can check by visually looking for leaks or you can remove the cap from the trim pump and draw out some oil to look at the color. If its milky or other you may have a leak. Note: I cleaned the area on the boat where the trim pump is housed thoroughly. I used marine silicone on the pump cover in addition to the rubber gasket that seats in the trim pump cover. That's a wrap.

Section II: Fuel Pressure Screen DIY Recall to Use E-clip. Service bulletin #P-23-7 3 01
**Disclaimer FYI Only** I recommend you follow manufacturer and service bulletin #P-23-7 3 01 information** My boat is pre-production 2010 so this affected my boat. At first I was going to purchase the e-clip, but after pulling the fuel screen and determining the purpose of the e-clip. I realized that the intent for replacing the fuel screen, was to remove the screen out of the equation and the e-clip is basically a void filler without a screen. So what I did was to simply, and carefully remove the screen and put it back in place, because the part itself is basically an OEM perfect fit, now only without the screen. My boat has been working flawlessly since then 15 months ago and still now, with no problems whatsoever, if not better.
**Info/Remarks from Bulletin #P-23-7 3 01**: Testing has determined that the fuel screen on the Fuel Pressure Regulator can cause a restriction of the fuel return line. Restricting the return line raises fuel pressure, which can degrade engine performance.
The screen has been removed in production, and replaced with an e-c1ip, beginning in 2010. The e-clip, #21491831 must be purchased separately.
Section III: Bellows Replacement
**Disclaimer FYI Only** First off do whatever is required of your warranty, maintenance agreement, mechanic's suggestion, and for your peace of mind. I decided to include this write up on bellows because people are curious as to whether they should change their bellows religiously every 2 or 3 years. My boat is used in saltwater regularly and is kept on a boatlift. I have not changed my bellows in 7 years (will probably change this year), but, I do inspect my bellows every year or as needed, and I spray silicone lubricant on them as a maintenance enhancement. I base my own personal decision on the hypothetical, not doctrinal, and none fact; as to whether a boat is kept in water, storage, or boatlift. In comparison to a boat kept in the water; boats kept on a boatlift or dry storage will come nowhere close to 8,760 hours of bellows in the water, as follows:
a) In water - Your boats bellows are under water 8760 hrs annually (365 x 24), whether the boat is used or not, with the exception when hauled out for maintenance or other. In this example it might be a good idea to change every 2 to 3 years or recommended interval.
b) Boatlift and Dry storage:
1-None usage during the year - In some instances the boat gets 0 hours exposure to water.
2-Monthly usage. Using an average of 6-8 hours per outing day:
+Most people might use their boat only 1 or 2 times per month or none, for total of 0 hours and 6 to 8 and 12 to 16 hours per month. Using 16 hours, 12x16 or 192 hours a year water exposure.
+Some people may use their boat mostly weekends or 4x2 for 8 times a month for total of 48 to 64 hours per month. Using 64 hours, 12x64 or 768 hours a year water exposure.
General. Hours will vary depending upon how much the boat is used outside the average used above; so add additional day(s) and hours.
Last edited:


