1986 Mariner 45HP lower unit/shift shaft? - updated

CatfishMN

Petty Officer 2nd Class
Joined
Jun 14, 2009
Messages
170
Hi everyone,

I just got a new to me 1986 Mariner 45 and I know that I need to change the impeller, etc. I have only worked on OMC stuff previously and want to cover a base before taking the LU off. I have watched a few videos online for Merc/Mariner models similar to this one, and there seems to be some difference in disconnecting the shift shaft. Can anyone tell me how this one comes off? Does anything need to be disconnected prior to dropping the LU? Anything else to look out for?

Thanks!
 
Last edited:
Joined
Apr 14, 2015
Messages
70
that shifter shaft has splines and will let the lower unit drop ,one area on the splines has a wide flat spot ,so it will only go back up one way ...a lot of people and the book recommends putting the motor in gear before dropping the lower unit....the female end of the shaft in the motor (exhaust leg ) will sometimes wiggle off to the side when your installing the lower unit back up and you will see that shaft barely from the outside in the hollow pivot bracket tube ,so you might have to push it to one side or the other maybe using a screwdriver to get it to line up ,,but not always ...look up into the housing after you remove the lower unit ,you will see that shift shaft ... otherwise just the normal maybe have to turn the flywheel to line up the main drive shaft into the power head and of course everyones favorite copper tube to the water pump housing ...a little patience youll get it ......but no bolt under the powerhead like the omc design ,,
 

emckelvy

Commander
Joined
Jan 16, 2004
Messages
2,506
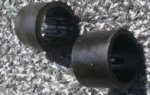
The Merc shift shaft is splined. It goes into the upper shift rod, which has a female-spined socket. When you drop the lower unit, it's best to have the remote control in Neutral. Keep in mind that you'll have to raise up the motor with the controls in forward, before shifting to neutral, since the motor is locked-down in Neutral as well as Reverse. Unless, of course, you have PT&T, then it's a piece of cake!

About the only "secret" thing on the older 4-cyl models is that there's a bolt hidden underneath the trim tab. You'll have to pull the trim tab then the bolt will be evident. The plastic plug at the top rear of the mid-section is pulled to reveal the trim tab bolt. The plug just pries out with a flat-blade screwdriver.

Once all the mounting bolts are undone, the L/U will slide right down. Don't disturb the shift shaft or change its position while you're working on it.

The Number One issue for novices working on these is that they get the shift shaft out-of-position and then the gearbox is stuck in Fwd when they reassemble. The reason for this is that in Fwd, there is about 270 deg of lost motion if you turn the shift shaft clockwise. But there is only one position where it's correct, which is fully CCW, just about ready to shift to Neutral, but still in Fwd. Such that the next motion CCW does shift to Neutral.

The reason to shift to Neutral is because there's a bit of a detent on the shift cam in Neutral, and it tends to stay there.

So, as long as you don't touch the shift shaft, and make sure both L/U and remote are in Neutral when you reinstall the L/U, it should go well.

Note that sometimes, the shift shaft and upper shift rod don't line-up perfectly upon reinstallation. This is due to pre-load on the shift cable, sometimes required to get the correct shift action. No biggy if this happens, just undo the shift cable from the shift arm at the Port side of the powerhead, and jiggle the shift arm a few degrees fwd or back. It'll line right up and then all you have to do is have someone turn the flywheel a bit to get the drivshaft and crank realigned.

The above is just a general description, but it should let you get 'er dun! The actual job of replacing the impeller, etc is very similar to a Johnrude in what you need to do, so you should be familiar with that process.

HTH............ed
 
Joined
Apr 14, 2015
Messages
70
and you will more than likely see a a black plastic hard hollow speedometer tube ,sometimes those will interfere with the shifter shaft when reinstalling ,,,,those are a nice smooth motor for trolling with adjustable idle mixture not like the non adjustable ya get what ya get omc carbs ...but that motor I believe does run low and medium speed until through those adjustable mixture idle screws and sometimes they will bog when trying to accelerate if there out of adjustment and that motor is simple otherwise being 4 cylinders and 2 carbs ,very simple to figure out if you have a plugged carb they definitely wont idle ...........and when you see how small the merc impellar is compared to the giant omc you can guess almost every merc I see gets a new water pump before they leave...that 45 should have good spray out the side very strong straight stream when your done ...and of course no thermostat in that puppy and no head gasket ,just a water plate cover over the back ....you probably knew all of this already ....
 

CatfishMN

Petty Officer 2nd Class
Joined
Jun 14, 2009
Messages
170
Thanks everyone! This is exactly what I needed and hopefully the project goes smooth tomorrow. Will report back!
 

CatfishMN

Petty Officer 2nd Class
Joined
Jun 14, 2009
Messages
170
Hi everyone,

I replaced the impeller, housing, etc., and all is running fine. One small issue is when I was putting the LU back on, it felt like something was obstructing the driveshaft. I pulled it back and one of these fell out and the other was sitting inside the leg perpendicular to the driveshaft. Does anyone know what these are, and if they are absolutely necessary? They are pretty worn down, but I can tell they were splined or had marks from the driveshaft.

I did put everything back together, omitting these parts for now, and everything seems to work as it should.

extra pieces1.gif

Thanks!
 

Attachments

  • extra pieces1.gif
    extra pieces1.gif
    6.8 KB · Views: 0

emckelvy

Commander
Joined
Jan 16, 2004
Messages
2,506
If one of those is plastic, it's supposed to slide down on the driveshaft splines and sit at the bottom of the splines. The rubber piece is what seals the crankshaft/driveshaft interface from water. So it really should be in there. Otherwise water will get in and corrode the crankshaft and driveshaft. If you're in salt water, don't run the motor without this seal. If in fresh water, you could get by for a while, but you'd really want to pull the L/U when you get a chance.

The plastic piece slides properly down the shaft splines in one direction only. The other way, it won't sit down as far. On the rubber piece, the side with the splines goes down. The flat end of the other side presses against the machined surface of the bottom of the crankshaft to seal.

I've attached larger pics of the 2 pieces, HTH................ed

78654A 1 - SEAT ASSEMBLY.jpg


86304 - SEAL.jpg
 

CatfishMN

Petty Officer 2nd Class
Joined
Jun 14, 2009
Messages
170
Thanks emckelvy. I got everything back together and we seem ship shape. I did notice that the speedometer pick up tube is broken clean off about halfway up the leg. The console has no speedometer, so I don't need it. Does that tube affect anything else? Does it need to be replaced? Thanks!
 

emckelvy

Commander
Joined
Jan 16, 2004
Messages
2,506
Thanks emckelvy. Does that tube affect anything else? Does it need to be replaced? Thanks!

Nope, and Nope. That tube is just for the built-in pickup and unless it's irritating you by spraying water out the busted end of the tube, you need not worry. You could always plug the tube if it's an issue. Or get a speedometer! Cheers..........ed
 
Top