Inline 6 1150

k dogg

Cadet
Joined
May 29, 2010
Messages
18
Im going to rebuild my 1150 inline 6. I want a set of piston ring compressors. Does anyone have the mercury part # or know where i can purchase these ?
 

k dogg

Cadet
Joined
May 29, 2010
Messages
18
Because the crank and pistons have to be dropped in the block as an assembly. The ring compressors reach around the crank and down the connecting rods. I had gotten some removable compressors from snapon designed for boat and motorcycle use. They wouldnt work. The only tool to do this job is the ones designed for it and napa wouldnt carry them. Thank you for your suggestion.
 
Last edited:

racerone

Supreme Mariner
Joined
Dec 28, 2013
Messages
36,306
Could you install the pistons without the crank ?----Then use an adapter on a torque wrench to tighten the rod nut.?-----Heard of a " crows foot " adapter ??
 
Last edited:

Chris1956

Supreme Mariner
Joined
Mar 25, 2004
Messages
27,158
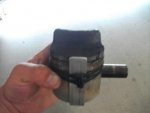
I used to place all the needle bearings into marked cups, and install the pistons one-by-one. Then grease the crank journals and stick the needle bearings and cages to them. It takes a bit of work, but you don't need the tool. BTW - the connecting rods will have either locknuts and bolts or screws. Locknuts and bolts may be reused. You need to buy new screws, once they have been removed.
 

racerone

Supreme Mariner
Joined
Dec 28, 2013
Messages
36,306
Agreed some of the later blocks used rods with high tensile alloy screws .----I have a set of ring compressors but on the later blocks you do not need them at all.
 

Jhoppy

Petty Officer 3rd Class
Joined
Oct 30, 2009
Messages
77
No Title

I made my own sort of it was very simple I wish I had a picture in use but here is some on an old piston to give you the idea. I picked up some aluminum strap 3/4 inch 1/8 inch thick cut it into 2 5/8 inch long pieces 12 total rounded all the edges good and zip tied one on each side of the pistons. It held the rings in like the factory tool looks like it dose, as I fit the pistons into the bore the straps slid up and off the pistons and I cut the zip ties off, on mine there were some notches in the bottom of the cylinder the strap pieces fit into I?m assuming that the notches are there for the factory tool to fit into.

I put my crank, rods and pistons all back in one piece I used an engine hoist and a strap attached to the crank(on both ends) to slowly lower the assembly in place as I worked the pistons and rings in one at a time. The rings are very easy to brake so go slow and gently work the pistons in one at a time I did not brake any rings using this method. once you get all back together use a pick or screwdriver to reach in though the exhaust and transfer port holes to gently test the spring on the rings to be sure you did not brake any rings.
 

Attachments

  • photo221625.jpg
    photo221625.jpg
    12.3 KB · Views: 0
  • photo221626.jpg
    photo221626.jpg
    14.3 KB · Views: 0
  • photo221627.jpg
    photo221627.jpg
    15 KB · Views: 0
Top