Stripped Thread on One of Water Pump Mounting Holes - Helicoil?

minuteman62-64

Lieutenant
Joined
Apr 12, 2011
Messages
1,350
So, my impeller replacement job hit a couple of stumbling blocks. Latest, stripped thread on one of the pump mounting holes in the LU. I'm thinking Helicoil or equivalent to restore threads.

Anybody done this? I'm thinking the SS Helicoil is the way to go. Yes/no? Or will that create a problem with galling from SS bolt on SS thread?

Tips/precautions? I looked for a "how-to" thread on here, but couldn't find one for this particular application. I've used Helicoils before, just not on an OB.
 

gm280

Supreme Mariner
Joined
Jun 26, 2011
Messages
14,590
Well I am not an expert about such things, but seems there are only a few options available. You could possible drill out the fixture to allow the next size up bolt and rethread the stripped hole. OR, you could drill out the hole and epoxy in an aluminum plug and drill and rethread, OR fill in the hole with JB weld and drill and rethread it. OR, use a Helicoil like you thought. OR, you could coat the original bolt with some type mold release (grease or wax substance) and fill the hole with JB weld and clamp the housing back on with all the boils installed until the JB weld cured and back out the suspect bolt. With the mold release and some prayers, that could work too... Those are my only suggestions. I'd use the best one if it were mine after seeing what would work the best for the long run... JMHO!
 

Georgesalmon

Lieutenant Commander
Joined
Apr 14, 2012
Messages
1,793
You do want SS, anything made out of plain steel will corrode the aluminum in a big hurry from electrolysis.
 

minuteman62-64

Lieutenant
Joined
Apr 12, 2011
Messages
1,350
In trying to figure out what Helicoil stuff I'll need, did some closer measuring. The hole is actually only about 1/2" deep, and is only threaded to a depth of about 3/8". That's about as deep as you can thread a blind hole, and you'd need a bottoming tap to do so. That explains the relatively shallow penetration of the bolt threads into the hole.

Looked at Grainger for Helicoil stuff. That would be great if I wanted 100 or so inserts. I just need 3. Amazon has lesser quantities and I can easily identify the bottoming tap I'll need (to follow up the regular tap to get the thread depth I'll need).

Also, looks like all the steel Helicoil inserts are at least 18-8 SS. Amazon does show 316 stuff for upgrade. Based on my reading, it looks like one factor in preventing thread seizing w/SS fittings is to have two different grades of SS (bolt different from female threads). Since the existing bolts don't appear to be 316, and my new, longer bolts are 18-8, I'm thinking of going with the 316 inserts. Because of the constraints of the hole depth I'll have to go with either 1D (6mm) or, at max 1.5D (9mm) inserts.

More to follow. I'll take some photos and provide a follow-up success (hopefully) report :)
 

Scott Danforth

Grumpy Vintage Moderator still playing with boats
Staff member
Joined
Jul 23, 2011
Messages
47,499
go to your local car-quest or napa. the complete helicoil kit is about $30 with drill, tap, tool, and 5 helicoils


my VP drive has every hole helicoiled from the factory.
 

minuteman62-64

Lieutenant
Joined
Apr 12, 2011
Messages
1,350
go to your local car-quest or napa. the complete helicoil kit is about $30 with drill, tap, tool, and 5 helicoils


my VP drive has every hole helicoiled from the factory.

Yes, they have it. But don't have the bottoming tap (although I didn't check napa - maybe do that this a.m. before ordering from Amazon). I'm thinking that if I have to order the bottoming tap from Amazon, might as well order all and just pay one shipping charge.
 

gm280

Supreme Mariner
Joined
Jun 26, 2011
Messages
14,590
Are you doing this helicoil tap and insertion while installed on the engine or off? If on the engine, how do you plan to keep metal particles and chips from falling inside?
 

minuteman62-64

Lieutenant
Joined
Apr 12, 2011
Messages
1,350
Are you doing this helicoil tap and insertion while installed on the engine or off? If on the engine, how do you plan to keep metal particles and chips from falling inside?

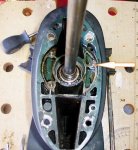
See attached photo. Arrow points to stripped (blind) hole. A little beeswax on drill and tap, some tape over a couple of openings, and, no problem.


LU 23jan15.JPG
 

gm280

Supreme Mariner
Joined
Jun 26, 2011
Messages
14,590
See attached photo. Arrow points to stripped (blind) hole. A little beeswax on drill and tap, some tape over a couple of openings, and, no problem.


Good deal. I can easily see how to trap any particles now after seeing the area. Just didn't want you to get metal particles in the lower foot section and screw up bearings and gears...
 

Texasmark

Supreme Mariner
Joined
Dec 20, 2005
Messages
14,557
Only "particles to consider" are any that would wind up on the upper drive shaft bearing. The other openings are water channels and and any filings would just flush out. As long as you have enough material (thickness) to install a helical-coil insert, that is the best remedy. I never knew of one that wasn't SS. On SS to SS galling, you can forget that. No dissimilar metal involved and no soft castings between the coil inner threads and the SS screw. Most marine galling problems are between SS hardware and cast aluminum. Different materials and in different sections of the materials compatibility chart which is one of the main causes of corrosion. Only parts needed are a tap for the coil, insertion tool for it, and punch to knock the tang off the bottom of the coil after insertion (which if you don't knock it off it can mess up your screws threads....BTDT). You can use your existing mounting hardware for the pump housing.

Mark
 

Scott Danforth

Grumpy Vintage Moderator still playing with boats
Staff member
Joined
Jul 23, 2011
Messages
47,499
you can create a bottoming tap by starting with the standard tap, then slowly grind off the point. its a pain in the butt, however it works. a bottoming tap is nothing more than a standard tap with most of the tapered tip ground off.
 

gm280

Supreme Mariner
Joined
Jun 26, 2011
Messages
14,590
you can create a bottoming tap by starting with the standard tap, then slowly grind off the point. its a pain in the butt, however it works. a bottoming tap is nothing more than a standard tap with most of the tapered tip ground off.

I always found that if you do need a bottom tap, go borrow the neighbor's tap and grind it away as needed. That way you don't screw up your own tap... :facepalm:

Just kidding! My cousin worked in a tape and die plant and it was amazing to me to see so many taps for one size hole. There is about 20 different tapes for any one size effort. I never knew there were so many different size 1/2 x 20 TPI taps made...
 

minuteman62-64

Lieutenant
Joined
Apr 12, 2011
Messages
1,350
you can create a bottoming tap by starting with the standard tap, then slowly grind off the point. its a pain in the butt, however it works. a bottoming tap is nothing more than a standard tap with most of the tapered tip ground off.

I was thinking if that - but, just ordered one via Amazon. Because of squirrely info provided, I'm not sure if what I'll get will be what I think I ordered (not really clear if the tap is a bottoming tap for installation of a 6x1 Helicoil or if it's a 6x1 bottoming tap :( ) If not, I'll return it and make my own.
 

minuteman62-64

Lieutenant
Joined
Apr 12, 2011
Messages
1,350
Got my first delivery from Amazon today - the basic Helicoil kit for the 6mm x 1 thread inserts. The inserts are all 9mm (1.5D) long, so I think one will go in my LU without cutting it down. Still waiting for the delivery of the bottoming tap - maybe today or tomorrow, but, I did a couple of things today to get ready.

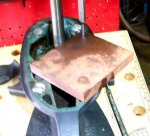
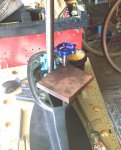
Got one good suggestion of using the pump housing to make sure the tap is started vertical. However, the Helicoil tap is bigger diameter than the 6mm bolt holes. So, took a piece of 1/2" thick steel and drilled a hole through one corner. Drilled first to 1/4" to use as a guide for drilling. Then I'll drill out to a size that will accommodate the Helicoil tap. See photo - the "guide" also verified that my drill will just clear the drive shaft when centered over the hole. Don't know how hard it is to pull the drive shaft, but, I won't have to find out :)

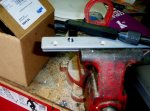
Also tapped a small piece of 1/8" aluminum to test fit the helicoil and make sure it's actually the correct size (it is). See second photo. If I have to cut a coil down to size I'll thread it into the test hole to hold it while I hit it w/Dremel tool. Also note in the photo the neat guide that came with the Helicoil kit. The bottom (chamfered end) is threaded to accept the coil. Near as I can tell, you hold the guide over the hole, with coil threaded in, and use it to insure you are starting threading in a vertical position (at least that's how it seems to work).


Water Pump1.JPG Water Pump2.JPG
 

gm280

Supreme Mariner
Joined
Jun 26, 2011
Messages
14,590
Did the helicoil kit say anything about thread sealer or something like loctite? Just wondering if they suggested using something on the helicoil when installing it... I've seen then installed both ways. Glad you are doing this the proper way and not shortcutting it. Probably nobody else will even know or see it after you're finished, but you will know it was done correctly... :thumb:
 

muskyfins

Chief Petty Officer
Joined
Jun 7, 2012
Messages
578
I recommend practicing on a spare piece of aluminum around the shop as well.

edit: I see that now in your post. Also I believe the guide is to "pre-wind" the heli-coil. The ones we use in the shop have to have a certain amount of pre-wind tension on them to go into the hole properly. Although I know there are several different types of installation tools available.
 
Last edited:

minuteman62-64

Lieutenant
Joined
Apr 12, 2011
Messages
1,350
Did the helicoil kit say anything about thread sealer or something like loctite? Just wondering if they suggested using something on the helicoil when installing it... I've seen then installed both ways. Glad you are doing this the proper way and not shortcutting it. Probably nobody else will even know or see it after you're finished, but you will know it was done correctly... :thumb:

Nothing in the kit about a sealer. Based on my readings, mainly on here, I'm planning on using red Loctite between the coil and the housing.
 

minuteman62-64

Lieutenant
Joined
Apr 12, 2011
Messages
1,350
Wouldn't you know - the bottoming tap came yesterday just after I'd shut down operations for the day. Had a little time today, so, first thing, verified that the bottoming tap fit the previously tapped test hole. It did.

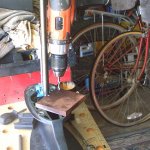
Then, using my 1/2" plate "guide" drilled out the hole. The Helicoil kit specified 1/4" (6.35 mm) drill. On their site, however, they suggested a 6.25 mm drill for aluminum. Closest I could find was a "D" drill at 0.246" (6.2484 mm). However, my local hardware store didn't have that size, so, I went with the 1/4" drill that I had (can't believe 0.004" will make much of a difference anyways).

First photo - point of no return - drilling the hole, through the "guide". Worked perfectly.

Then re-drilled my pilot hole to just fit the Helicoil tap. Second photo shows the tap in the guide with my "cheapo" low clearance tap wrench. Had to clear the drive shaft so found a hose faucet handle with a square hole that just fit the tap. Just had to grind about 1/16" from the "nubs" around the circumference to get the clearance. Thought I'd only use it to start the threading, but, was able to run the tap all the way to the bottom using it. Switched to the bottoming tap and, again, able to run it all the way to the bottom with my improvised wrench.

Tomorrow, if I have time around the Super Bowl festivities, I'll insert the coil. After a lot more reading on thread sealants for Helicoils, with input all over the map, I'm now thinking of using the Loctite Blue, which I already have.


Water Pump3.JPG Water Pump4.JPG
 
Top