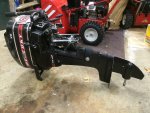
1969 Mercury 7.5 HP Drive Shaft . . . .

tpenfield

Moderator
Staff member
Joined
Jul 18, 2011
Messages
17,694
I received the new oil seals and the bearing carrier cover/retainer. Found the tool on eBay for $48, also ordered the shims.

Once everything arrives, I can put this thing back together.
 

tpenfield

Moderator
Staff member
Joined
Jul 18, 2011
Messages
17,694
Update:

I started to put the LU of the Mercury 7.5 back together . . .

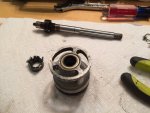
I decided to replace the seals while I was at it . . . here is the new prop shaft seal along with the remains of the old one.

IMG_6173.jpg

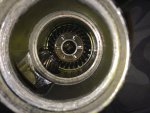
I installed the new drive shaft and fastened the pinion gear (I think that is what it is called)
IMG_6174.jpg

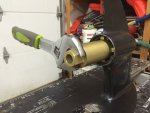
My new bearing carrier nut tool came in handy . . . not sure what the proper torque is . . . here is a picture of tightening it up, then I torqued it to 45 ft-lbs.
IMG_6180.jpg

I think I need to take some of the gear lash out a bit, I used the same shims as was there before, but it is a new(er) shaft & bearing.

One question I have is if there is any trick to inserting the round key for the impeller into the notch on the drive shaft. ??? :noidea:

I did it once before a while ago, and it was a real PITA as I recall. I had to give up late last night as I tried and it was a no-go . . . probably too tired at that point. :rolleyes:
 

racerone

Supreme Mariner
Joined
Dec 28, 2013
Messages
36,265
Post picture of impeller " key " and what is the part # of the impeller is it the 80 or 81 as they are a different bore diamete.?
 

tpenfield

Moderator
Staff member
Joined
Jul 18, 2011
Messages
17,694
Post picture of impeller " key " and what is the part # of the impeller is it the 80 or 81 as they are a different bore diamete.?

The impeller is the 45-89981 (which I believe is the larger diameter core vs. the 45-89980).

The key is actually a 'pin' 28-8M0032835 is the new 'replaced by' number ( originally 17-39076 )

It is wicked hard to insert the pin into the impeller and drive shaft notches . . . just want to see if there is a trick to doing it.
 
Last edited:

emckelvy

Commander
Joined
Jan 16, 2004
Messages
2,506
What I normally do is grease-up the driveshaft flat and stick the key to it. Make sure the key is aligned straight and in the middle of the flat. Use a Sharpie and scribe a line directly above the key.

Make sure the impeller is lubed-up, too (dish soap works, I use marine grease). Line up the impeller keyway with the key. Insert the impeller into the pump's stainless cup with a clockwise twist, while turning the driveshaft to keep it lined up with the impeller keyway.

If you're successful, the impeller will drop right in! Otherwise, it'll hit the key in the wrong spot and push the key out of alignment. You have to make sure that the impeller is engaging the key, by turning the driveshaft clockwise; the impeller should follow and if you wiggle the driveshaft ccw/cw you should feel a little slop between impeller and key.

Some folks use a couple of tie-wraps around the impeller so it'll drop right in without the impeller vanes touching the pump insert. Or a small chunk of pipe, slightly smaller in O.D. than the pump insert. It'd have to be thin-wall to fit, though.

I've done the insert/twist method enough that it works pretty well for me; but there's always a stubborn one! Be sure to check the fit of the impeller, without the key, to ensure the impeller is the correct I.D. for the shaft. Especially since you've upgraded to a newer driveshaft. Pretty aggravating it don't fit, after all the trouble of trying to install it!

HTH..........ed
 

tpenfield

Moderator
Staff member
Joined
Jul 18, 2011
Messages
17,694
I like the tie-wrap approach, because I was doing just as you described until I had to turn the impeller to get the vanes to go inside the pump housing, then all bets were off as far as aligning to the pin . . .
 

racerone

Supreme Mariner
Joined
Dec 28, 2013
Messages
36,265
I put the new style flat key on the shaft with a bit of grease.-Start / rotate the impeller into the housing until vanes bend in a bit.-Then with the notch over the key I push impleller down.---Works every time !
 

tpenfield

Moderator
Staff member
Joined
Jul 18, 2011
Messages
17,694
UPDATE:

OK, I got past that impeller and pin/key hurdle, thanks to the advice given :thumb:

I completed the assembly of the lower unit this evening and everything seems to be OK
IMG_6183.jpg

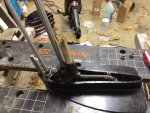
Here is the water pump installed. I filled the gear case with High Performance gear lube . . . 'cuz that's all I got.

Here is the engine put back together . . . just got to install the prop.
IMG_6184.jpg

I greased everything up around the transom mount, as the salt water pretty much seizes things up each season. I'll be doing some test running this weekend . . . maybe even launch the dinghy and take it for a spin. :)
 

tpenfield

Moderator
Staff member
Joined
Jul 18, 2011
Messages
17,694
Also . . . financial sanity check . . . outboard motors tend to be expensive. so, I thought that I would add up what I have spent on this engine so far.

Purchase price $250 (1969 Mercury 7.5 hp in running condition)

Fuel fitting $50

Fuel Line $50

Fuel Pump Rebuild $40

New cable harness (home made) $10

Gear shift seal $10

Drive shaft $160

LU seals $30


So . . . $600 total. I think I could have bought a newer engine for about that price versus my initial $250, but there is no telling how much $$$ I would have spent on repairs.

I am hoping that is it for a while and it just runs . . .
 

tpenfield

Moderator
Staff member
Joined
Jul 18, 2011
Messages
17,694
I got the engine all back together and gave it a test run today. Seems to be OK . . .


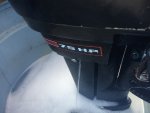
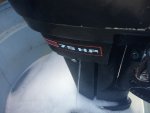
One additional thing that I did was to enlarge the 'pee hole' (by drilling it out to a larger size), as it would continually get clogged. Now it seems to be fine and can pass bit of crud fairly easily.
IMG_6188.jpg

I am not sure if the 'pee hole' is the only exit for the cooling water, or if some water also goes out the exhaust, similar to an I/O . . . :noidea:

But if it is the only exit for water, I figured that getting clogged up every 2 minutes was not a good thing.

Anyone know for sure ?
 

Attachments

  • IMG_6188.jpg
    IMG_6188.jpg
    91.1 KB · Views: 0

emckelvy

Commander
Joined
Jan 16, 2004
Messages
2,506
It sounds healthy! There is a discharge passage out the bottom of the powerhead as well. Some of that water might spray out the exhaust relief ports at the rear, below the lower cowl. But it's always nice to have the telltale working, that's for sure.

Now get out on the water and enjoy your updated, good-running Classic Merc!

Cheers..........ed
 

GA_Boater

Honorary Moderator Emeritus
Joined
May 24, 2011
Messages
49,038
What was plugging the pee hole, TP? Looks like good flow. I've had bugs make a winter home in mine.

Most the cooling water exits through the prop and some through the exhaust relief/pee hole.
 

tpenfield

Moderator
Staff member
Joined
Jul 18, 2011
Messages
17,694
What was plugging the pee hole, TP? Looks like good flow. I've had bugs make a winter home in mine.

Most the cooling water exits through the prop and some through the exhaust relief/pee hole.

Probably salt crystals or other 'stuff' from inside the cooling jacket. It seemed to be a constant problem, and I always kept a piece of wire with me to unclog it. I drilled out the hole to 3/32 ( I think) or maybe 1/8" It seems like it was 1/16" originally. Now it is able to pass the debris, as I can see the stream of water fluctuate now and then.
 

tpenfield

Moderator
Staff member
Joined
Jul 18, 2011
Messages
17,694
Thanks all for the info on the cooling flow,

Another thing that I have been struggling with is the steering has gotten very (very) tight and after the engine was layed up for a year, the steering would not move at all. I have pumped the grease fitting in the past and did so this weekend, only to get grease coming out of the lower pivot point, but nothing out of the top.

I removed what I believe is the friction plate from the upper part of the clamp assembly, but it still would not budge. Then I finally applied some oil to the upper pivot point and let it soak in for a while. The steering eventually broke loose, but it is still pretty tight.

Short of taking the whole thing apart, are there any other tips/tricks to get the steering to loosen up a bit more? I am just concerned that it will tighten up again . . .
 

emckelvy

Commander
Joined
Jan 16, 2004
Messages
2,506
Heat it up with a torch, pump grease thru the fitting(s), and work the motor back and forth. About the only way to get 'er undone besides complete disassembly, a real Pain, especially since you just put it all back together. Heat along the bottom of the swivel pin and fan the torch up & down the body of the swivel assy. This'll loosen up any old grease/crud and give the new grease a fighting chance to get in there.
 

GA_Boater

Honorary Moderator Emeritus
Joined
May 24, 2011
Messages
49,038
That old grease gets hard and stiff for some reason. I pump grease and swivel the motor at the same time. It took a while, but grease finally started to come out the top. It took a lot! Warming would probably make it faster like emckelvy said.
 

tpenfield

Moderator
Staff member
Joined
Jul 18, 2011
Messages
17,694
Yea, I'm thinking I could warm it up with a heat gun and get the grease flowing.
 
Top