Kill Switch 1974 Mercury 50HP Thunderbolt Ignition

dOb

Petty Officer 1st Class
Joined
Jun 14, 2010
Messages
244
OK, I've read and read about this and thought I had it figured out. But I don't.

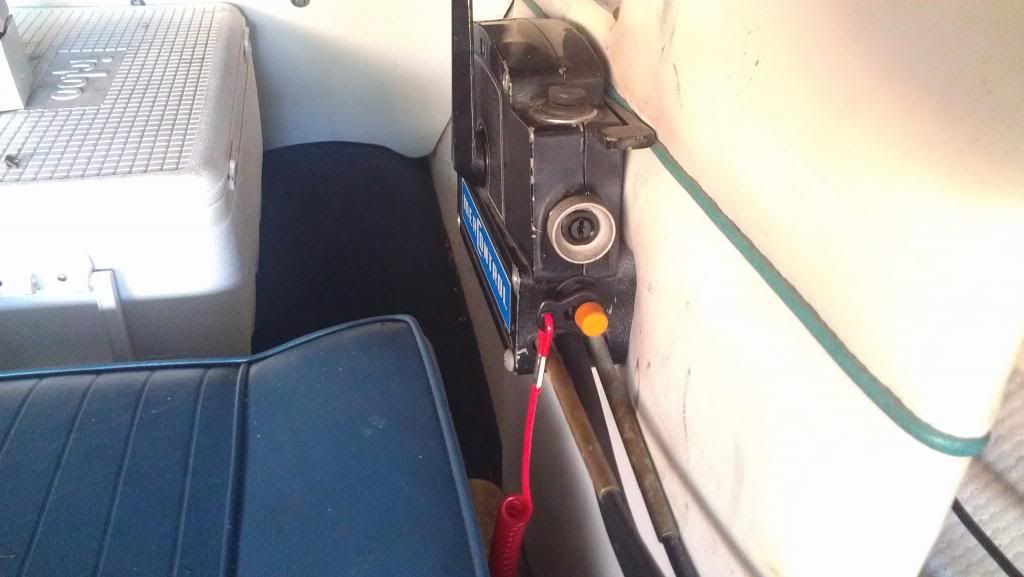
I have a universal Kill switch. Four terminals on the back, two "C" and two "M".

From what I read, I thought that I should cut into the the "White" wire behind the ignition leading to the motor and connect the kill switch in line by the "M" terminals.

Here is the diagram I am using;
http://www.maxrules.com/oldmercs/Wiring/1966ona/26A.jpg

When I tried this, the motor ran no matter what I did. With the kill switch , M, C, no switch, cut wire and all. The key turned it on, and the key turned it off.

I would really appreciate some help with this.

BTW - I don't know if will effect this, but I did install a tach a while back. I had to get into the internal harness in the motor to separate the salmon wire and run the tach to (I think) the rectifier. The tach works. But I am wondering if that changes the way the kill switch would work.

Thanks
 

dOb

Petty Officer 1st Class
Joined
Jun 14, 2010
Messages
244
Re: Kill Switch 1974 Mercury 50HP Thunderbolt Ignition

Still working on it. I have discovered that by jumping the yellow "E" wire and the black "D" while the motor is running, I can kill the motor. I also figured out that when the lanyard is pulled, the "C" terminals make a closed circuit. So in theory, when I connect the "C" terminals to E and D of the ignition switch, by pulling the lanyard, I can "jump" D and E and kill the motor.

So my only question is, will this cause any other electrical damage?

Thanks
 

Laddies

Banned
Joined
Sep 10, 2004
Messages
12,218
Re: Kill Switch 1974 Mercury 50HP Thunderbolt Ignition

Thats where it goes,
 

GA_Boater

Honorary Moderator Emeritus
Joined
May 24, 2011
Messages
49,038
Re: Kill Switch 1974 Mercury 50HP Thunderbolt Ignition

The D - E connection a ground to the switch box when the ignition switch is turned to "OFF", so the lanyard switch will do the same thing. As Laddies said, that's where it goes.
 
M

Maxz695

Guest
Re: Kill Switch 1974 Mercury 50HP Thunderbolt Ignition

The salmon wire is the key kill switch and the grey wire is the tac wire to the rectifire yellow wire
 

Laddies

Banned
Joined
Sep 10, 2004
Messages
12,218
Re: Kill Switch 1974 Mercury 50HP Thunderbolt Ignition

Actually on his wiring diaghram gray is for the choke but newer engines gray is the tach wire.
 

dOb

Petty Officer 1st Class
Joined
Jun 14, 2010
Messages
244
Re: Kill Switch 1974 Mercury 50HP Thunderbolt Ignition

Thanks for the help. The tach and choke work fine. But now I have a new problem.

As I was working out the kill switch puzzle, I noticed that the red wire was loose. As I went to re-solder it, the terminal on the back of the ign. switch literally crumbled. Long story short, the whole switch is falling apart.

I found this one:
Sierra Sierra International MP41000 Push To Choke Marine Ignition Switch - Fitness & Sports - Boating - Boating Accessories

I can get it cheaper, but this was the first link I could find. Will this work on my 1974 control box?
 

GA_Boater

Honorary Moderator Emeritus
Joined
May 24, 2011
Messages
49,038
Re: Kill Switch 1974 Mercury 50HP Thunderbolt Ignition

I'm not sure which control box you have. Do you have a push to choke switch bow? You can wire a PTC switch to replace the separate choke button as long as the PIC switch will physically fit, which I'm not sure.
 

dOb

Petty Officer 1st Class
Joined
Jun 14, 2010
Messages
244
Re: Kill Switch 1974 Mercury 50HP Thunderbolt Ignition

I have a Mercontrol control box. I don't have a push to choke switch now. But this was the closest I could find. I'll keep looking. I don't really want to buy a used 1974 control box only to find that the wires are bad, if not worse, than what I already have.
 

dOb

Petty Officer 1st Class
Joined
Jun 14, 2010
Messages
244
Re: Kill Switch 1974 Mercury 50HP Thunderbolt Ignition


#3819598 - the controller you have above looks the same. But I have a 50hp. The diagram i posted above shows the wiring in my control box exactly.

I don't really want a push button choke. If the one from the Crowley link is the same setup, then that's the way to go. I'll give them a call tomorrow.

Thanks
 

carholme

Rear Admiral
Joined
Sep 4, 2010
Messages
4,845
Re: Kill Switch 1974 Mercury 50HP Thunderbolt Ignition

The 115 doesn't mean anything, they are the same boxes and the switch will be the same for yours. You don't have to use Crowley as they tend to be a bit pricey, I just like their search engine. Look at this one:

FULL POWER TILT (CONTROL PANEL AND LIFT HOSES) - Mercury Marine Parts - Mercury Performance - 30162 - SWITCH, IGNITION - CONTROL PANEL (WITH KEY #30431)

30162 is one of the original numbers and it has been upgraded to 54211T

Gerry
 

dOb

Petty Officer 1st Class
Joined
Jun 14, 2010
Messages
244
Re: Kill Switch 1974 Mercury 50HP Thunderbolt Ignition

Great! Thanks for the info. I'll post back when I get everything worked out.

Thanks again.
 

dOb

Petty Officer 1st Class
Joined
Jun 14, 2010
Messages
244
Re: Kill Switch 1974 Mercury 50HP Thunderbolt Ignition

Kill Switch is installed. I didn't get many pictures. Once I got started, I just plowed through. But this is how it all worked out.

When I got the boat, the harness from the control box to the motor was already a couple of feet longer than necessary. I just wrapped it and tied it up under the gunwale. So when I went to replace the ignition (see above) I was able to cut about five inches of old, crumbling wire off, and expose good wire to work with. The colors were brighter and easier to distinguish.

With the box opened, I figured that the best option was to install the kill switch below the ignition. There was just enough room to squeeze in behind the neutral/start switch. Once I marked the location, I drilled a 3/4 inch hole in the control box, just under the key switch, and above the cables. (BTW ? If I didn?t want to keep the choke, I think the cut out for the choke would have probably been a good place to install the kill switch0.

The original wire grouping entered the control box and made a 90 degree turn, still in the black cover. There was a clamp to hold it down. In order to buy some room, I cut back the black cover right after it entered the box, and was able to tuck the smaller wires under the kill switch. I also had to cut the ?M? terminals, and bend the ?C? terminals in order to get it all to fit. It?s very snug, but it works.

IMAG0702_zps89e35ee1.jpg


Now when I go out by myself or with my kids, I have one less thing to worry about.
 
Top