accentphoto
Petty Officer 2nd Class
- Joined
- May 4, 2011
- Messages
- 128
The technician at CDI gave me some pointers on how to check a coil and I thought I would pass them on.
The first step is to do a Ohms test to see if the coil is good before going on to the visual internal ferrite core inspection.
Meter Test:
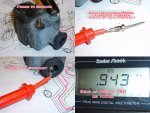
1. With your ohm meter, measure the coil ground to the secondary (where the spark plug wire goes). (See attached photos)
2. See if it is around the 1KΩ or 1000Ω range. If so then go on to the visual inspection.
Visual Inspection:
Warning: Do not put a lot of pressure with your fingers on the top (where the brass screw threads are) and bottom of the ignition coil. You may snap the fragile Ferrite core inside.
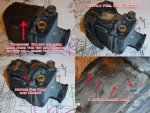
1. Gently peel back the rubber protector and take it off of the ignition coil.
2. Check to see if there are any noticeable cracks. If so, replace the coil.
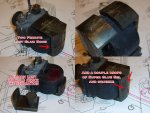
3. If no visible cracks are noticed then check to see if the area where the two ferrite parts meet are loose. If so you need to see if one or both have lost the silicon bond
that helps to keep them from separating too much.
4. The string stranded packing type of tape is used to hold the two ferrite cores together. Sometimes this gets dirty and looses its adhesion so the technician recommended to add the silicon to hold the ferrite like before and to add a couple of Super Glue Gel drops where they ferrite core halves meet. You could also add the string tape if you would like for added comfort.
5. Carefully put the rubber protector boot back on and hope it works!


