


After doing a lot of searching around on here for some detailed instructions on how to replace the water shutter on my 470, I came up mostly empty handed. I found some posts from people with the same engine but my water shutter looks different than theirs. There are apparently two styles... mine which has the brackets and the shutter deep down into the tube, and the others that have the rubber grommets in the tube. So this is how I replaced mine...
Keep in mind that I'm fortunate enough to have the motor out while doing this job... I would probably have had to pull the exhaust elbow if the motor was in the boat.
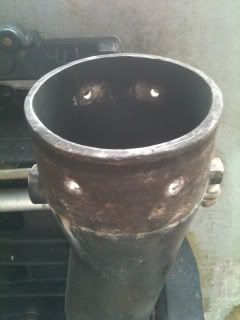
The brackets were held in with four rivets. I drilled out the two on the front and used a cut disc on an angle grinder to cut off the two on the back that a drill couldn't reach. Be careful not to let the brackets or the leftover rod fall into the tube! This is after the rivets and bracket are removed:
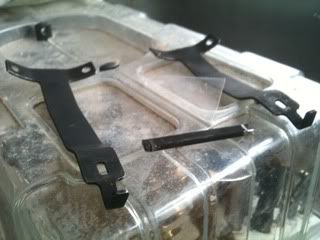
This is what came out of there... two brackets and the leftover rod. Careful: the rod just sits in there so it will fall out as you remove the brackets from the exhaust tube.
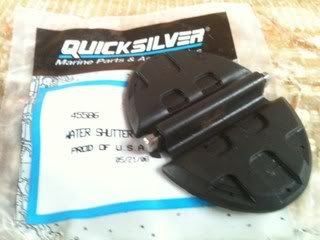
This is the replacement shutter you need. Quicksilver #45586. It's one-piece molded rubber with the flat rod in the middle.
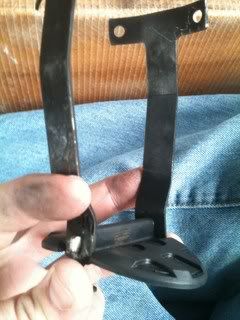
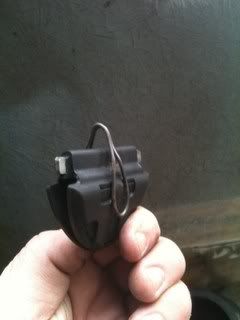
This is how the whole thing goes back together. It doesn't "snap" together so at this point I'm having to hold it all together.
Now it's time to insert the new shutter into the exhaust tube. The shutter won't fit down into the tube while in its closed position as in the previous picture, so you have to be able to hold the shutter open as you insert the assembly into the tube. A small clamp would work but I couldn't find one quick so I just used a piece of wire to hold it open. Whatever you use, make sure it won't fall off into the exhaust pipe.
Once you have the clamp on, put the whole thing back together and slowly (carefully!) lower it back into the exhaust tube. You have to keep pressure on the brackets to squeeze the shutter to hold it in place until you get it all the way down into the final position. Once it's all the way down and the bracket holes line up with the holes in the tube, put a couple new rivets in the holes to hold it in place, then you can let go of the assembly to pop the rivets in tight. Once the rivets are in, reach down in there with some needle nose pliers and remove the clamp (whatever you use).
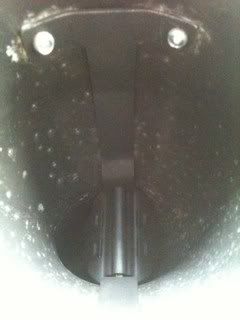
This is how it looks after it's all in place. The shutter didn't open up when I took the clamp off, so I made sure it would fit right by taking a piece of wire and making a hook, then reaching down and hooking the flap and pulling it up. Both sides looked like they would seal off pretty good if water gushed in.
Maybe this will help someone that wants to replace their shutter.
Keep in mind that I'm fortunate enough to have the motor out while doing this job... I would probably have had to pull the exhaust elbow if the motor was in the boat.
The brackets were held in with four rivets. I drilled out the two on the front and used a cut disc on an angle grinder to cut off the two on the back that a drill couldn't reach. Be careful not to let the brackets or the leftover rod fall into the tube! This is after the rivets and bracket are removed:
This is what came out of there... two brackets and the leftover rod. Careful: the rod just sits in there so it will fall out as you remove the brackets from the exhaust tube.
This is the replacement shutter you need. Quicksilver #45586. It's one-piece molded rubber with the flat rod in the middle.
This is how the whole thing goes back together. It doesn't "snap" together so at this point I'm having to hold it all together.
Now it's time to insert the new shutter into the exhaust tube. The shutter won't fit down into the tube while in its closed position as in the previous picture, so you have to be able to hold the shutter open as you insert the assembly into the tube. A small clamp would work but I couldn't find one quick so I just used a piece of wire to hold it open. Whatever you use, make sure it won't fall off into the exhaust pipe.
Once you have the clamp on, put the whole thing back together and slowly (carefully!) lower it back into the exhaust tube. You have to keep pressure on the brackets to squeeze the shutter to hold it in place until you get it all the way down into the final position. Once it's all the way down and the bracket holes line up with the holes in the tube, put a couple new rivets in the holes to hold it in place, then you can let go of the assembly to pop the rivets in tight. Once the rivets are in, reach down in there with some needle nose pliers and remove the clamp (whatever you use).
This is how it looks after it's all in place. The shutter didn't open up when I took the clamp off, so I made sure it would fit right by taking a piece of wire and making a hook, then reaching down and hooking the flap and pulling it up. Both sides looked like they would seal off pretty good if water gushed in.
Maybe this will help someone that wants to replace their shutter.
