Trying to figure out which transom seal/bellows kit fits a Mercruiser 165/MC-1?

jimmwaller

Petty Officer 1st Class
Joined
Nov 30, 2013
Messages
265
Hi all,

I have a Mercruiser 165... can't find the serial number, so I don't know exactly what year it is. I believe that this is the serial number:
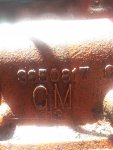
serial.jpg


which I'm reading as 3850817

According to the charts, this puts it as a 1970-1978 Mercruiser GM 165. It's a GM165, so this seems reasonable! Problem is, I don't know what year. Assuming they made similar numbers every year, this would be.... around a '74? But i have no real way to be sure.

Anyways. I'm looking for a transom seal/bellows kit. I can't find anything on iBoats that clearly works, so wondering if anyone know of a kit that definitely works for a mid-70's Gm 165?

The first one I saw that looked maybe right was this one:

http://www.iboats.com/Sierra-18-8205...BoC7Q8QAvD_BwE

but then I read a review of this kit on amazon, the reviewer says that it didn't fit their 165 at all. Looked some more and found this one:

http://www.mercaftermarkets.com/merc...803097t-1-oem/

says it fits the MC-I, which I assume is the same as the MC1? But it also says that it fits 1977 and later, whereas I think mine is pre-1977.....


Totally lost about where/how to find a kit that'll work with my setup. Any help would be appreciated.

thanks!!
 

Chigwalla

Petty Officer 2nd Class
Joined
Jul 11, 2017
Messages
109
That's just a GM casting number. Mercruiser serial numbers are never cast in because there is no "Mercruiser" block.
Even on the new 4.5 and 6.2 (their own blocks), they didn't cast the serial number.
Your metal tag is gone ?
 

Grub54891

Vice Admiral
Joined
Jun 17, 2012
Messages
5,915
The transom hull id would give you the year, post that and we can get you closer to finding the year, or your title should have the hull id and year also. The numbers for the transom assembly, and drive might be on the valve cover also.
 

Bt Doctur

Supreme Mariner
Joined
Aug 29, 2004
Messages
19,111
You may have to remove yours to find out if it has a ridge or not
 

jimmwaller

Petty Officer 1st Class
Joined
Nov 30, 2013
Messages
265
Thanks for all the info.

A few things:

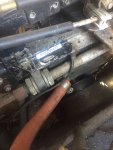
One, I actually found this serial tag, but the actual number is, of course, totally obscured. Looks like it was melted off.... the black isn't just dirt, it will NOT come off. No idea what is it... anyone know?

serialtag.jpg


I looked for the metal tag that is supposed to be above the starter motor but didn't see anything. Just so I'm clear I'm looking in the right place, this would be on the starboard side of the engine, towards the stern (but still on the starboard side)?


I also know that my boat is a 1970, but the PO said that it has been repowered at some point so unfortunately that's not much help. I will keep digging for the serial number! Is there anywhere else it might be?

BT Doctur, I also saw your post about the ridge in another thread. Quick question: if I take the drive off before I have the kit, the internals will be exposed for days or weeks. Is this really bad?

thanks!
 

Bt Doctur

Supreme Mariner
Joined
Aug 29, 2004
Messages
19,111
No,the only internal thing is the gimbal bearing . untill you know what bellow you need you cant order the kit.
 

jimmwaller

Petty Officer 1st Class
Joined
Nov 30, 2013
Messages
265
Hi all,

I took the outdrive off this morning and now I need to figure out how to get the bellows off. I've been watching youtube videos, and it seems like once the lower unit is off the bell housing, you can just take the bellows off without removing the bell housing.

Is this correct, or do I need to take the bell housing off?

thanks!
 

Bt Doctur

Supreme Mariner
Joined
Aug 29, 2004
Messages
19,111
I have changed the bellow on an early drive like yours but is was a b^&ch Its a lot easier to remove the 2 SS nails and remove the housing.Once you have the clamps loose you can use a very long screwdriver to get the bellow loose at the transom, cut the remaining bellow off the gimbal, and remove the clamp and remnents of the bellow.
Pay STRICT ATTENTION as to how the clamps are set
 

jimmwaller

Petty Officer 1st Class
Joined
Nov 30, 2013
Messages
265
hi bt Doctur, thanks for the info.

So I'm gathering two things from your post: One, I can just go ahead and cut the bellows off? That would save me a lot of time because the big reason I want them off sooner rather than later is to see what bellows kit I need (apparently some were made with a ridge on the lip and some weren't). That way I can see which ones I need, order them, and then while they're shipping, I can take the bell housing off and get them ready for installation and stuff.

And two, when you say to pay strict attention to how the clamps are set, what exactly do you mean? You mean that I need to, like, see where the screw thing is located? Or what type of clamp? What exactly am I supposed to me looking for?

thanks!!
 

jimmwaller

Petty Officer 1st Class
Joined
Nov 30, 2013
Messages
265
another question: If I'm understanding properly, there are two bellows kits for a mercruiser 165/MC1. The earlier models were just smooth boots, and the later ones had a raised ridge/bead thing that had a corresponding groove on the housing for it to slip into.

I just went and looked at mine today.... didn't see a raised bead.

It would be fairly noticeable, correct?

And it would be on all the boots? Maybe not the shift cable boot, but all the other ones?

So if I have the earlier-model smooth boot, what bellows kit is this? I can't find anything specifically for a 165.

thanks!
 

fishrdan

Admiral
Joined
Jan 25, 2008
Messages
6,989
BT was talking about how the clamps are "clocked", be 100% sure to put them back into the exact same position, or reference the manual for their position. Pictures, pictures, pictures.....

You have to remove the bellows to see if you have the ridged or smooth version, the ridge is on the inner surface of the bellows, where it touches the bell/gimble housings.

Do yourself a HUGE favor and remove the bell housing. Another huge, favor get the exhaust bellows tool, or search iboats for the "$3 exhaust bellow tool" I made
 

jimmwaller

Petty Officer 1st Class
Joined
Nov 30, 2013
Messages
265
hi fishrdan,

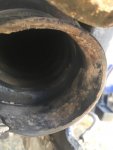
thanks for the info. So I took off the bottom-most bellow (not the main, large one that covers the driveshaft/gimbal bearing, it was the medium-sized one just below that main one) and didn't see a ridge on the bell housing side.

bellows.jpg


So if I can see the whole inner lip (as shown in the photo, although I guess you can't see the left side) and there's no noticeable ridge, I have the smooth version? And it would be right on the inside of the bell housing side of this particular bellow, correct? It's not like it's only on the main (largest) bellow, or only on the transom side or anything?

thanks!!
 

Bt Doctur

Supreme Mariner
Joined
Aug 29, 2004
Messages
19,111
the exaust bellow is smooth the main bellow will have the ridge or no ridge.(Sierra 18-2752)Fits all #1 Merc Units without "ridge" to hold bellows (Serial No. 3443920 and lower).
 

jimmwaller

Petty Officer 1st Class
Joined
Nov 30, 2013
Messages
265
oh bummer..... guess I have to take the main bellow off then.

So am I correct in believing that I need to take off the pivot pins (and there should be two?), and then the housing will come off? And that it should still be connected to the bellows, but it'll be loose at least?

thanks!
 

kenny nunez

Captain
Joined
Jun 20, 2017
Messages
3,075
Get a small chisel and use that to to straighten the front of the nail. If you are lucky the nails are not corroded in the gimbal ring. Try to get under the head of the nail with a pair of diagonal pliers then hit the pliers with a hammer to pull the nail out. The front clamp on the exhaust bellow can be reached through a hole in the gimbal housing. The best tool for these type of jobs is a 5/16th 1/4 drive universal socket. Clean the bellow mount surfaces with some 80 grit and and be sure that the surfaces are clean and grease free on reassembly.
 

jimmwaller

Petty Officer 1st Class
Joined
Nov 30, 2013
Messages
265
hi kenny,

thanks for the info. And these are the pivot pins you're talking about? I have a clymer's "stern drive shop manual" for '64-'85 mercruisers. They have a lot of information for my engine, but not for my outdrive. I was told that I have an MC-1 outdrive, which doesn't seem to be listed/covered in my manual.

But I had hoped that the pictures in there were good enough... I am seeing other bell housings with the pivot pins labelled, but I don't see anything like that on my outdrive. I also didn't see any nails, I don't think....

Is this what you're talking about?

nail_maybe.jpg


If not, would you mind describing where the pivot pins are?

thanks!
 

kenny nunez

Captain
Joined
Jun 20, 2017
Messages
3,075
Just like the Doctor pointed in his post. Good luck . The drive you have was always known as a 1 drive. The Alphas started showing in the early 80s. The #2 was a much stronger unit that started with a 292 cu.in. Chevy truck engine rated @ 200 hp then 283s and some Ford engines. Thru transom exhaust only. Then up the numerical scale. #8 and I am sure that there are 9s and beyond in the planning and development.
 

jimmwaller

Petty Officer 1st Class
Joined
Nov 30, 2013
Messages
265
hi all,
just want to confirm..... took off the main bellow this morning. Checked the side that attaches to the bell housing.... didn't see a ridge.

However, I did see little "dimples". That's not what you're talking about, is it? I still need the "smooth" ones?

The boot has maybe 4 little dimples in it, and there are corresponding little "buttons" on the housing.

Tried to get photos, but they're pretty bad.

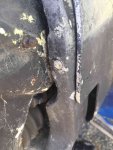
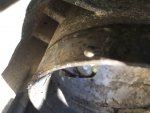
You can see the dimple here--it's right in the sliver of sunlight (it looks like it comes out, but that's an optical illusion. it's actually indented):

dimple.jpg


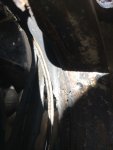
And here's the best photo I could get of the button on the housing:

button.jpg

Thanks!
 

Grub54891

Vice Admiral
Joined
Jun 17, 2012
Messages
5,915
yeah, you need the smooth bellows, the dimples keep it from slipping off, the clamp, be sure its behind the dimples to keep it in place.
 
Top