I wanted to give it a little throttle, but I am not sure if the control is working as well as it should be. I assume the button that says push for throttle only disconnect the drive and when you pull the red handle and push it forward the throttle is all that should engage? The throttle on the Grady white I am used to functions similarly.
Correct. Just push the button inwards, lift the red handle and move forward to engage higher throttle setting/RPM. The button disconnects shifting into gear... You should hear the button pop back out with a click type sound when you bring the handle back up to the straight up neutral position.
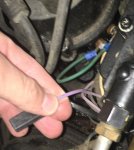
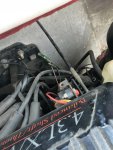
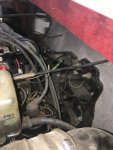
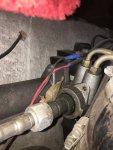
I am still failing to see where the trim wires (brown/white stripe & black) connect?
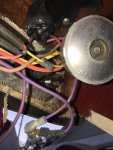
In one of the photos where you show the back transom area behind the engine (
http://forums.iboats.com/filedata/fe...otoid=10308043 ) ...There are two sets of black wires coming from the middle transom assembly area.. One of the sets of wires are for the trim gauge and the other is for the trim limit height.. One set connects to the two wires in question which is the Tan/White and Black wires in your hand...
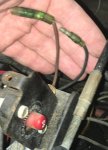
Plus there's another set of wires inside the boat sometimes even harder to find that connect to the other set of black wires coming from the transom assembly. On the outside of the boat mounted to the gimbal ring you should see two black round pucks that resemble these in a how to fix the trim sending units video >
https://www.youtube.com/watch?v=dVSNXYpWJVI
Would the trim gauge actually effect the trim from working? As I stated earlier, but trim does not go up - I intent to swap the relays around and see if that identifies the problem.
If the trim limit sending unit isn't working or adjusted correctly plus depending on what trim/trailer up button at the shift handle you are using, the trim limit sending unit could keep the drive from coming up while using the trim up button... The trailer button should be overriding a failed trim up limit sending unit though.
When the system is working correctly, The trim up button which is the up/down button at the top of the shift handle will only bring the drive roughly halfway up from a near/or full down position and automatically stop. Once you reach the up limit you have to use the rubber trailer button in order to override the trim up limit in order to bring the drive up the rest of the way... Of course bearing in mind that the trailer button will/should also work to bring the drive all the way up from any position it's in at the moment.
If the rubber trailer button isn't working then you'll need to go much further into you troubleshooting shooting diagnostics.
Most likely the trim sending units will still need to be replaced if you'd like them to work again as they tend to not last a very long time and if someone already bypassed the wiring then they likely failed on the pervious owners/s.
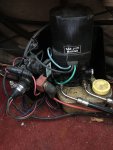
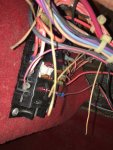
After looking under the console, there is a lot of stuff I want to identify and clean up. They have disconnected the safety lanyard.
As for the safety lanyard kill switch, you'll want to ohms test the switch wiring terminals to see if the switch seems to be working correctly or not since someone bypassed the switch connecting the two Purple wire together. Pretty sure new switches are still available from Mercruiser if needed. Let us know as the part number can be located online.
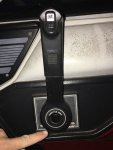
Also, the main circuit breaker where is says push to reset... it does not appear to reset when I push it? It doesn't appear to move at all? Is that because it would actually have to trip?
Using a multimeter on the voltage scale, test to see if 12v power is present at both wire terminals at the rear of the circuit breaker in order to know if it's working or not...If it's tripped, only one side would show 12v power. That mentioned, yes if it's tripped then it would move for a reset. Not moving should indicate it's working. But for learning purposes to get to know the wiring systems, test it anyway with a multimeter.
")
Sorry for all my questions guys - I am new to this
At times, We're all learning this together my friend.:encouragement:
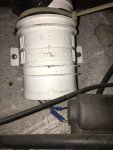
PS, the white thing mounted on the rear transom is called a bilge blower to help remove gas fumes before engine start up...Safety first.
http://www.iboats.com/Boat-Parts-Acc...Bilge%20blower
Make sure your bilge pump to remove water is working too,
http://www.iboats.com/Boat-Parts-Ac...searched.1--session_id.542087146&q=Bilge pump