Mercruiser Pre-Alpha (R) prop spins both ways in gear.

SWBuechler

Cadet
Joined
Sep 14, 2015
Messages
27
So, the continuing saga of Tweedle Dee and Tweedle Dum. We put the outdrive back on and everything is fine. The drive is in forward gear (we never moved it). The lower unit seems good, the prop only moves in one direction. Everything's GREAT!

Then we decide we should have replaced the impeller and water pump in the lower unit so off it comes (leaving the upper unit installed and in gear) and we replace the impeller and water pump and re-install the lower unit. NOW THE PROP TURNS BOTH WAYS!!! What did we miss during installation? Are you suppose to turn the gear rod in the lower unit a certain way while re-installing? Do I have to take the lower unit off and make some sort of adjustment and then reinstall? Can I just take it out of gear and put it back in gear? Help please.
 

Grub54891

Vice Admiral
Joined
Jun 17, 2012
Messages
5,911
You have to have the splined shift shaft lined up correctly, remove and reset it.
 

Rick Stephens

Admiral
Joined
Aug 13, 2013
Messages
6,118
Be very careful reinstalling a lower while the upper is installed. Easy to damage the seal coming out of the upper when you stab the shaft in.

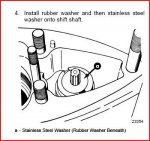
Rotate the splined shaft clockwise to engage in forward gear, and check that it in in forward gear, before sliding it on. Make sure the stainless washer is on the splined shaft as well. It is easy to allow to drop off and not notice it.
 

Bt Doctur

Supreme Mariner
Joined
Aug 29, 2004
Messages
19,111
If your not 100% confident you can drop the lower and connect it correctly,its best to remove the drive as a unit and set it on a stand.
If the spline is not correct and you just tighten the bolts you will damage the lower unit
 

SWBuechler

Cadet
Joined
Sep 14, 2015
Messages
27
So, I tried to remove the lower unit to make the adjustment and reinstall but I couldn't get the lower unit off. I removed the bolts and dropped it down but it would not come free. The shift shaft appears to be stuck in the upper housing. I could see the shift shaft and I was able to turn it slightly so the prop went in to gear. I turned it and the prop locked in place like it should (won't rotate counter clockwise but will rotate clockwise). I put it all back together. Now, when I try to shift it out of gear at the shift handle at the controls I can't shift it out of gear. It is permanently stuck in forward. Is my only recourse to pry the lower unit off with a crow bar and survey the damage I've done?
 

Rick Stephens

Admiral
Joined
Aug 13, 2013
Messages
6,118
Starting place will most likely be to pull the entire drive off so you can see what is happening. If the lower shift shaft is stuck into the brass intermediate shift shaft you will have to work those apart to split the halves. Most likely if they are stuck then the damage is done to the brass intermediate shaft, the one with the shoe on top. It is the softest metal. Should not be that hard to pull them apart if the teeth were just jammed together by tightening the bolts.

One thing of note: by assembling upper and lower with the lower in a stand, when you drop the upper on it will go all the way into place by its own weight when everything is aligned properly. The tendency when lifting the lower up to the upper with the upper on the boat is to pull the lower into place with the bolts. Not as safe a process.
 

Bt Doctur

Supreme Mariner
Joined
Aug 29, 2004
Messages
19,111
the brass shoe and the splined shaft MUST be lined up before tightening the nuts.If you used the nuts to draw the unit together you have damaged it.
In most cases the units can be pushed together to within a 1/8 inch before you tighten the nuts.
 

Grub54891

Vice Admiral
Joined
Jun 17, 2012
Messages
5,911
Sometimes the shoe gets bent ever so slightly. Seen it happen once, the owner did something similar to what you did, and had same issues. Brought it in and replaced the shoe, problem solved. Kinda hard to spot but looking closely you should be able to tell.
 

Rick Stephens

Admiral
Joined
Aug 13, 2013
Messages
6,118
Every time you split the halves you run the risk of damaging the output shaft seal coming out of the upper when you pull out and then stab the lower input shaft back into it.

The shift shaft issue is totally separate from that. They have no relationship to each other that matters in this case. Either the shaft went in clean when you reassembled or it didn't. Damaging that seal is the most common damage done when assembling a lower to a still mounted upper.

There is also a seal on the lower shift shaft that can be damaged, I doubt that clamping down on the bolts while the intermediate shaft is improperly aligned would damage it, but it is possible.

In both cases, the seals should be pressure tested when you reassemble the upper and lower.
 

SWBuechler

Cadet
Joined
Sep 14, 2015
Messages
27
Every time you split the halves you run the risk of damaging the output shaft seal coming out of the upper when you pull out and then stab the lower input shaft back into it.

In both cases, the seals should be pressure tested when you reassemble the upper and lower.

So how do I go about pressure testing the seals?
 

Rick Stephens

Admiral
Joined
Aug 13, 2013
Messages
6,118
Pressure test an outdrive. You can make a tester, screws into the oil fill vent hole. Don't have to remove the drive - do have to drain the oil. Should hold pressure over night even. I use 12 pounds pressure. Here's a post where a tester was built.
http://forums.iboats.com/forum/engi...drives/239516-drive-pressure-check-prior-post

I built mine out of a chunk of 1.5 inch PVC, a 1/2 pipe adapter at one end and a T with adapters down to 18th pipe thread on the other. Made up a piece of hose with the aforementioned 3/8 course thread to go into the vent - most just use the metal pump adapter from a oil filler pump. Then screwed a schrader valve into one of the 1/8th threaded holes to pressurize it, and a pressure gauge in the other. I can use a tire filler off my air compressor to run it up to 12 psi, or a bicycle air pump. Same same.

Idea is to find the leaky seal if it goes down. First time I did it the hose to vent adapter was what leaked :^) Squirting some soapy water on external seals and your test rig will usually show the leak. Hard ones to see are at the water pump and the lower seal on the upper gear case. The u-joint seal is no picnic either. But once you locate a problem you can go on to fix it. Worth having a tester sitting around to annually check things out.

Rick
 

SWBuechler

Cadet
Joined
Sep 14, 2015
Messages
27
No Title

Well, we pried the pieces apart and there doesn't APPEAR to be any damage to the end of the shift shaft (pictured). However, when I look up into the upper unit I can't see anything that corresponds with the grooves on the end of the shift shaft. I expected to see a matching female end to the grooved male end on the shift shaft. The upper unit appears to have a single groove instead of the anticipated 6 grooves. Does anyone have an exploded view of what the connection between the shift shaft in the lower end and the receptacle in the upper unit should look like?
 

Attachments

  • photo234569.jpg
    photo234569.jpg
    25.6 KB · Views: 2

Rick Stephens

Admiral
Joined
Aug 13, 2013
Messages
6,118
I don't have one apart right now, maybe someone else does. It should socket down and fit well over the lower shaft. Turning it should give you a definite feel that it is engaged and stops at the right place. When rotated clockwise, and in the proper location, it should stop turning when it is straight forward. There should not be much slop in the connection between the intermediate and the lower shaft. If there is damage, I would expect it to be to the brass intermediate and not the steel lower shift shaft.

Rick
 
Last edited:

SWBuechler

Cadet
Joined
Sep 14, 2015
Messages
27
I don't have one apart right now, maybe someone else does. It should socket down and fit well over the lower shaft. Turning it should give you a definite feel that it is engaged and stops at the right place. When rotated clockwise, and in the proper location, it should stop turning when it is straight forward. There should not be much slop in the connection between the intermediate and the lower shaft. If there is damage, I would expect it to be to the brass intermediate and not the steel lower shift shaft.

Rick

The steel lower shift shaft seems to be in good shape. Perhaps it is this "brass intermediate" piece you mentioned. To me it just looks like a tube. I can't see anything in it that corresponds to the teeth of the lower steel shift shaft.
 

Rick Stephens

Admiral
Joined
Aug 13, 2013
Messages
6,118
If I am not mistaken the inside of the intermediate shaft looks like it was made to fit an allen wrench - 6 flats.
 

Mercruiser420

Petty Officer 3rd Class
Joined
Nov 24, 2015
Messages
92
There should be splines in there. Sometimes if its packed with grease it will look like a hex.

Shift the lower unit to forward by turning the top of the splined shift shaft then push on the prop until it stops to keep the shaft from turning on you and slipping out of gear (lock it in gear). Note: When locked in gear, the prop will ratchet one way and not move the other way.

Assuming the controls on your boat are in forward position, mate the lower to the upper (lower unit still in forward gear). They probably won't line up right away but you can turn the drive shaft and make it spline up by turning the prop while it still in gear (the "not move" way NOT the ratchet way or you will take it out of gear).

The key is that the lower unit stays locked in forward gear the entire time of installation. Good luck
And do make sure its forward and not reverse...done that before and had to start over
 
Top