1972 40hp questions

F_R

Supreme Mariner
Joined
Jul 7, 2006
Messages
28,195
You can use a toggle switch for the choke, OR you can use a push-to-choke key switch---your choice. The '72 uses the OMC Universal Magneto, so there is no room in there for charging coils. However, a belt-driven DC generator was sold as an accessory kit.
 

chris16371

Petty Officer 2nd Class
Joined
May 19, 2017
Messages
156
Then the 2 wires that shut off the motor, do those get wired directly into ignition or do I need a separate kill switch?
 

racerone

Supreme Mariner
Joined
Dec 28, 2013
Messages
36,274
The 2 wires would go to the M terminals on an ignition switch.---An ignition switch meant for a magneto would have the 2 M terminals.
 

chris16371

Petty Officer 2nd Class
Joined
May 19, 2017
Messages
156

jbuote

Lieutenant Junior Grade
Joined
Aug 17, 2016
Messages
1,001
Hey Chris,
​I recently had to redo my ignition in my 71' 50hp... I used:
http://www.iboats.com/Omc-Push-To-C...id.291359254--user_step.logout--view_id.39662

​I wired my choke to the ignition switch instead of the toggle switch it was on and it works perfectly.
Above link has pics of the back and diagrams too.

​Looks like what you found is about the same switch. As long as it has the 2 M posts (and being a 6 terminal I believe it does) on it as racerone pointed out, you should be good to go with it.
 

chris16371

Petty Officer 2nd Class
Joined
May 19, 2017
Messages
156
Hey Chris,
​I recently had to redo my ignition in my 71' 50hp... I used:
http://www.iboats.com/Omc-Push-To-Ch...-view_id.39662

​I wired my choke to the ignition switch instead of the toggle switch it was on and it works perfectly.
Above link has pics of the back and diagrams too.

​Looks like what you found is about the same switch. As long as it has the 2 M posts (and being a 6 terminal I believe it does) on it as racerone pointed out, you should be good to go with it.

They do look to be the something just different brand. Thank you! Now to remember what each wire is lol.

When I change impeller being that is has the extension do I unbolt from top of extension or bottom?

I also need it in gear correct?
 
Last edited:

chris16371

Petty Officer 2nd Class
Joined
May 19, 2017
Messages
156
I took off the very lower portion of the extension and the water pump is right there, how do I disconnect driveshaft so I can slide it out?

I'll have to post a pic of the keyed ignition I bought, they sold the one that was for OMC so I might have bought one that won't work.
 

F_R

Supreme Mariner
Joined
Jul 7, 2006
Messages
28,195
Disconnect the shift rod through the oval hole/cover plate on the side of the midsection. There is nothing holding the drive shaft in (except rust, any you better hope not.)

EDIT: If you mean slide it out of the lower unit, the water pump impeller's drive pin prevents sliding it out. The condition disappears as soon as you remove the water pump housing.
 

chris16371

Petty Officer 2nd Class
Joined
May 19, 2017
Messages
156
Disconnect the shift rod through the oval hole/cover plate on the side of the midsection. There is nothing holding the drive shaft in (except rust, any you better hope not.)

EDIT: If you mean slide it out of the lower unit, the water pump impeller's drive pin prevents sliding it out. The condition disappears as soon as you remove the water pump housing.

Thank you. I meant the shift rod, I had the motor on it's side with the oval cover down so I didn't see it until I turned the motor on it's back. I have it all done.
 

chris16371

Petty Officer 2nd Class
Joined
May 19, 2017
Messages
156
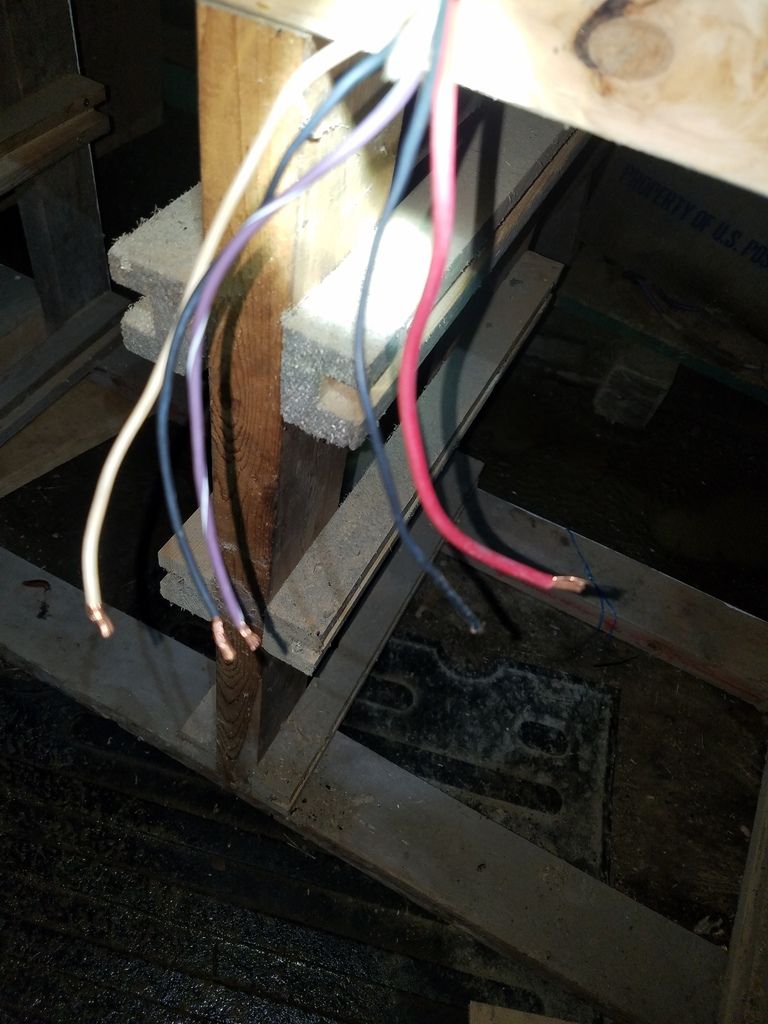
Pic of the wires, can't remember which one is which.


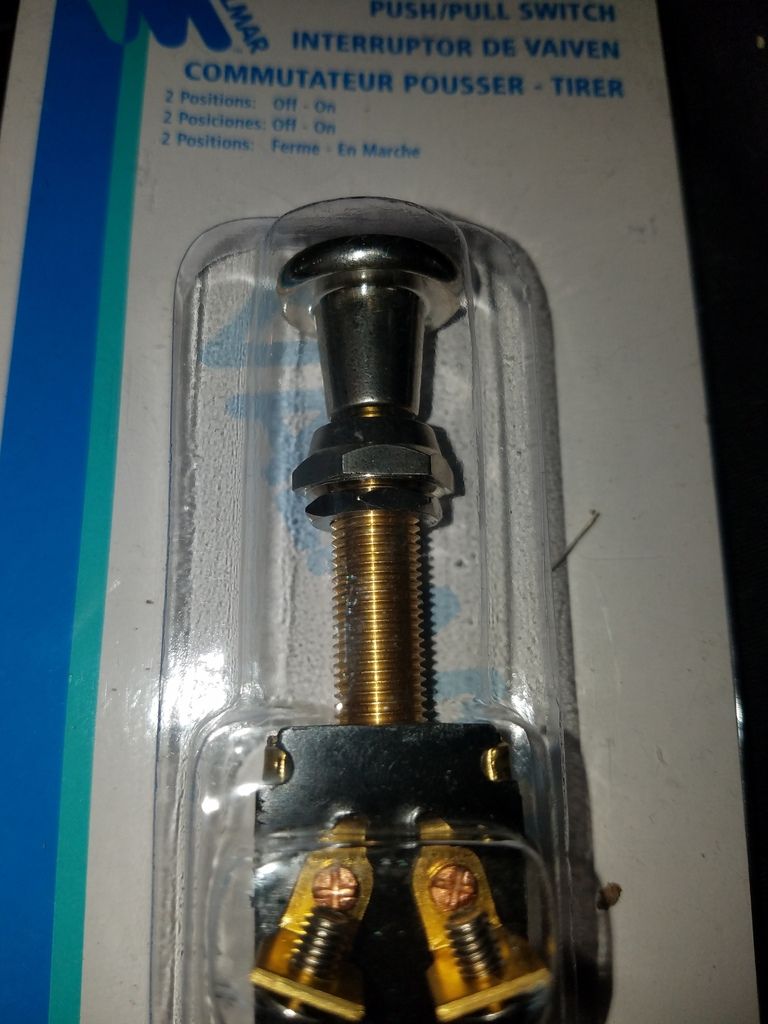
I bought this push pull switch for the choke since they sold the one OMC ignition with choke before I got there.


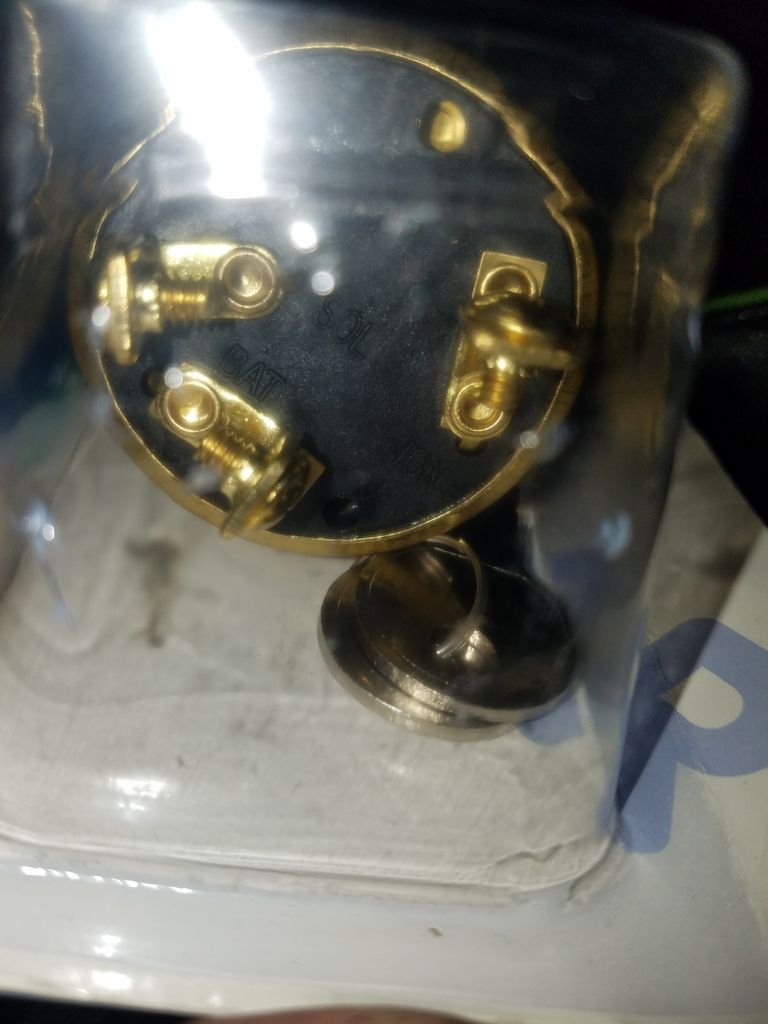
This is the ignition I bought since they sold out of the OMC ignition switch. Will this work for my motor?
 

chris16371

Petty Officer 2nd Class
Joined
May 19, 2017
Messages
156
Ignition worked but I put purple wire to IGN on the switch and it engaged choke when I turned key to on so that must of been wrong. I ordered the Johnson switch from amazon and returning these switches. I'm also not sure what the 2 black wires are, I thought that the guy I bought them from said 2 black were choke but that isn't correct I guess.

I changed out the impeller and upon starting it's not pumping water, it's suppose to pump water at idle correct? I didn't try it in gear to see if it would pump bc I didn't want to over heat it.
 

chris16371

Petty Officer 2nd Class
Joined
May 19, 2017
Messages
156
I figured out red is battery (obviously), white is solenoid, and purple with white line must be choke. Can't figure out what the 2 black are and not sure which 2 wires to touch to stop engine.

I did the tune up suggestions and also replaced impeller and I need help with 2 things. First is the motor still isn't pumping water. I've only tried in neutral and at idle bc I don't want to overheat it, using muffs.

My other issue is I cleaned the carb and I'm not sure I put speed jet back in correct location. I screwed it all the way in and backed it out a full turn before hooking it back up to the rod the goes to the speed jet control knob. I'm not sure if that's correct, Idk if I'm suppose to have it all the way in and then hook the rod back to the adjustments knob or if it needs to be out more than one turn before hooking it back to knob.
Oh I'm not sure how to tilt this motor lol, it has a lock/unlock on the front but it won't tilt in either position, what else needs to be done to tilt the motor up?

I'm sure these questions would be easily answered with the service manual I bought off eBay. Unfortunately the seller didn't ship till Saturday and used USPS Media Mail which is slow, expected delivery is next Monday which doesn't help me now lol.

I really appreciate everyone who has helped me, I would be lost without this forum!
 

jbuote

Lieutenant Junior Grade
Joined
Aug 17, 2016
Messages
1,001
According to the diagram I have, Yes. The purple/white is the choke, White is the starter solenoid, Red is Batt, All as you said,

​The two blacks should be for the M posts on the ignition. One of them goes to power pack, and the other goes to negative side of starter solenoid.
​Looks like you touch the 2 black wires together to ground the ignition and shut off the engine.
(As long as that's how you see it on your engine)

​Still new myself, and my diagram may not be for your exact engine, so maybe others here with more experience could confirm or correct me if needed.

​For what it's worth..
 

chris16371

Petty Officer 2nd Class
Joined
May 19, 2017
Messages
156
According to the diagram I have, Yes. The purple/white is the choke, White is the starter solenoid, Red is Batt, All as you said,

​The two blacks should be for the M posts on the ignition. One of them goes to power pack, and the other goes to negative side of starter solenoid.
​Looks like you touch the 2 black wires together to ground the ignition and shut off the engine.
(As long as that's how you see it on your engine)

​Still new myself, and my diagram may not be for your exact engine, so maybe others here with more experience could confirm or correct me if needed.

​For what it's worth..

Yes that sounds exactly right, I forgot about that wiring diagram lol! Thank you again!!
 

jbuote

Lieutenant Junior Grade
Joined
Aug 17, 2016
Messages
1,001
As for the carb adjustment, I read up on it in my manual, and it says you have the Type II Carb for the 72 40hp. Type I would be on the 71 40hp.
​The adjustments should be:

Low speed mixture needle, turn out 1 1/2 turns from lightly seated, then tighten the packing nut so there is drag on the needle, but can still be moved.
​IF you have high speed mixture needle, it starts off at 3/4 turn out from lightly seated.
​If you have a fixed jet for high speed, it just gets screwed in with no adjustments possible.

(Make the following adjustments 1/8 - 1/4 turn at a time, allowing some time in between for engine to acclimate to the change)
​Then, (preferable on lake) start and warm up engine to operating temp.
​Adjust low speed needle clockwise till starts to stumble or stall, then back out Counter-clockwise till highest RPM's are reached.

​Make sure you do a link N sync on the carbs first, since you've had them off for cleaning.. Very important.

Only for High Speed Adjustable: (Skip this if fixed jet)
​If high speed is adjustable, then ON THE LAKE ONLY, shift into forward, and advance to wide open throttle.
​Adjust high speed clockwise till RPM's start to drop, then back out counter-clockwise till highest RPM's are reached.

Then repeat low speed adjustment.
​Then go back to WOT in fwd on lake to double check high speed.

​As for the water pumping, How do you know it isn't pumping water? Does it have a tell-tale?
​My 72 50 hp has exhaust overflow slots in the back, and I get a light mist out there when on muffs. There are some drain holes in the foot that stream water when running, but again.. Yours is a 40hp, so not sure how yours is supposed to be..

​Might try dropping the lower unit and use a hose to put low water pressure directly up the water tube to make sure nothing is clogged up..

​And once again, I'm still quite new to outboards, but from what I've experienced so far, read here, and learned I think this is accurate. (Real close anyway.. lol)

There are many great folks here with much more experience than I have and welcome them to confirm or correct me if needed!

​Hope it helps even if just a little.. :)
 
Last edited:

oldboat1

Fleet Admiral
Joined
Apr 3, 2002
Messages
9,607
​Adjust low speed needle clockwise till starts to stumble or stall, then back out Counter-clockwise till highest RPM's are reached.

Actually, rpms increase when the mix is leaned out (clockwise). When the rpms increase as the mix is leaned out, throttle down and continue adjusting the mix. When you get lean sneezing or stalling adjusting clockwise, back it out (richer) about 1/4 turn. rpms would not be affected by that last adjustment.

The more thorough approach is to adjust richer after hitting the overly lean setting, until the engine stumbles from an overly rich mix (rpms will decrease), then find the mid-point between too rich and too lean, and use that setting.
 

jbuote

Lieutenant Junior Grade
Joined
Aug 17, 2016
Messages
1,001
^^^ Yeah.. That confused me for a minute when the manual said to go richer from lean till highest RPM's are reached. I know leaning will increase rpm, but still typed what the manual said in case it was a carb difference or something..
​Thanks for correcting that and confirming my thought!

​Well there you go Chris! lol... Use what oldboat1 said as the more thorough approach.. :D
 

chris16371

Petty Officer 2nd Class
Joined
May 19, 2017
Messages
156
As for the carb adjustment, I read up on it in my manual, and it says you have the Type II Carb for the 72 40hp. Type I would be on the 71 40hp.
​The adjustments should be:

Low speed mixture needle, turn out 1 1/2 turns from lightly seated, then tighten the packing nut so there is drag on the needle, but can still be moved.
​IF you have high speed mixture needle, it starts off at 3/4 turn out from lightly seated.
​If you have a fixed jet for high speed, it just gets screwed in with no adjustments possible.

(Make the following adjustments 1/8 - 1/4 turn at a time, allowing some time in between for engine to acclimate to the change)
​Then, (preferable on lake) start and warm up engine to operating temp.
​Adjust low speed needle clockwise till starts to stumble or stall, then back out Counter-clockwise till highest RPM's are reached.

​Make sure you do a link N sync on the carbs first, since you've had them off for cleaning.. Very important.

Only for High Speed Adjustable: (Skip this if fixed jet)
​If high speed is adjustable, then ON THE LAKE ONLY, shift into forward, and advance to wide open throttle.
​Adjust high speed clockwise till RPM's start to drop, then back out counter-clockwise till highest RPM's are reached.

Then repeat low speed adjustment.
​Then go back to WOT in fwd on lake to double check high speed.

​As for the water pumping, How do you know it isn't pumping water? Does it have a tell-tale?
​My 72 50 hp has exhaust overflow slots in the back, and I get a light mist out there when on muffs. There are some drain holes in the foot that stream water when running, but again.. Yours is a 40hp, so not sure how yours is supposed to be..

​Might try dropping the lower unit and use a hose to put low water pressure directly up the water tube to make sure nothing is clogged up..

​And once again, I'm still quite new to outboards, but from what I've experienced so far, read here, and learned I think this is accurate. (Real close anyway.. lol)

There are many great folks here with much more experience than I have and welcome them to confirm or correct me if needed!

​Hope it helps even if just a little.. :)

That helps a ton! Thank you. It must only have the low speed since there's only 1, I think someone mentiond it in another thread I had (maybe this one though).

Now to figure out why it isn't pumping water. I changed impeller and at idle it just spits smoke and a very little bit of what looked like oil came out, just a couple drops.
 

jbuote

Lieutenant Junior Grade
Joined
Aug 17, 2016
Messages
1,001
Well again, in referencing the manual I have, it talks about the water inlet on the front of the lower unit with a screen on it.
​Is that screen plugged up so no water is getting in? Unless you have muffs that are specific to that, I'm guessing you ran it in a barrel? Was the water level high enough so water could get into the inlet?

​If in fact it's not getting water to the impellor, my guess would be you might have to replace it again.. Probably wrecked it if it wasn't getting water.. Yes, even a brand new one will fail QUICKLY with no water...

​I don't know too much about the 40 hp cooling, if it has a thermostat or not etc...
so I'll leave that part to others from here.. lol...
 
Top