1987 8hp Evinrude

Tekin

Petty Officer 2nd Class
Joined
Jul 19, 2016
Messages
105
I need help on how to properly remove the lower unit? I have looked everywhere online for instructions on how to remove my lower unit.
 

boobie

Supreme Mariner
Joined
Nov 5, 2009
Messages
20,826
I found my '89 service manual and all it says there are three bolts to remove and the L/U comes off. Put it in forward gear before removing.
 

gm280

Supreme Mariner
Joined
Jun 26, 2011
Messages
14,590
Not knowing myself, he probably has a shift rod to remove or disconnect as well. Just a guess though. :noidea:
 

Tekin

Petty Officer 2nd Class
Joined
Jul 19, 2016
Messages
105
I have watched similar videos. But they all show six bolts total. 3 on each side. My lover unit has one Phillips head and two bolts right above the water intake screen. And one bolt in the back of the lower unit right above were the lower unit separate. Does anyone know some schematics for this motor I can download? Model number BE8BACUD
 

interalian

Commander
Joined
Jul 23, 2009
Messages
2,105
If it's the same LU as my '82 7.5, you take off the anode and there's a bolt under there among others. Shifter on the unit rotates and has a "D" shaped shaft that goes into the powerhead.
 

Vic.S

Rear Admiral
Joined
May 4, 2004
Messages
4,699
I need help on how to properly remove the lower unit? I have looked everywhere online for instructions on how to remove my lower unit.
Hi It is almost exactly the same as my 84 6hp. but you do do not say exactly which version you have ( standard shaft, long shaft or Yachtwin)

Probably best to drain the oil first ( I dont bother ) No need to worry about the shift shaft ( its all one piece slides out of the gear at the top) and it does not really matter which gear it is in.

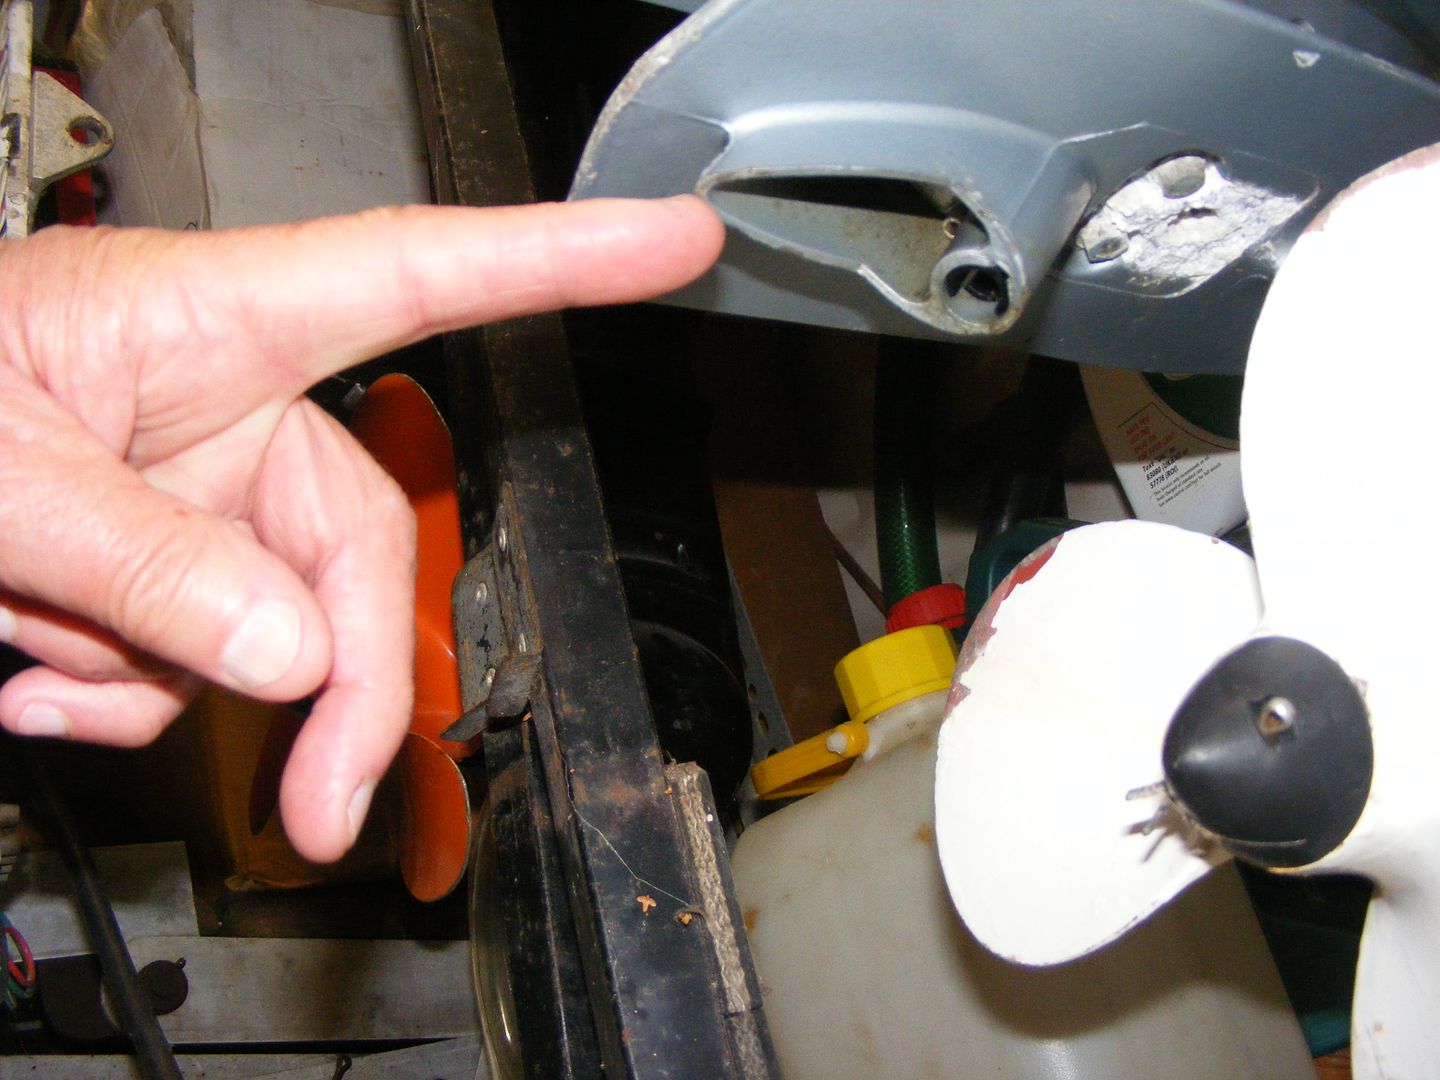
If it's a standard shaft model remove the two bolts from underneath and the one at the front from the top. and pull the unit off.

If its a long shaft model remove the bolts that secure the extension to the exhaust housing, rather than the bolts between the gearcase and the extension, pull the unit off c/w extension then clean up the drive shaft and remove the extension.
When rebuilding fit the extension to the exhaust housing, then fit the gearcase.

Reassembly is a bit of a fiddle to ensure that the water tube enters the water pump grommet and the shift shaft enters the gear at the top.
With plugs removed turn the flywheel ( or with it in gear turn the prop) until the splines in the crankshaft and the drive shaft engage with each other and the unit slides home.
 

Tekin

Petty Officer 2nd Class
Joined
Jul 19, 2016
Messages
105
Thank for the instructions! I'm not sure if it's a l9ng shaft or standard. I can't found any manuals under the model BE8BACUD. The shift rod does turn as you described Interalian. So im going to remove the two bolts right above the exhaust housing. Thete the only bolts I see. And the one bolt directly behind were you can see the shift rod.
 

Tim Frank

Vice Admiral
Joined
Jul 29, 2008
Messages
5,333
The "B" that starts your model number indicates that it is Belgium made.
The absence of a length designation I believe means that by default it is a short-shaft.
The BA is an option code....you'd have to look up what it means.
Other than that, it should be the same as a regular '87 8HP.
 

Vic.S

Rear Admiral
Joined
May 4, 2004
Messages
4,699
Thank for the instructions! I'm not sure if it's a l9ng shaft or standard. I can't found any manuals under the model BE8BACUD. The shift rod does turn as you described Interalian. So im going to remove the two bolts right above the exhaust housing. Thete the only bolts I see. And the one bolt directly behind were you can see the shift rod.

The "B" that starts your model number indicates that it is Belgium made.
The absence of a length designation I believe means that by default it is a short-shaft.
The BA is an option code....you'd have to look up what it means.
Other than that, it should be the same as a regular '87 8HP.


Yes it is a standard ( 15") shaft model. There would be an "L" before the year letters if it was along shaft model.
BA means that it has an AC lighting coil fitted . The output should be connected to a three pin socket on the lower cowl.

So you can ignore my comments about removing the 5" extension of a long shaft model

So the two bolts #56 and one bolt #50 are all you have to undo ..........

convert
 

Tekin

Petty Officer 2nd Class
Joined
Jul 19, 2016
Messages
105
No Title

I see bolt number 50 but there is no bolt 56. I included a photo. Am I looking at the schematics wrong?
 

Attachments

  • photo251457.jpg
    photo251457.jpg
    155.8 KB · Views: 0

Vic.S

Rear Admiral
Joined
May 4, 2004
Messages
4,699
I see bolt number 50 but there is no bolt 56. I included a photo. Am I looking at the schematics wrong?

They are either side of the anode (#47) , They are clearly visible in your photo.

The heads are accessible with a socket wrench. Mine (below) is salt water motor so I get a lot of oxide around the anode which has to be cleaned away .but there is absolutely no need to remove the anode. ( I now almost certainly cannot )


DSCF1536.jpg
 
Last edited:

Tekin

Petty Officer 2nd Class
Joined
Jul 19, 2016
Messages
105
Ok. Vic, thanks for clearing things up. I'm going out now to remove the lower unit. I'm rebuilding the water pump. And installing a new impeller.
 

Tekin

Petty Officer 2nd Class
Joined
Jul 19, 2016
Messages
105
Ok. I found the culprit of why the water pump was not working.
It had all kinds of tiny debri in it. Do I need to replace these aluminum plates that the water pump sits on?
 

Vic.S

Rear Admiral
Joined
May 4, 2004
Messages
4,699
Ok. I found the culprit of why the water pump was not working.
It had all kinds of tiny debri in it. Do I need to replace these aluminum plates that the water pump sits on?
"aluminium plates" ?????

Replace the bottom plate #37 if its damaged or worn.

wise to replace the two gaskets #4 but last time I changed my impeller they came out unharmed stuck to the bottom plate so carefully put the "sandwich" back as it was

Also replace the cup #40 if it is worn.

Inspect and replace the grommet #57 if necessary too.
 

Tekin

Petty Officer 2nd Class
Joined
Jul 19, 2016
Messages
105
Ok. Thank you very much Vic! The plate was dirty but doesn't show any signs of damage. I will order all the parts you mentioned and replace them why I have the unit off. Again thank you.
 

interalian

Commander
Joined
Jul 23, 2009
Messages
2,105
If you have debris in the pump, you should consider flushing the water jacket with a garden hose and low pressure as well. There may also be debris in the rest of the motor. Just adapt the hose to the small copper pipe in the leg and run your hose for a couple of minutes.
 
Top