Hennysemitara
Petty Officer 2nd Class
- Joined
- Aug 4, 2016
- Messages
- 175
Hello guys last question im looking to do my headgasket on my 140 johnson 2 stroke 1984. the process is pretty much straight forward right? any tips?


Salt deposits around the gasket aren't unusual - it tends to seep over time and this is an old motor. After overheat, re-torquing the heads is a minimum step.
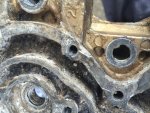
That said, a concern on old motors is the diverter rubbers in the block can move/swell which can cause overheat in the future if they didn't cause it in the first place. The only way to check them is to remove the heads. IIRC this is a crossflow based on a thread you made a while back. Don't remove the 7/16" bolts holding the water cover to the head - they're far more likely to break than the larger 10 bolts that hold the head to the block (1/2" heads).
Oh, and after you remove the heads, they'll need to be lapped flat (they ALL warp). Put some medium grit sandpaper/emery cloth on a flat surface (thick glass pane or a scrap of granite countertop/tombstone) and work in a figure-eight. Observe the surface and work until the whole sealing surface is evenly shiny.
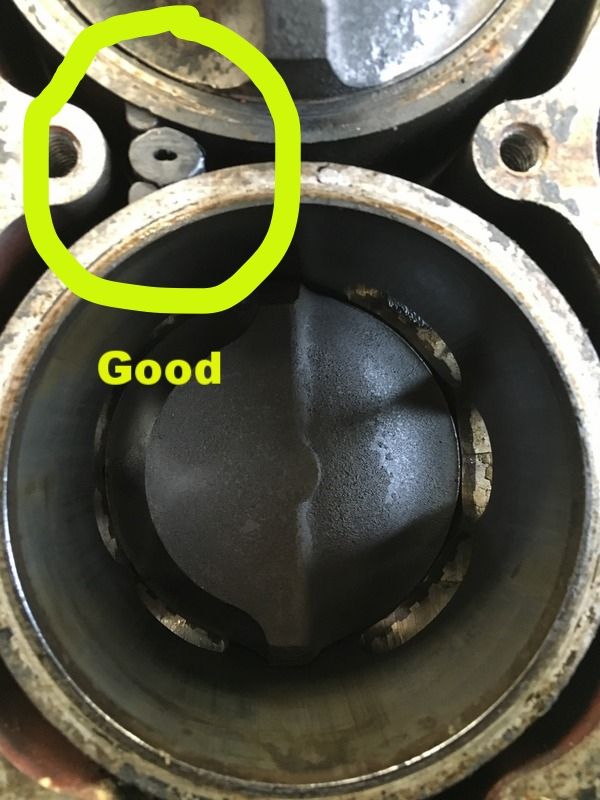
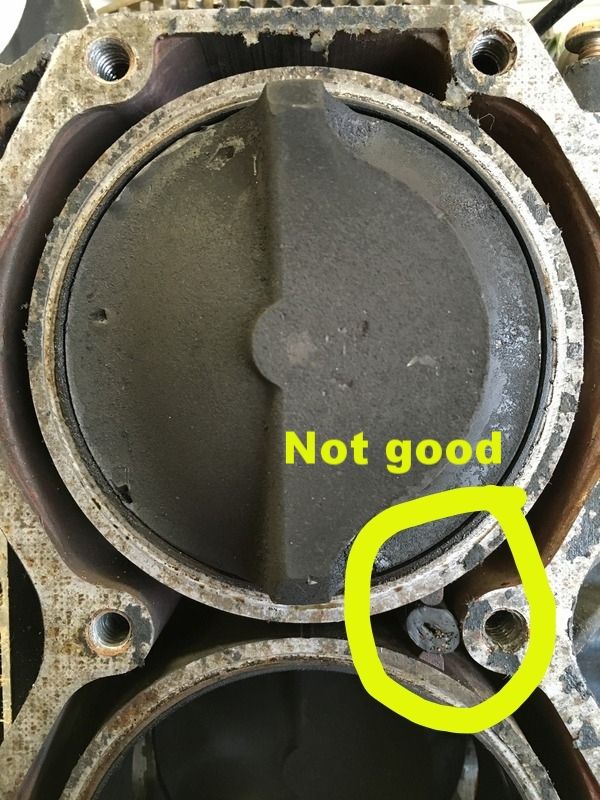
 , but i broke 2 of the head cover bolts. What should i do? How do u take the broken bolts out of the cover??
Clean it up and install a heli-coil in it.
Salt deposits around the gasket aren't unusual - it tends to seep over time and this is an old motor. After overheat, re-torquing the heads is a minimum step.
That said, a concern on old motors is the diverter rubbers in the block can move/swell which can cause overheat in the future if they didn't cause it in the first place. The only way to check them is to remove the heads. IIRC this is a crossflow based on a thread you made a while back. Don't remove the 7/16" bolts holding the water cover to the head - they're far more likely to break than the larger 10 bolts that hold the head to the block (1/2" heads).